
We all know the benefits of Power BI, but to reap its benefits, first, you have to authenticate yourself to
get access to the Power Bi services. The first and foremost thing to do is to create a work account in Power
BI.
Steps to Create a Free Power BI Work Account
Even though creating a Power BI account may seem like an easy task, people often get stuck in this process. Creating it
is important because it publishes Power BI reports and uses more visuals, ultimately allowing you to
get the most out of it. I will explain how to create a power BI work account for free.
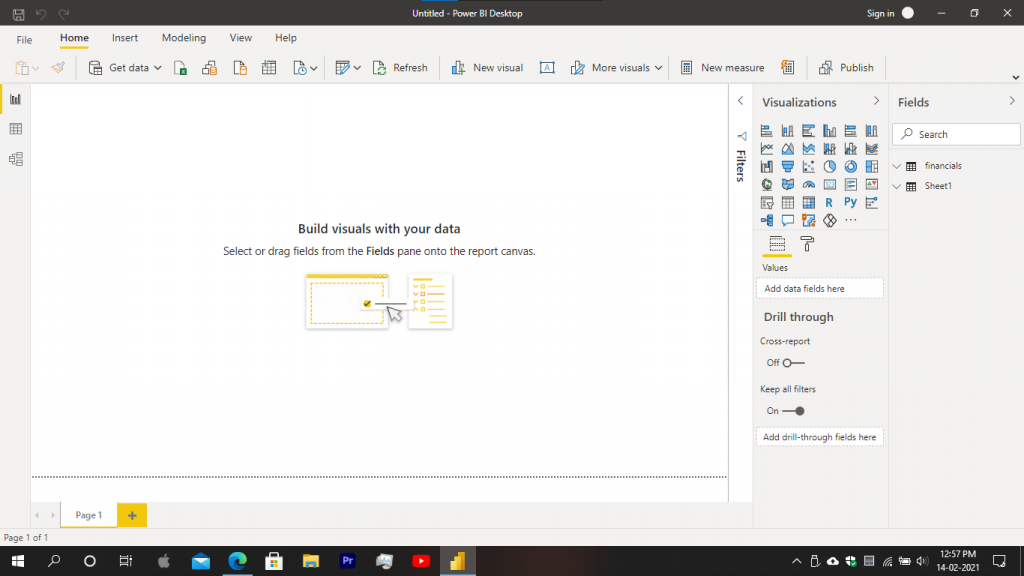
- First, when you enter power BI, it will look like this. When you click on sign in, it will ask for a
work account to sign in.
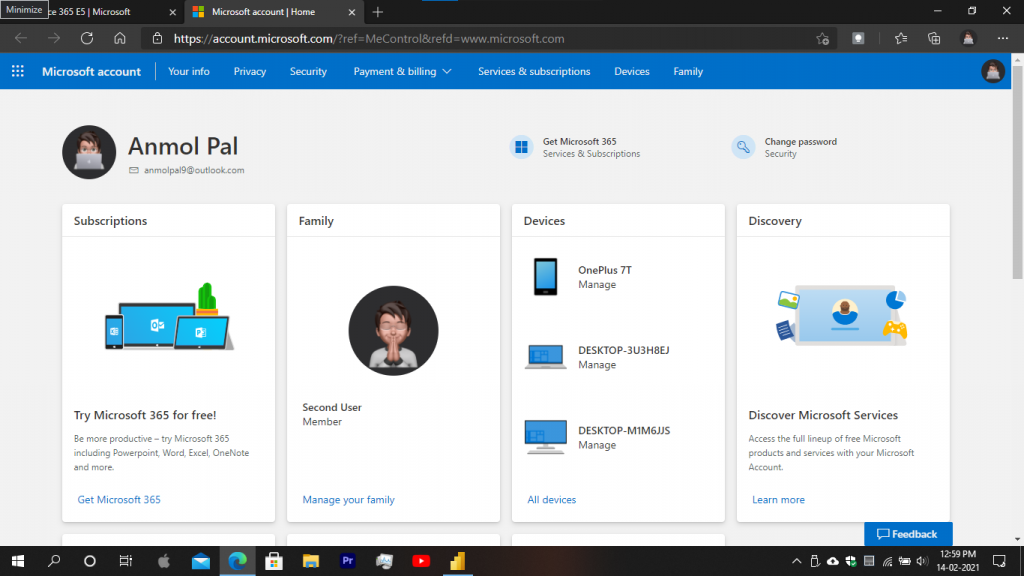
- Go to Microsoft.com and log in with your personal account which you used to log in to windows.
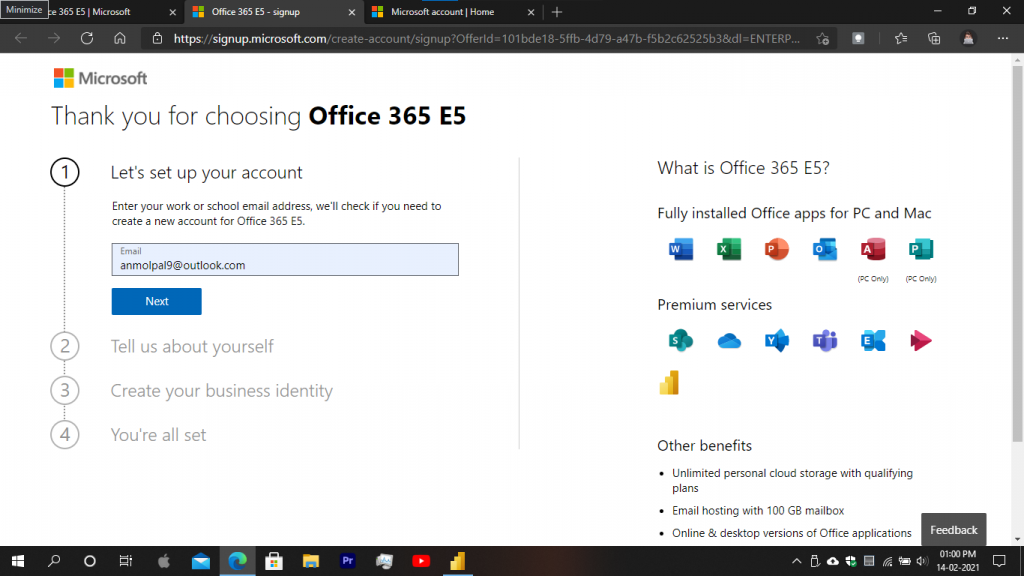
- Open your web browser and search for office 365 E5. You will see a page like this. Click on the free
trial.
- In this window, enter your personal email address and click on next.
- In the next step, it will ask for your details. Fill up the information and click next.

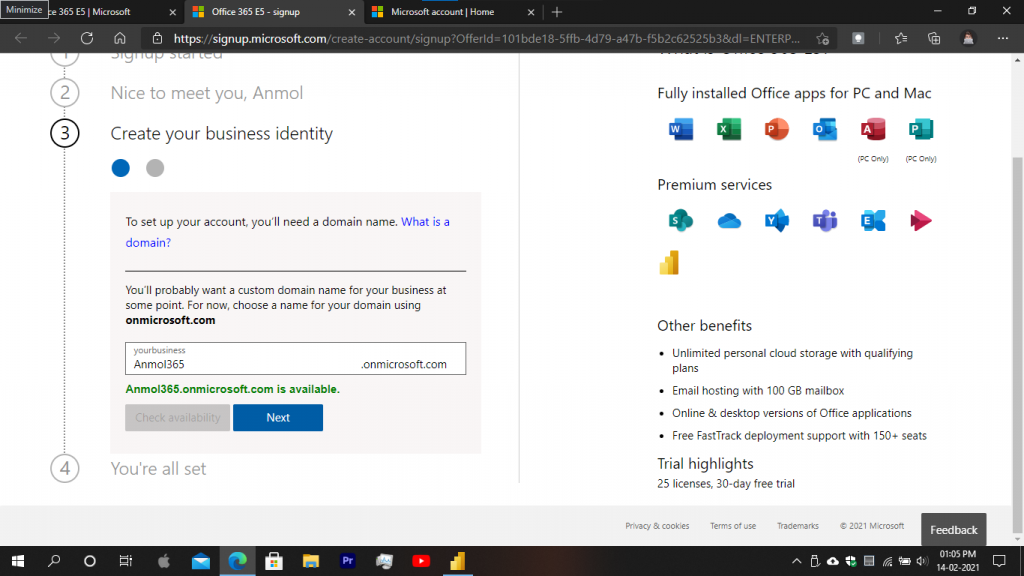
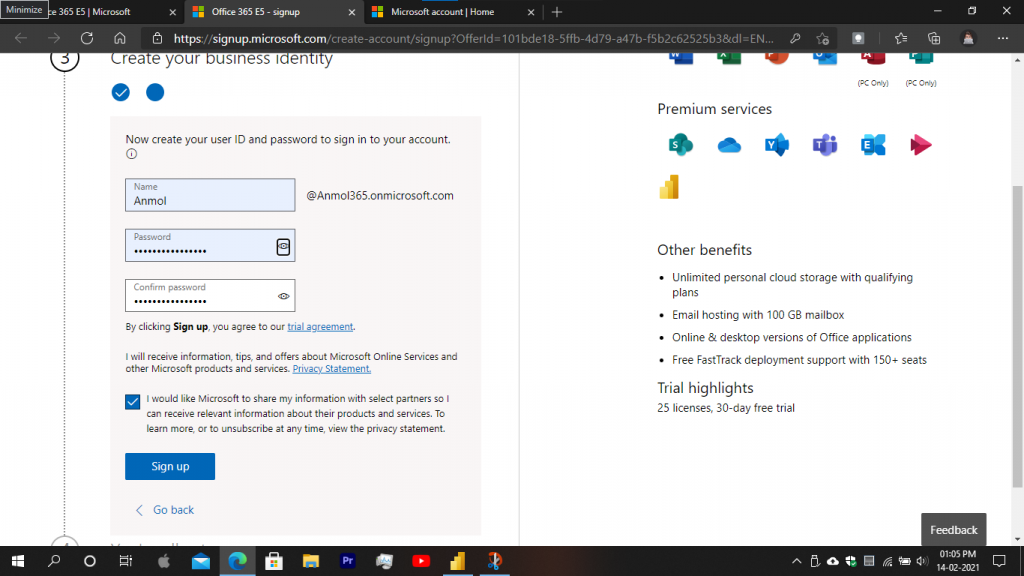
- Now, in the next step, create your business identity by entering your business name. Create a unique
business name and click on next.
- Now, create a unique password for your account and be sure you remember it. You can paste your password
into a notepad file and save it. After that, click on sign up.
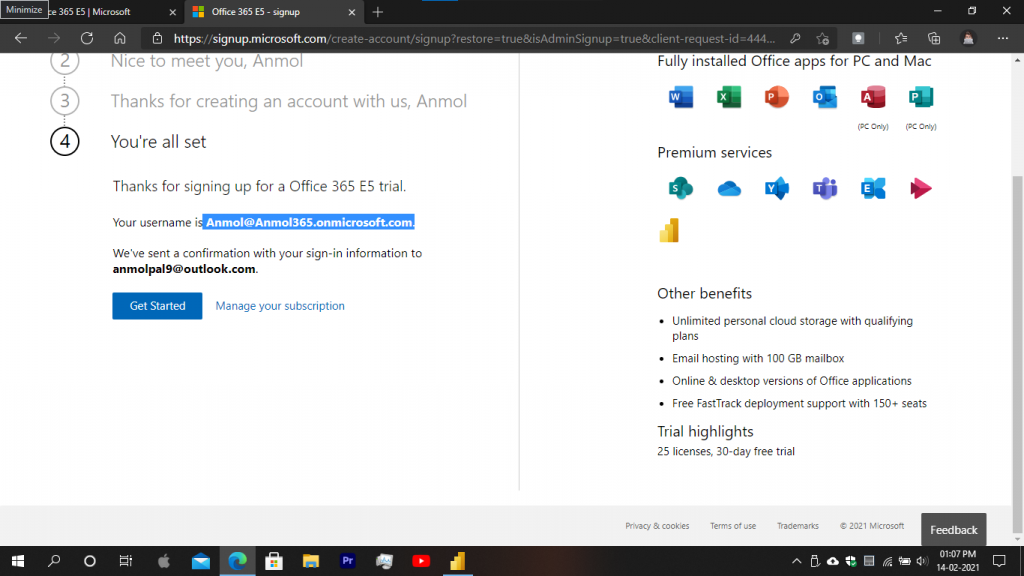
- After clicking on the sign-up, a page will appear like this. It will show your work account username
with the domain name registered to Microsoft.com. Copy this work account username to a notepad file in
case you forgot it. Click on get started, and it will take you to a different web page where you can see
your power BI published files and also work online on Power BI. Also got to your personal email address
and verify your Power BI work account.
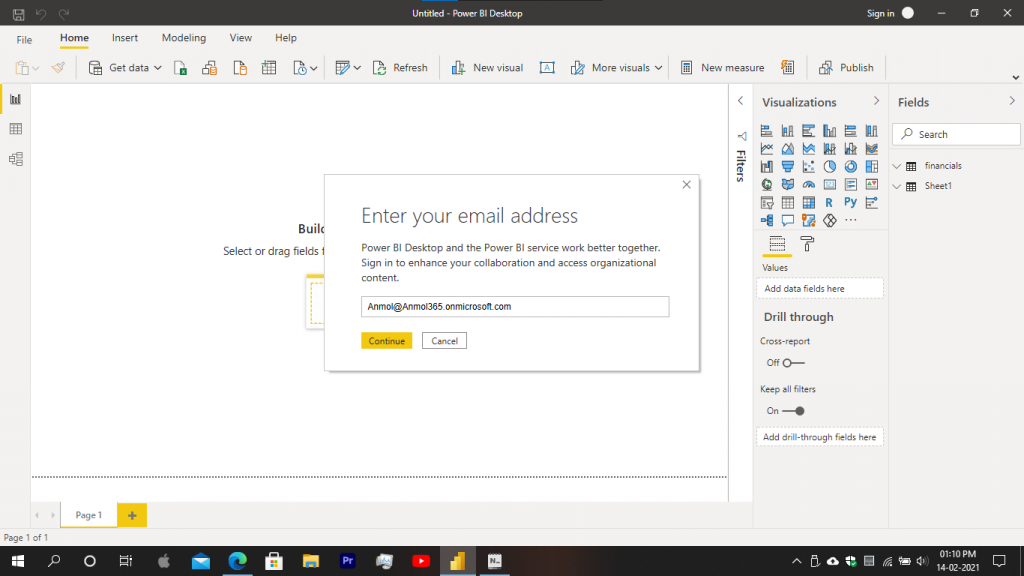
- Open the Power BI desktop, and at the upper right corner, you can see the sign-in option. Click on the
sign-in option, and a pop-up will appear asking for your work account address. Copy your work account
from the notepad and paste it on the sign-in pop-up. After that, click on continue. After some time, it
will ask for the password. It will take some time to log sign in because it will authenticate you with
the Power BI server. Enter your password, and you are successfully signed in.
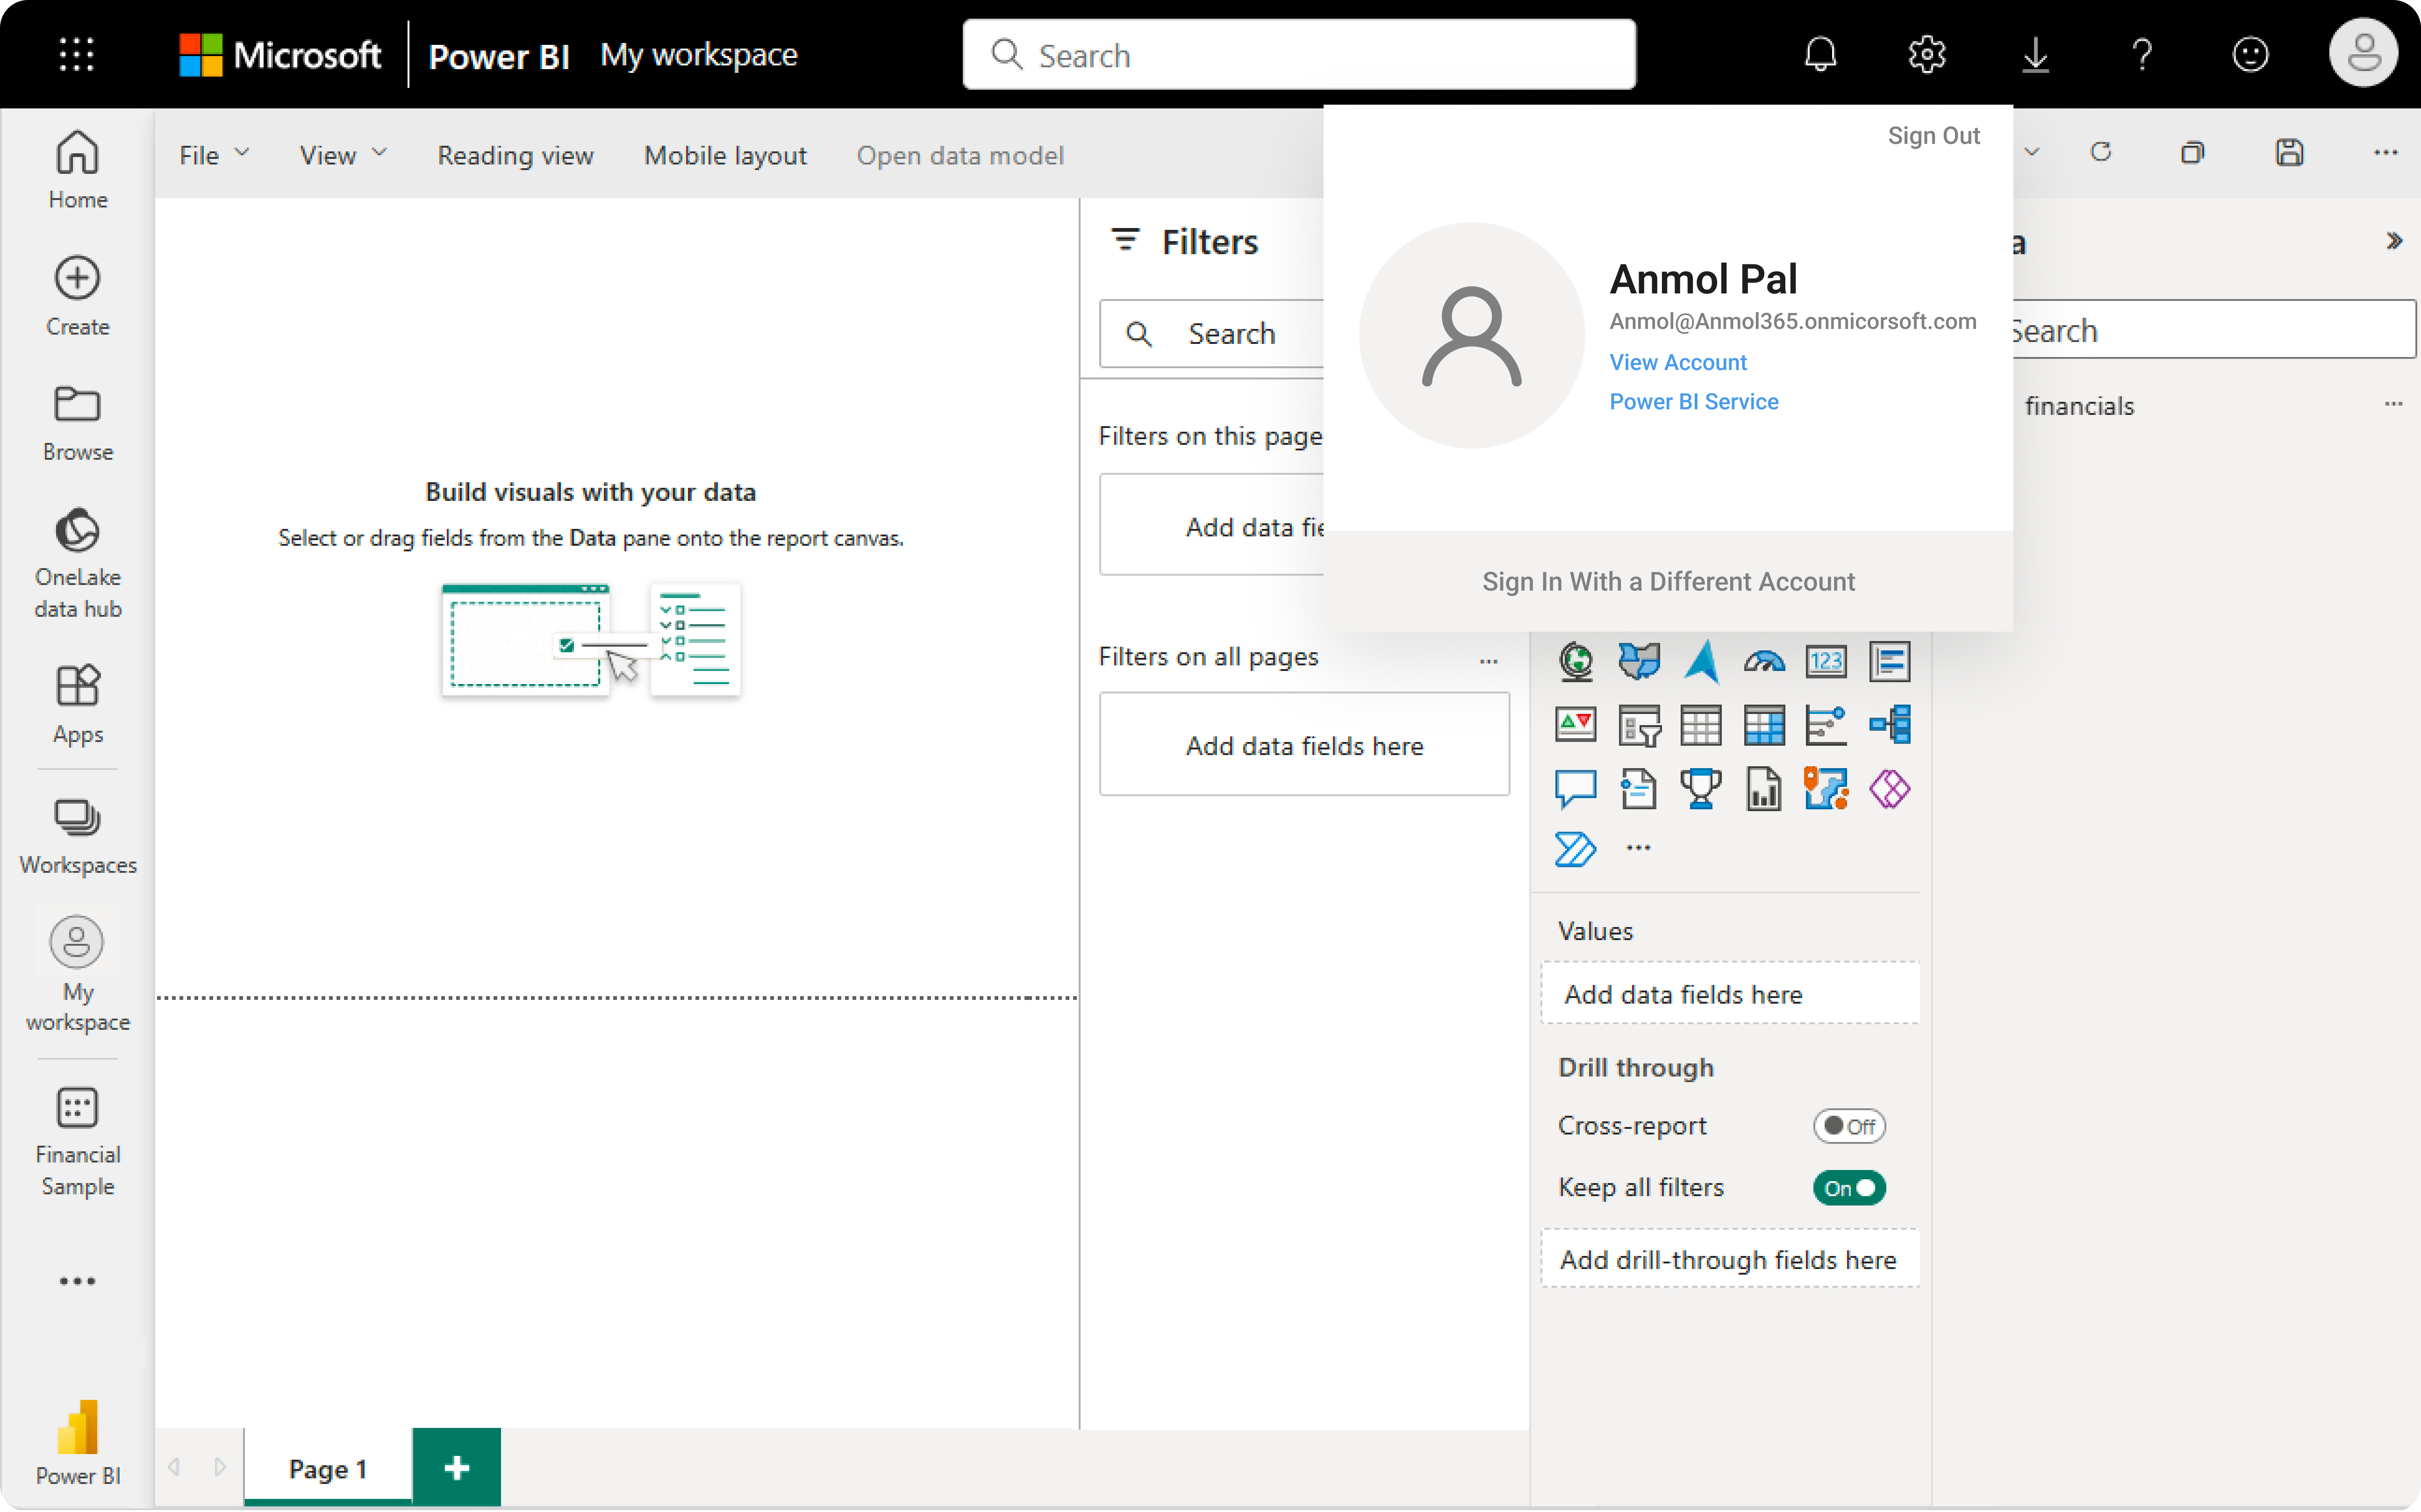
- After you successfully sign in to your account, the page will appear like this in which your power BI
work account is shown.
Conclusion
The above point contains a step-by-step guide to creating a work account in Microsoft
Power BI. However, just creating a work account is not going to do the job. Integrating your Business data
into Power BI is not easy and can be a hefty job. The best solution will be to opt for a company that
specializes in Power Bi services and data visualization.


