What are Microsoft Powerapps Portals?
Powerapps Portals enable users to interact with selective dynamic 365 data and enable low-code, customized websites. A part of power automate, websites created with powerapps allow third-party users outside an organization to sign in with various credentials, create and view data in Microsoft dataverse, or view anonymous content.
Advanced Forms
The advanced form step provides an idea of the flow of the user's experience of the form such as steps and conditional branching. It also provides details about form submission and additional conduct.
It persists in the history of the steps the user has visited. Each advanced form will be presented with one or more steps. These steps share some common elements. Each step consists of a look at the next step, with the exception of the last steps.
Types Of Advance Forms:
- Load form/Load Tab step type: This type of step allows an advanced form step to act as a basic form in Microsoft flow. It loads the form with the same set of options available as the basic Form.
- Conditional Step Type: in power apps, the step can be a condition type that indicates the step should evaluate an expression. If the expression evaluates to true then the next step is displayed. If the expression evaluates to false and if the next Step If Condition Fails has been specified, that step will be displayed.
- Redirect Step Type: The Redirect Step Type allows for a redirect.
In this series, we will take you through the whole process of �Creating Advanced Forms� in powerapps.
Step 1: Create a table.
- In the navigation pane, expand Data, and then select Tables.
- On the command bar, select new table.
- In the New table panel, enter the following information columns. Required Columns are designated with an asterisk (*) next to the column label.
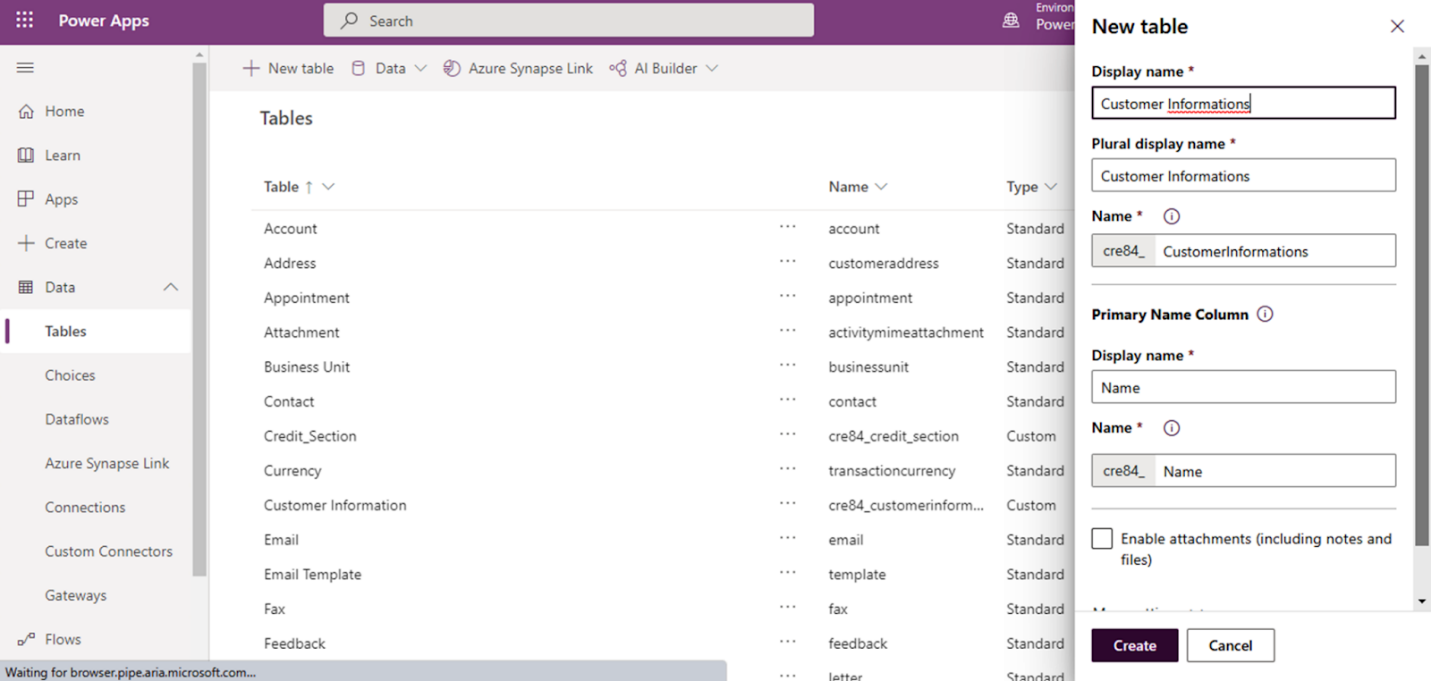
- Click on create.
- Enter new columns in the table by clicking on the add column in the command bar and filling in the required fields.
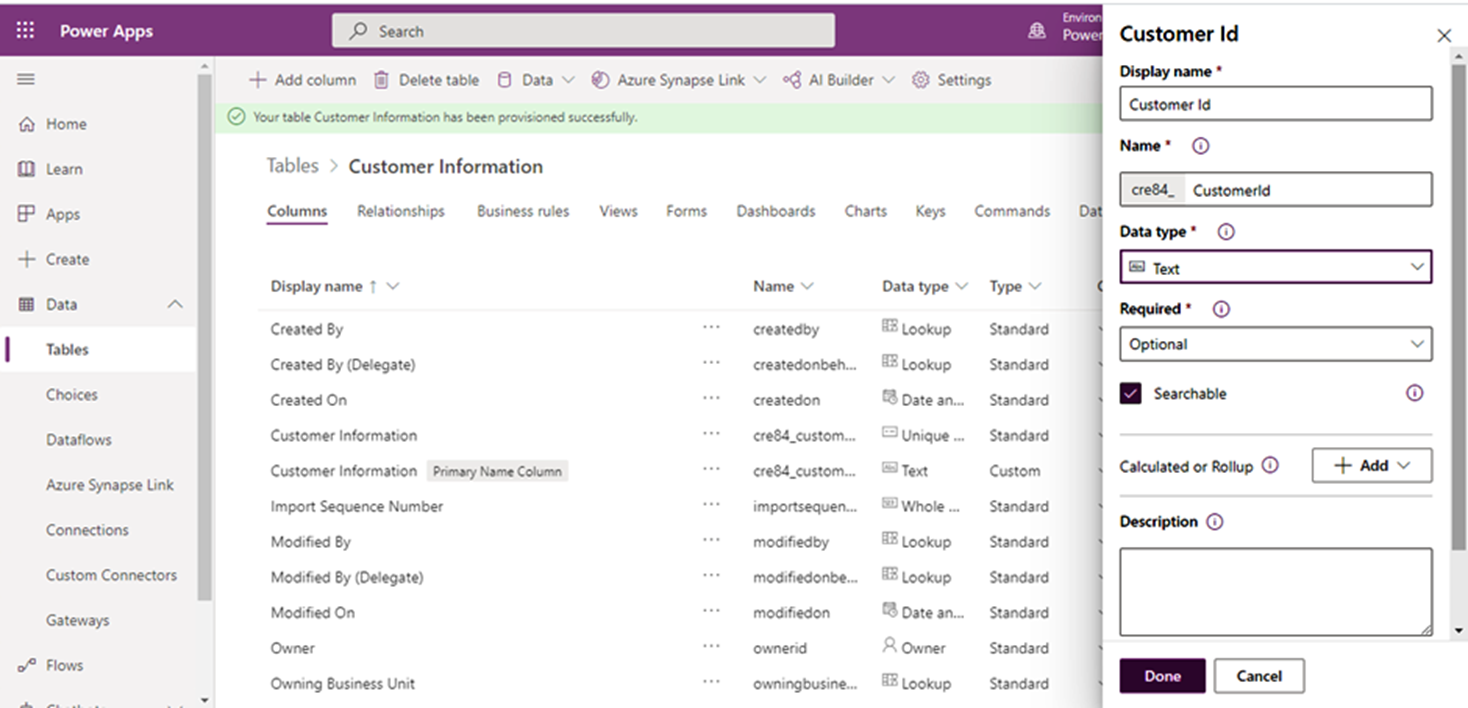
In the same way, create another table.
Step 2: Create a form:
- Click on forms of the table created above, then click on add form and select the main form.
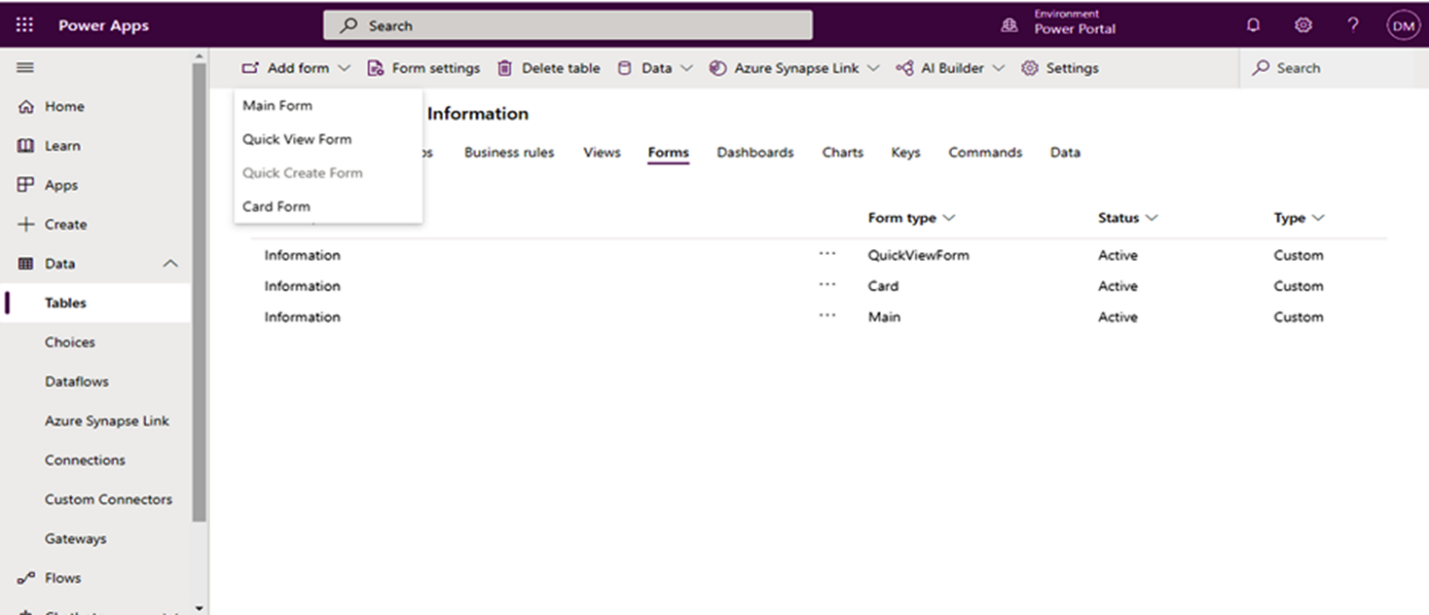
- Under Table columns, select the columns, drag and drop that are required on the form.
- Enter the label name. If we want, we can hide the label name by clicking on hide label.
- When all the fields are added to the form, click on save and then publish.
In the same way, create another form from a different table
Step 2: Create a form:
- Click on forms of the table created above, then click on add form and select the main form.
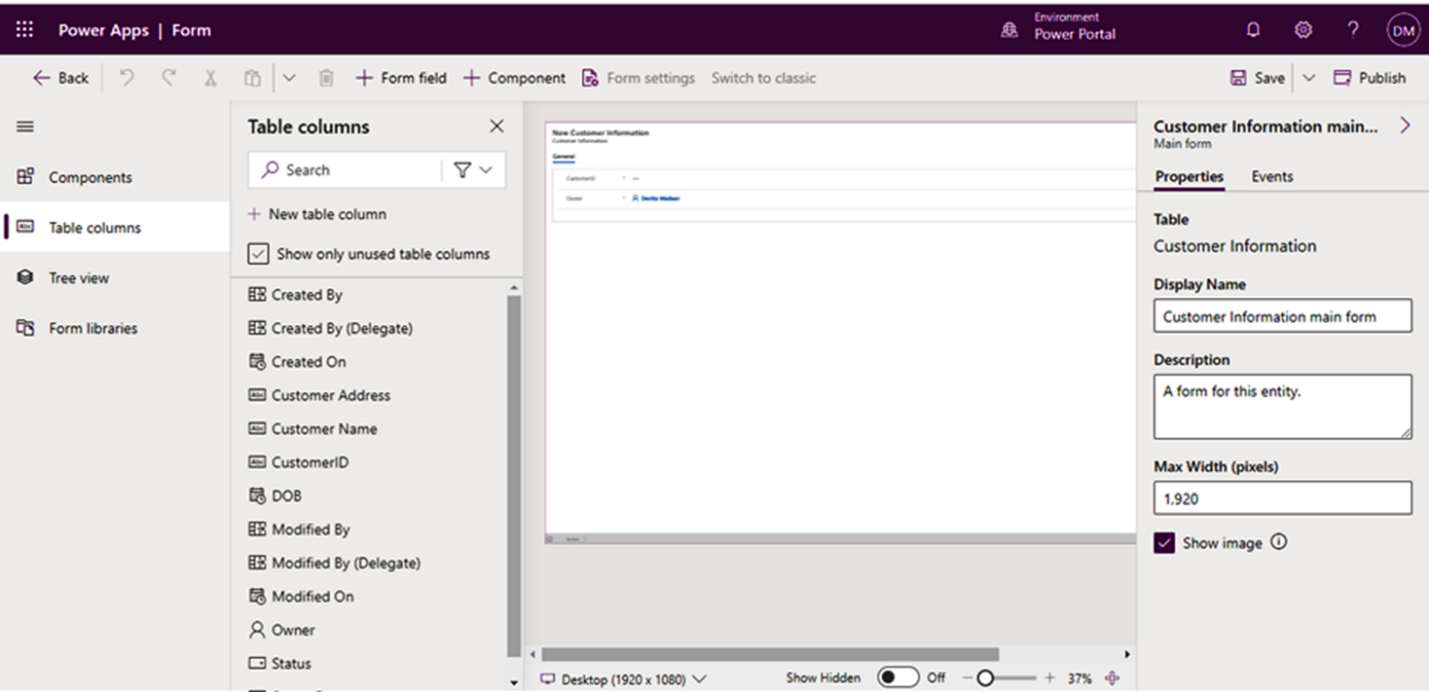
- Under Table columns, select the columns, drag and drop that are required on the form.
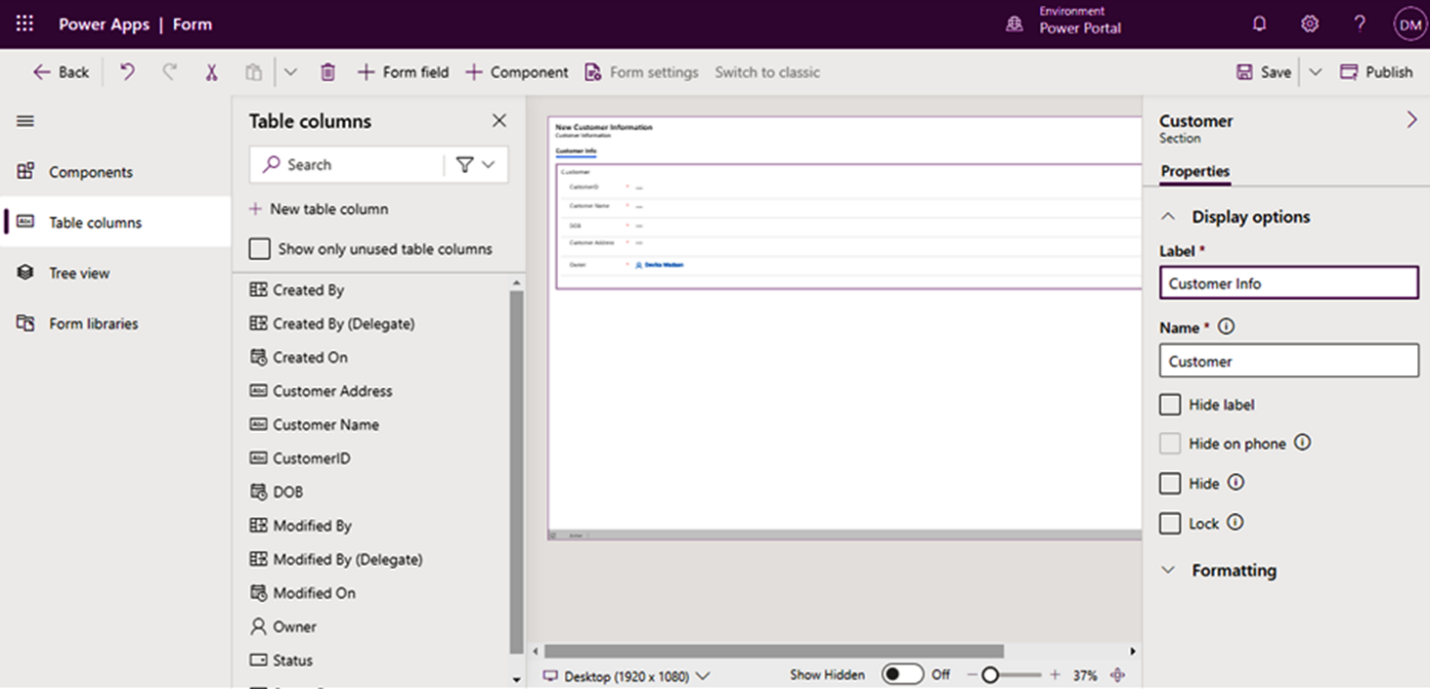
- Enter the label name. If we want, we can hide the label name by clicking on hide label.
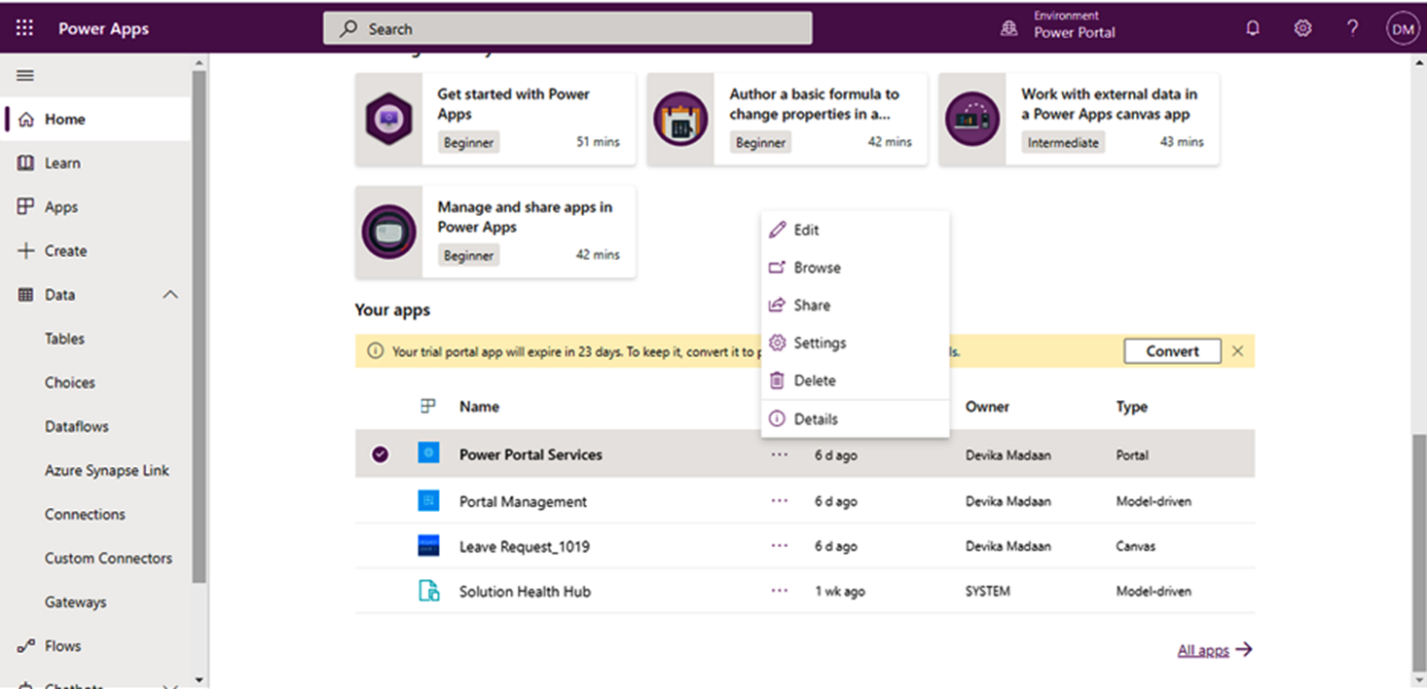
- When all the fields are added to the form, click on save and then publish.
In the same way, create another form from a different table.
Step 3: Steps in the portal management studio:
- Click on edit to open the Power Apps portals Studio.
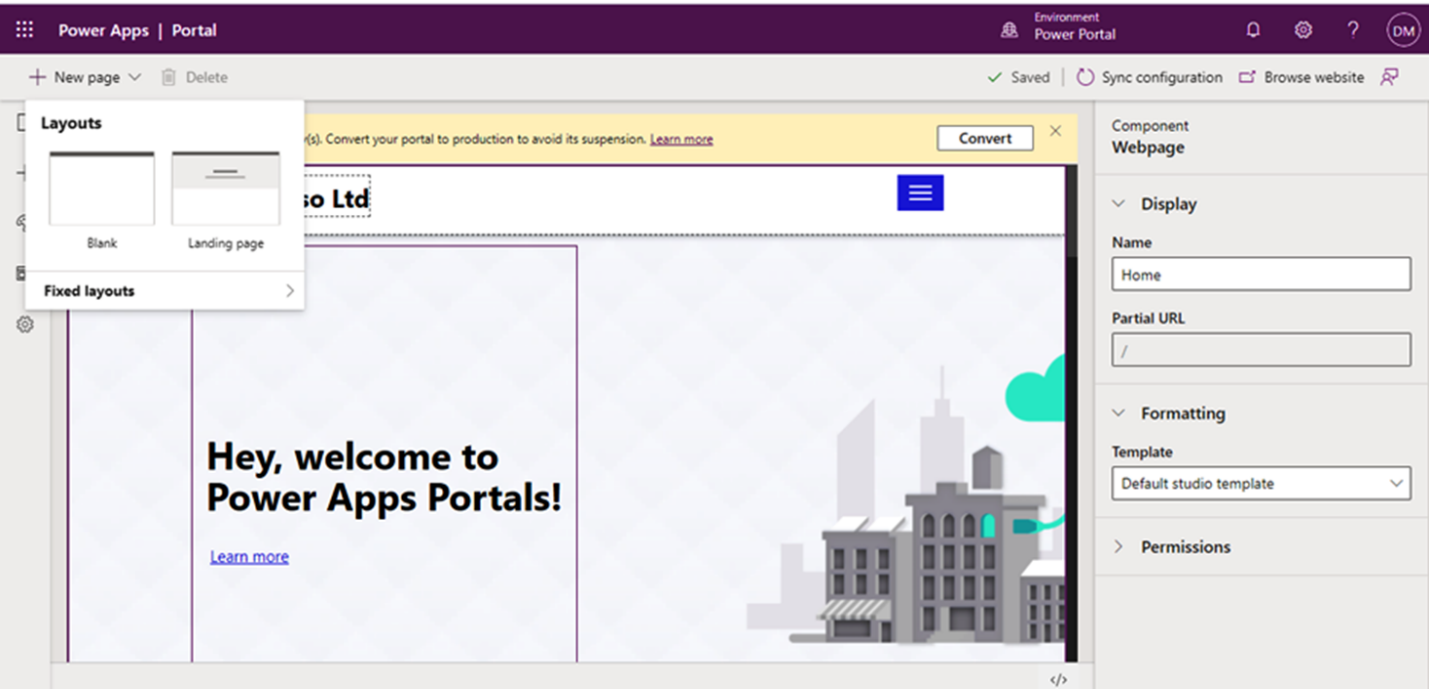
- Select a new blank page.
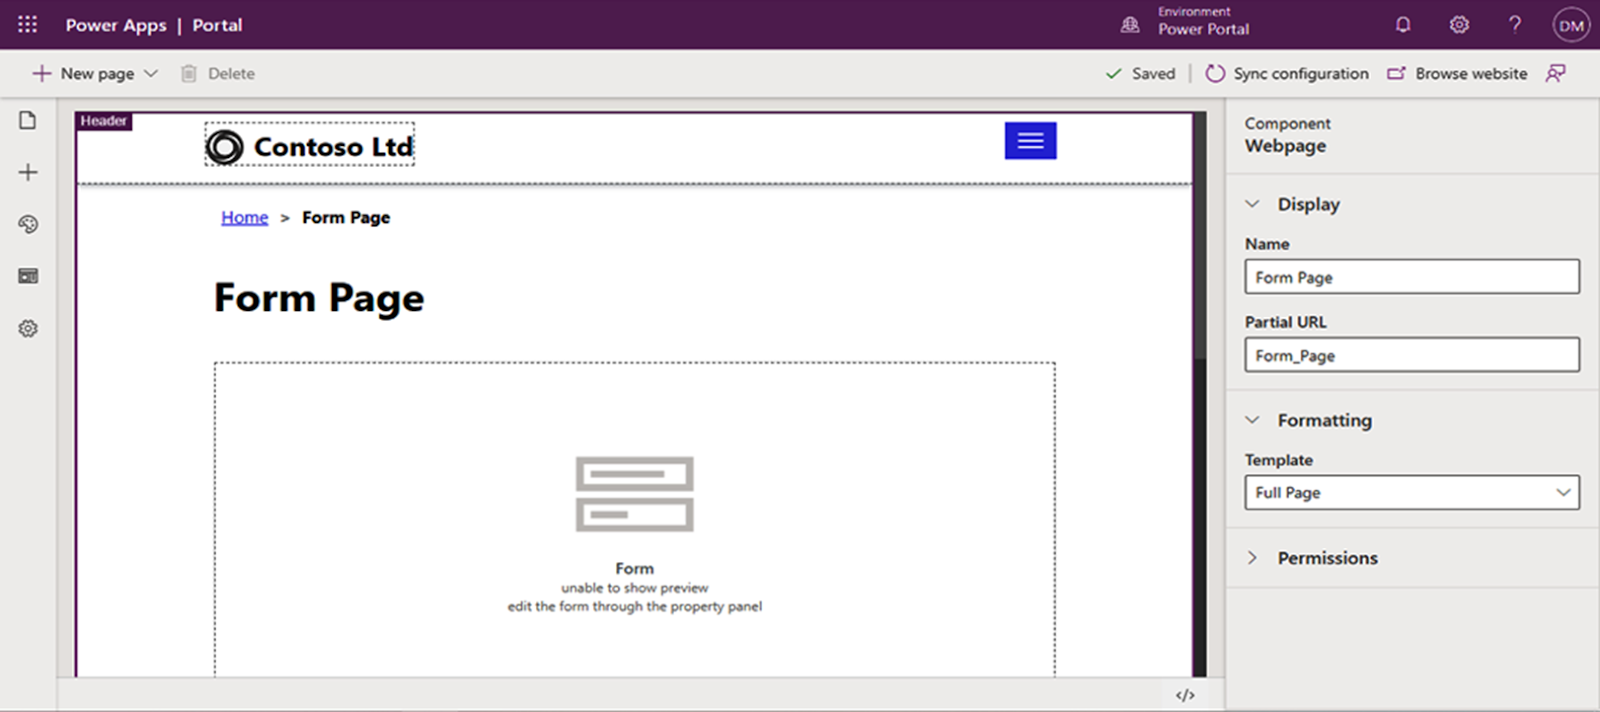
- Fill in the name and partial URL.
Choose the template as (Full Page or Page with title). This is mandatory as the advanced powerapps forms will be displayed in this template only.
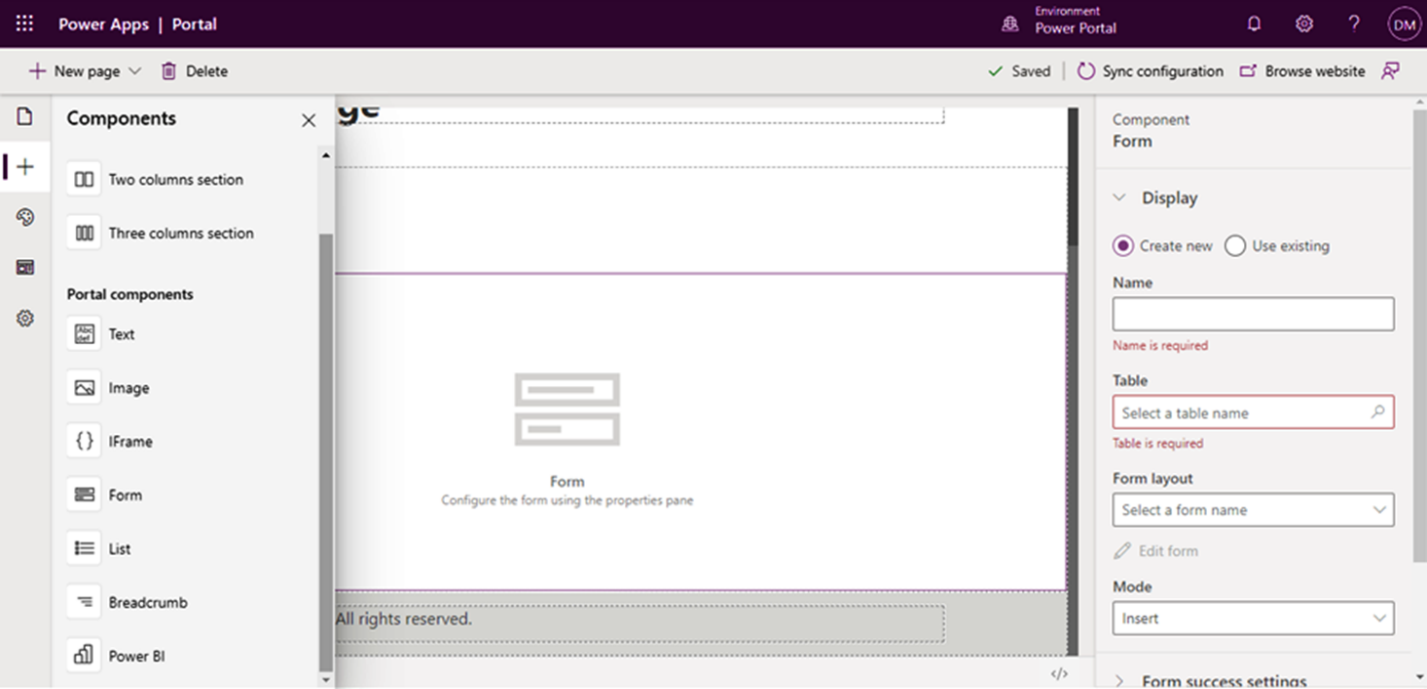
- Click on components and select form from it. You can create a new form, or you can use the existing form that is already created. Fill in all the fields that are required.
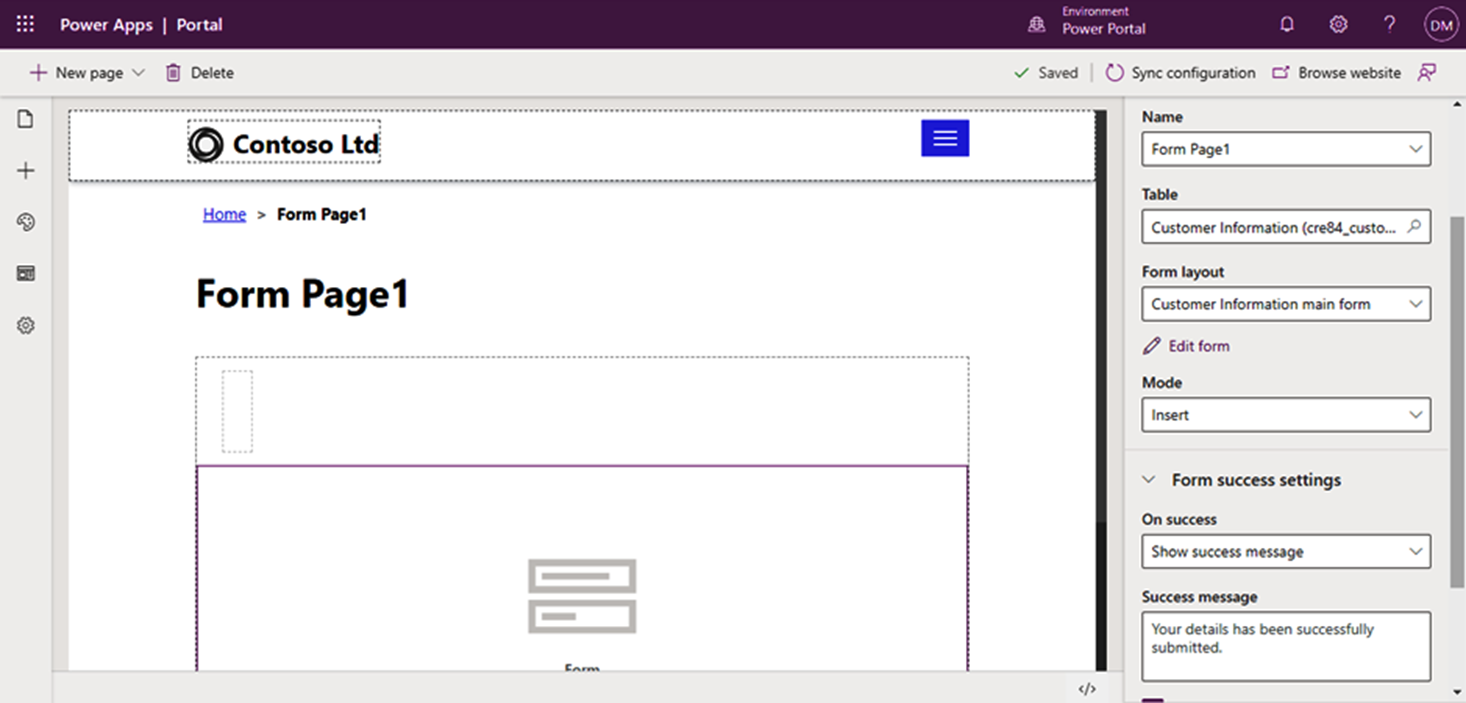
- Create a new form and enter the name of the form, table name, form layout, mode of the form, and form success settings.
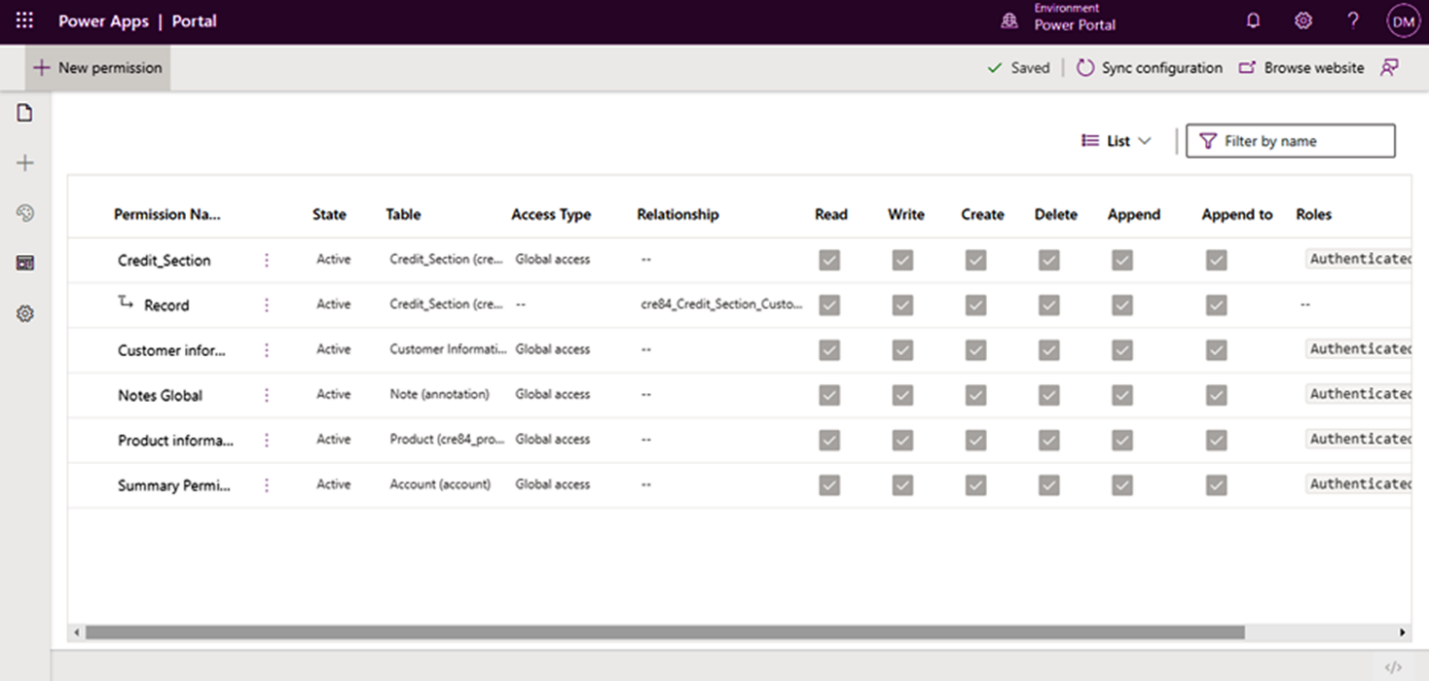
- Click on permissions, click on manage the table permissions and then click on new permission.
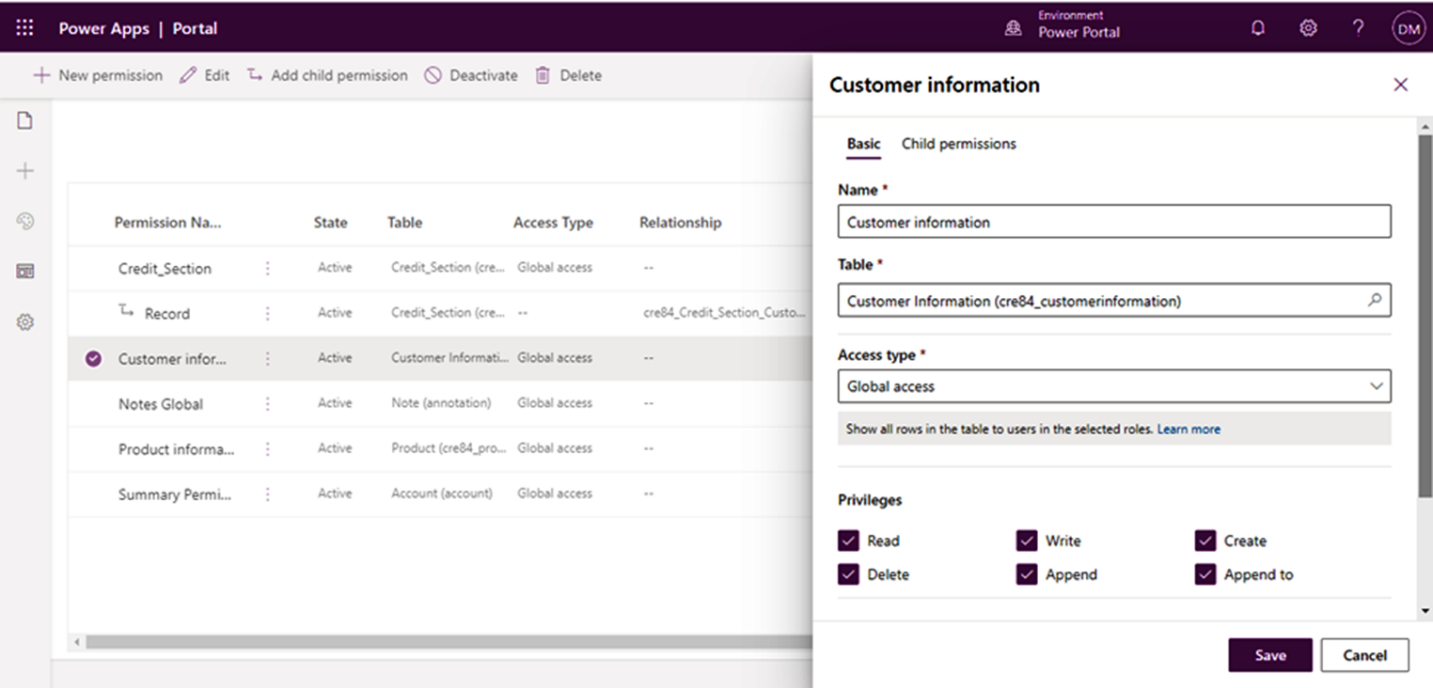
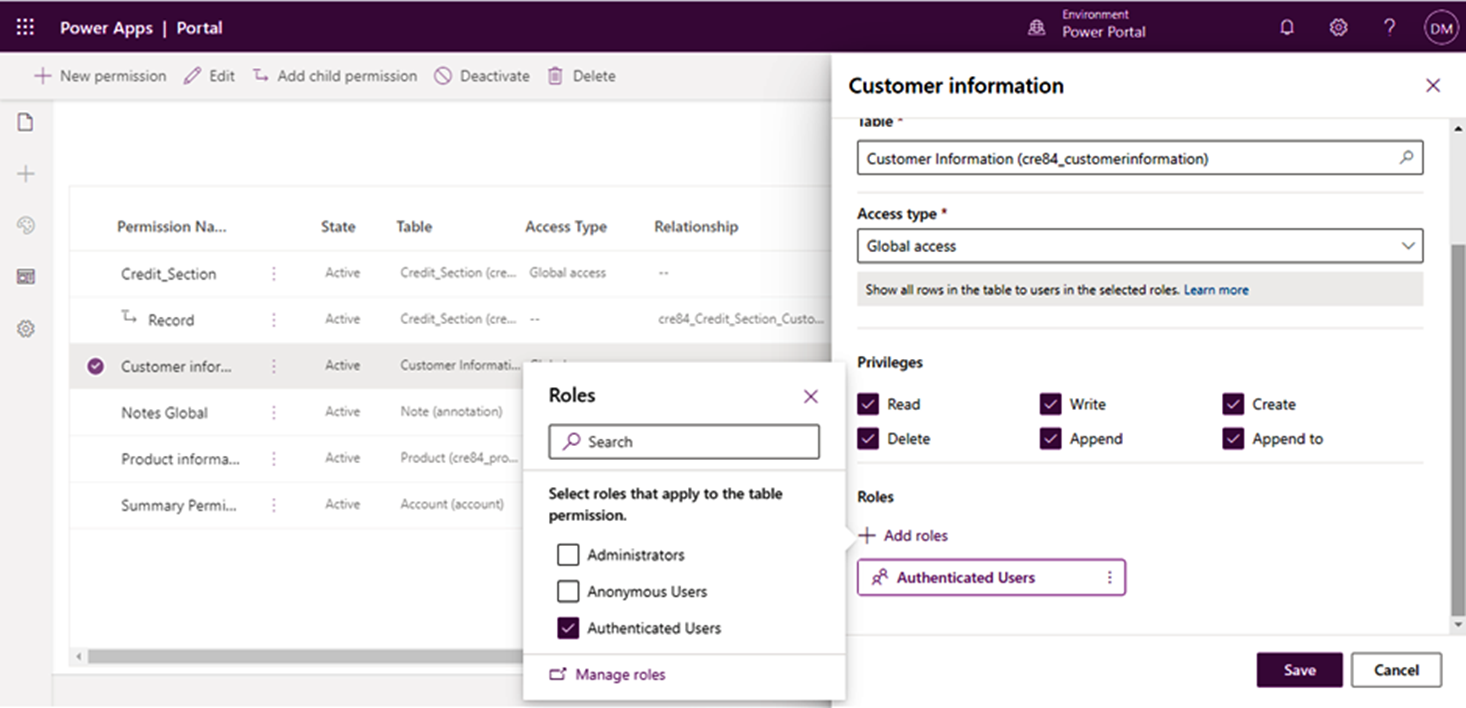
- Fill in the details to create table permission.
Access Type:
- Global Access: Applies the selected table permission and privileges to the users from the selected roles for all records in powerapps portal.
- Contact Access Type: Applies the selected table permission and privileges to the users from the selected role associated with the signed-in user.
- Account Access Type: Applies the selected table permission and privileges to the users from the selected role associated with the signed-in user's account
- Self-Access Type: Applies the selected table permission and privileges to the users from the selected role for only their own Contact record.
- Parental Access Type: Permissions are granted for a table that's relationship is away from a table for which a Table Permission record has already been defined. This permission is actually a Child record of the Parent Table Permission
Privileges in advanced forms:
- Read: It controls whether the user can read a record.
- Write: It controls whether the user can update a record.
- Create: It controls whether the user can create a new record.
- Delete: It controls whether the user can delete a record.
- Append: It controls whether the user can attach another record to the specified record. The Append and Append To access rights work in combination.
- Append To: It controls whether the user can append the record in question to another record.
- Click on Add Roles.
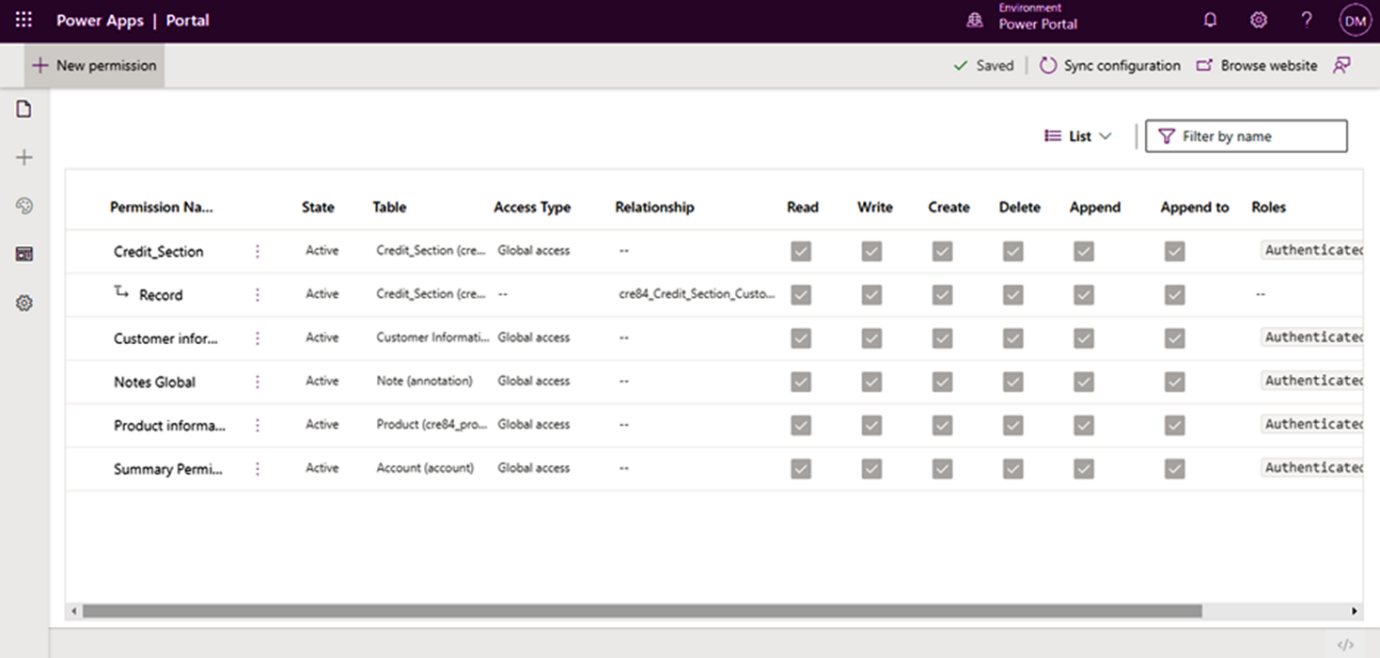
- Click on sync configuration, and the permission created for the table will be saved.
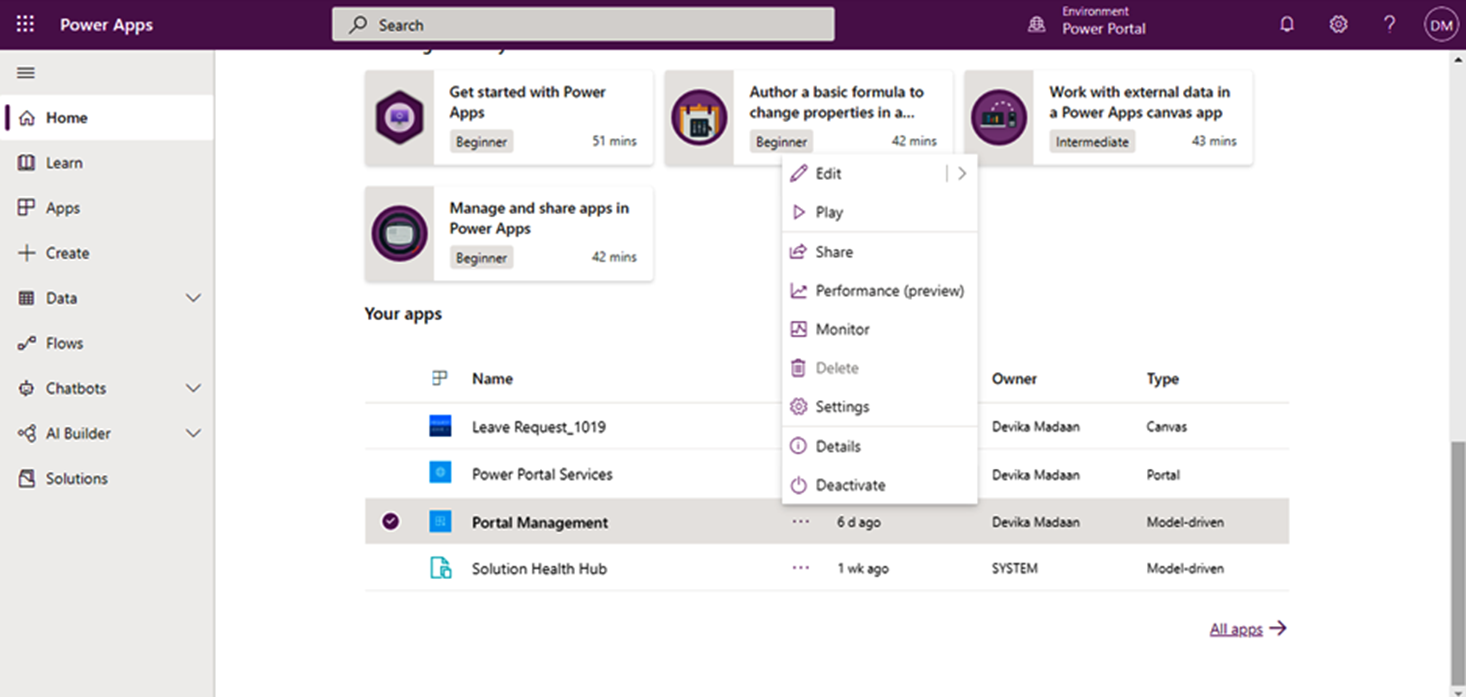
Step 4: Steps in the portal management for advanced forms:
- Open the portal management and select play. You can also open it directly by clicking on it.
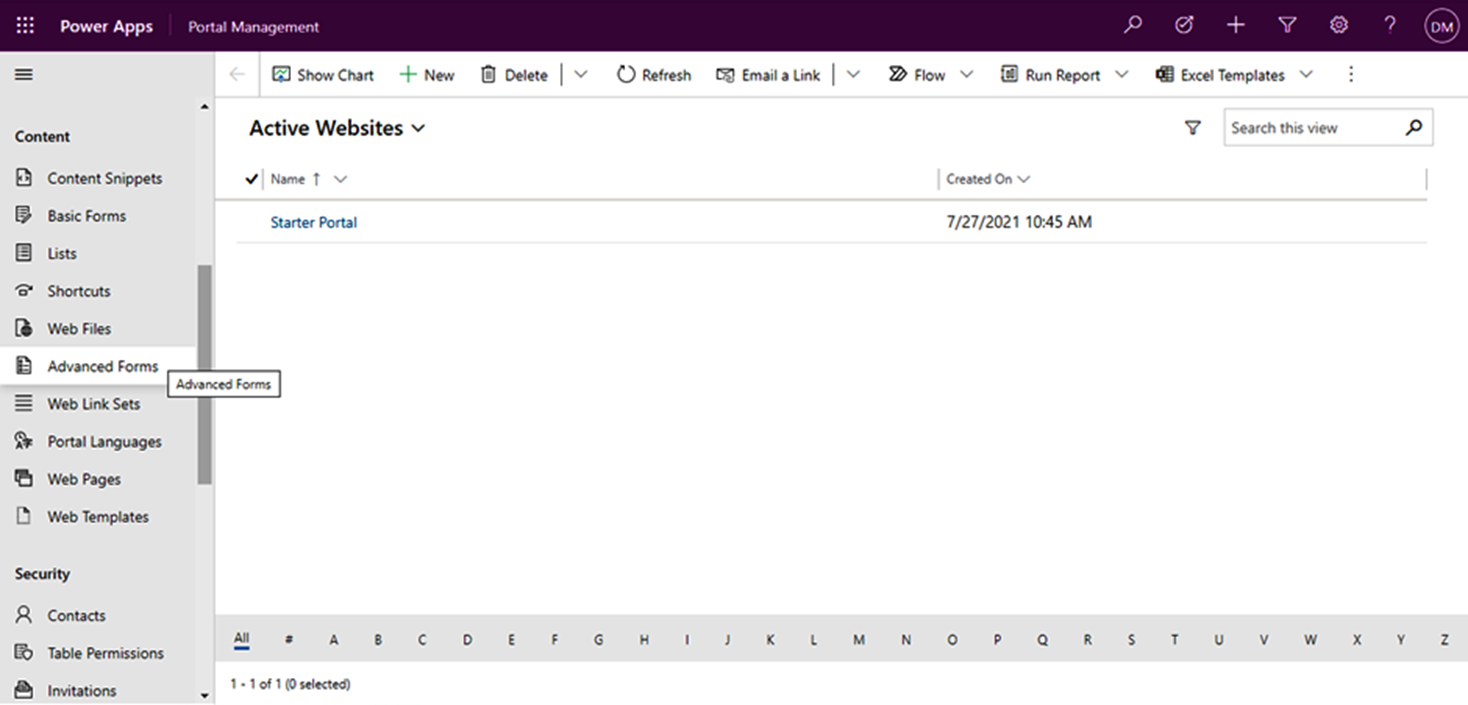
- Click on the advanced forms.
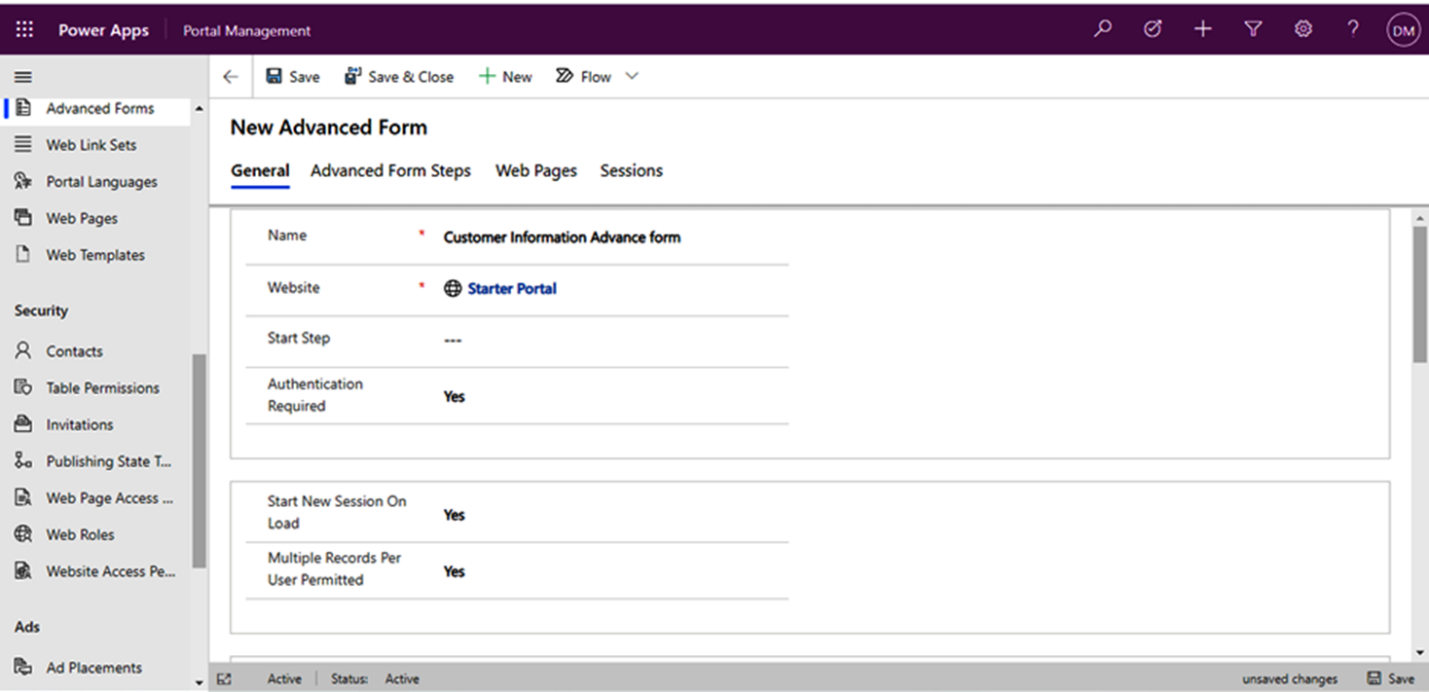
- Select new and fill in the required details and click on save and close.
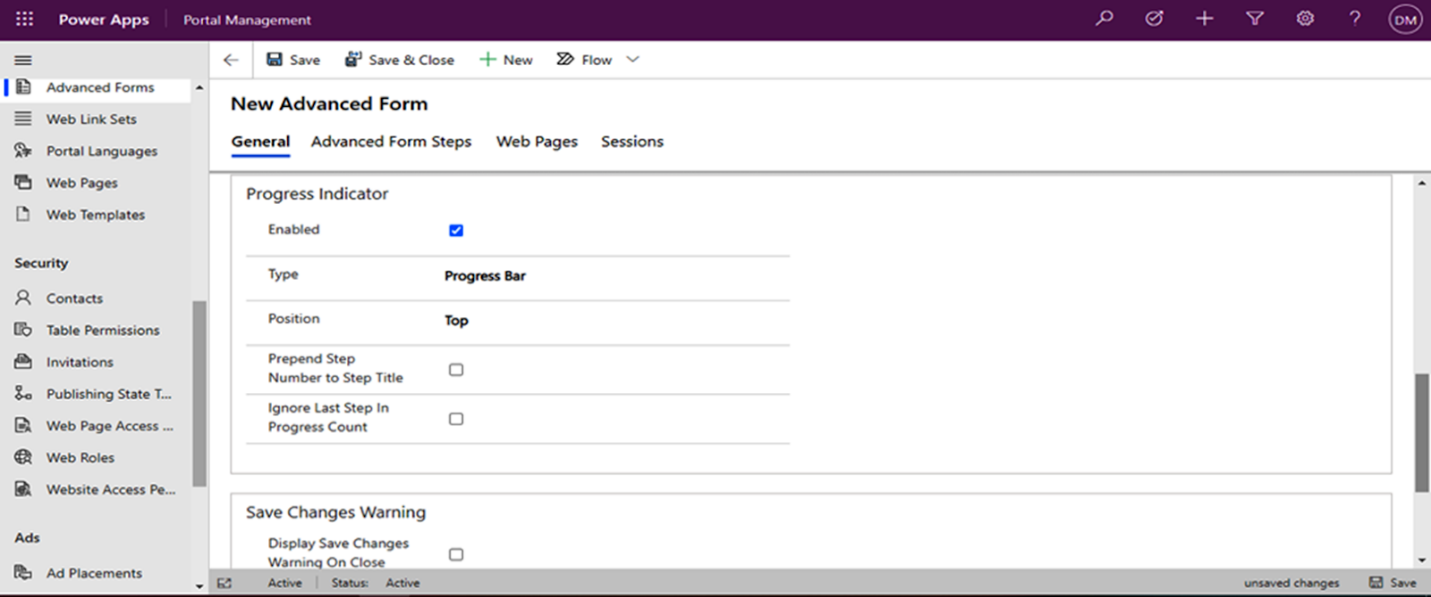
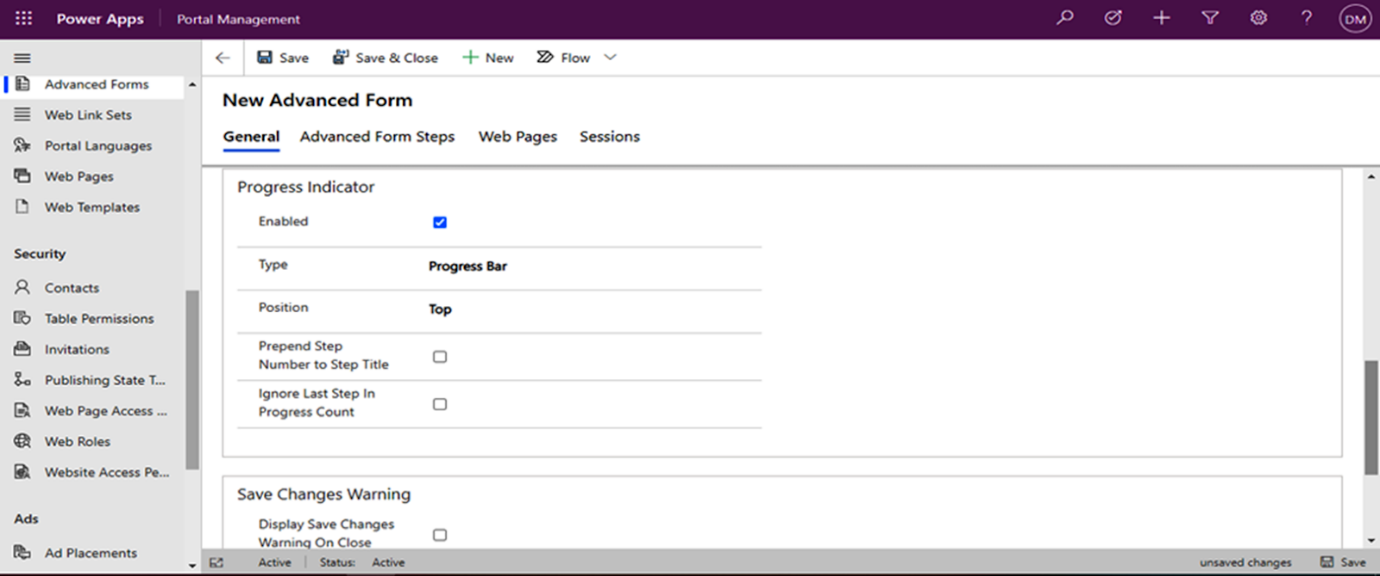
- Now go to the advanced form steps and fill in the information.
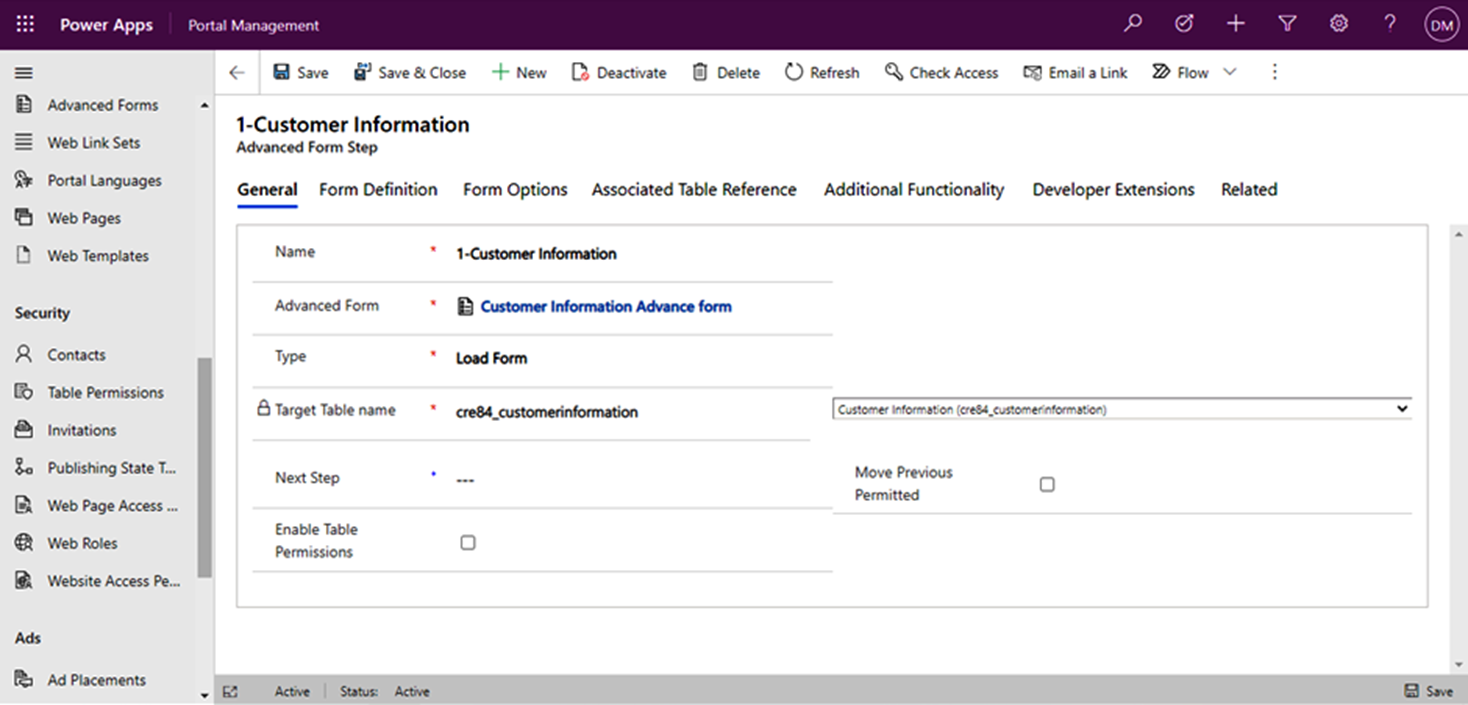
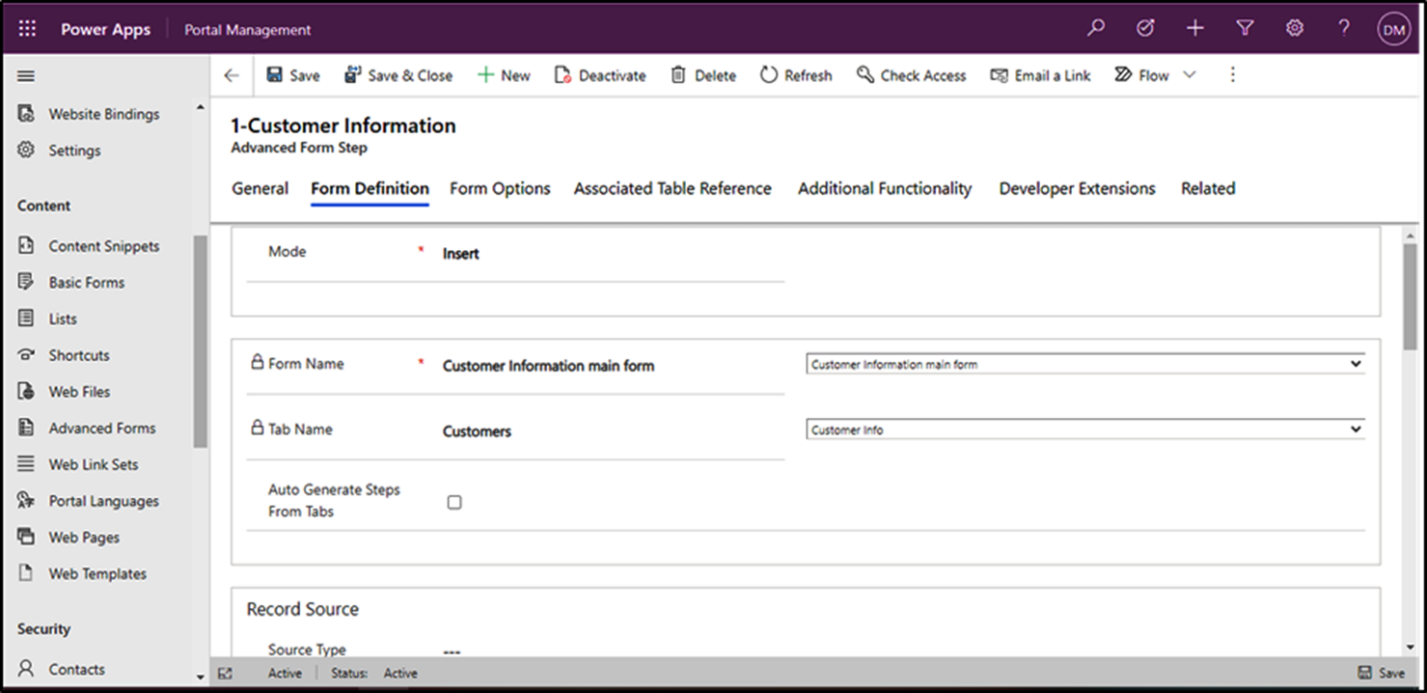
- Go to the form definition of the first step and fill in the required information.
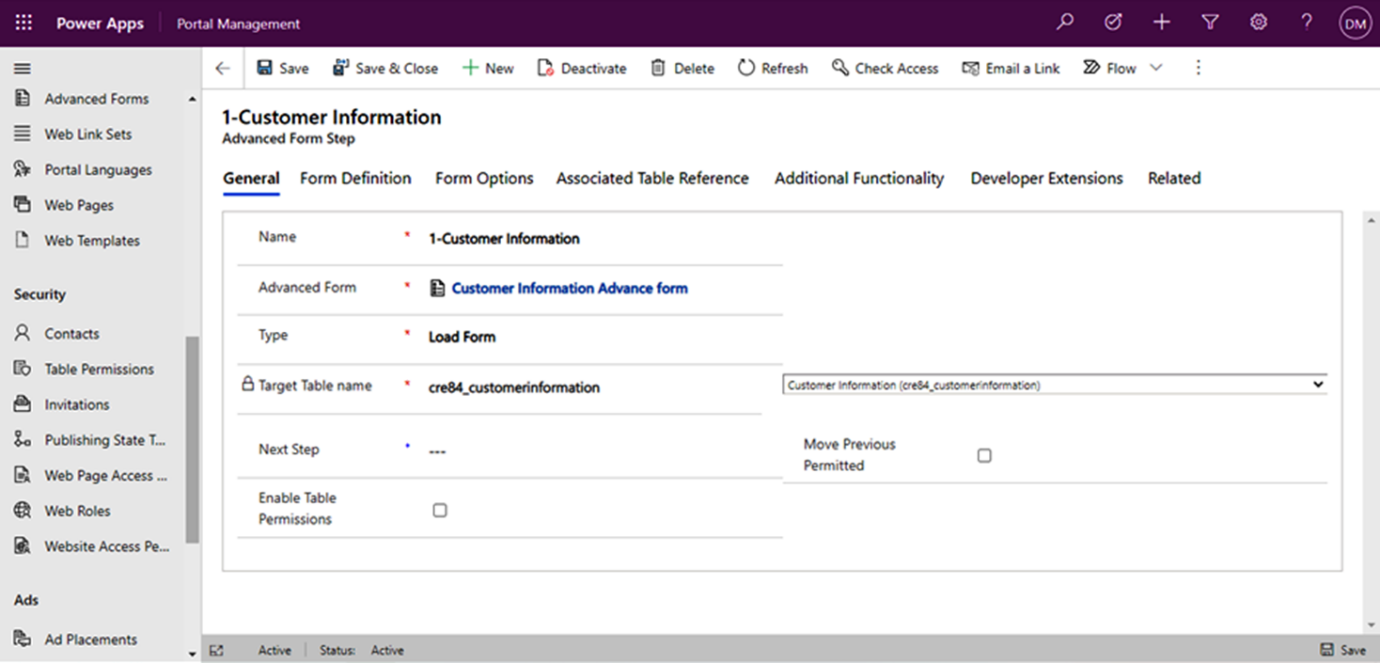
- In the next step field, fill the next step information of the advanced form.
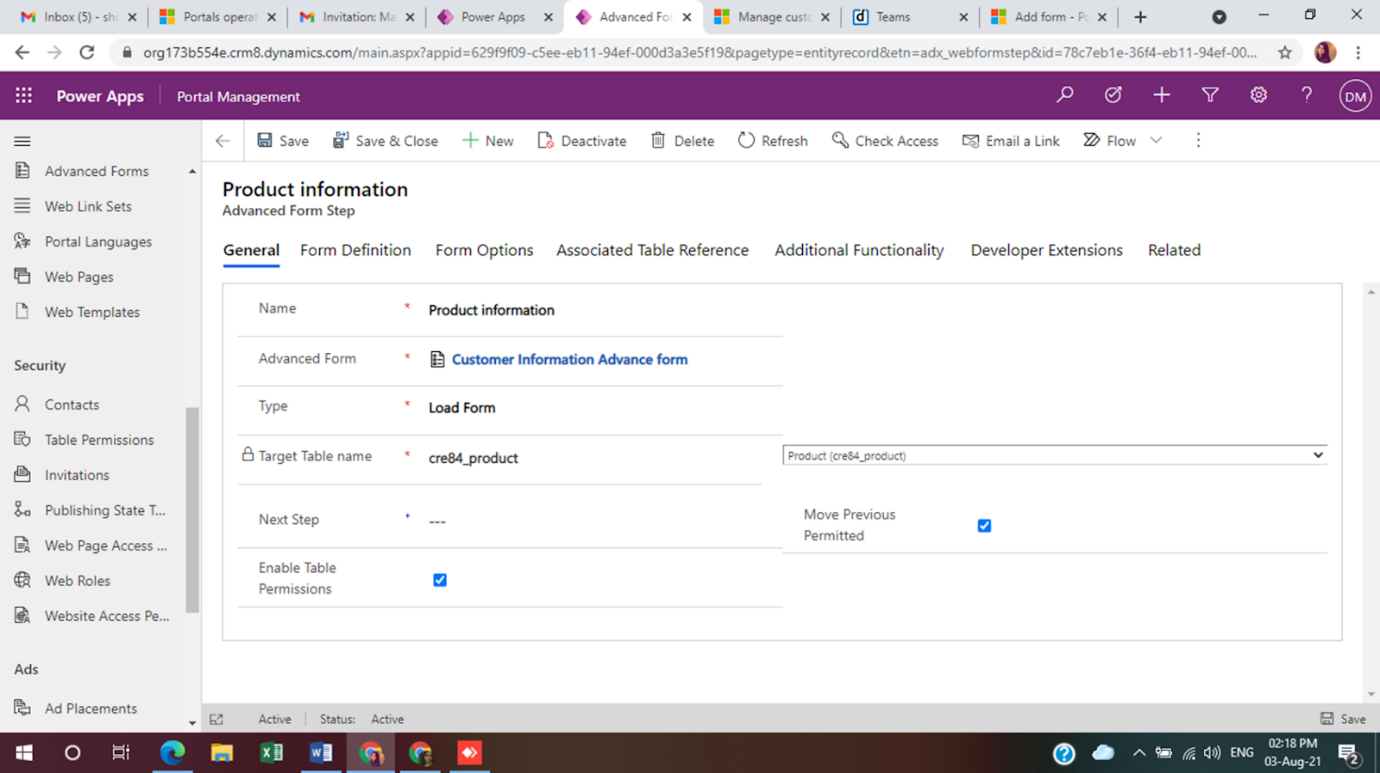
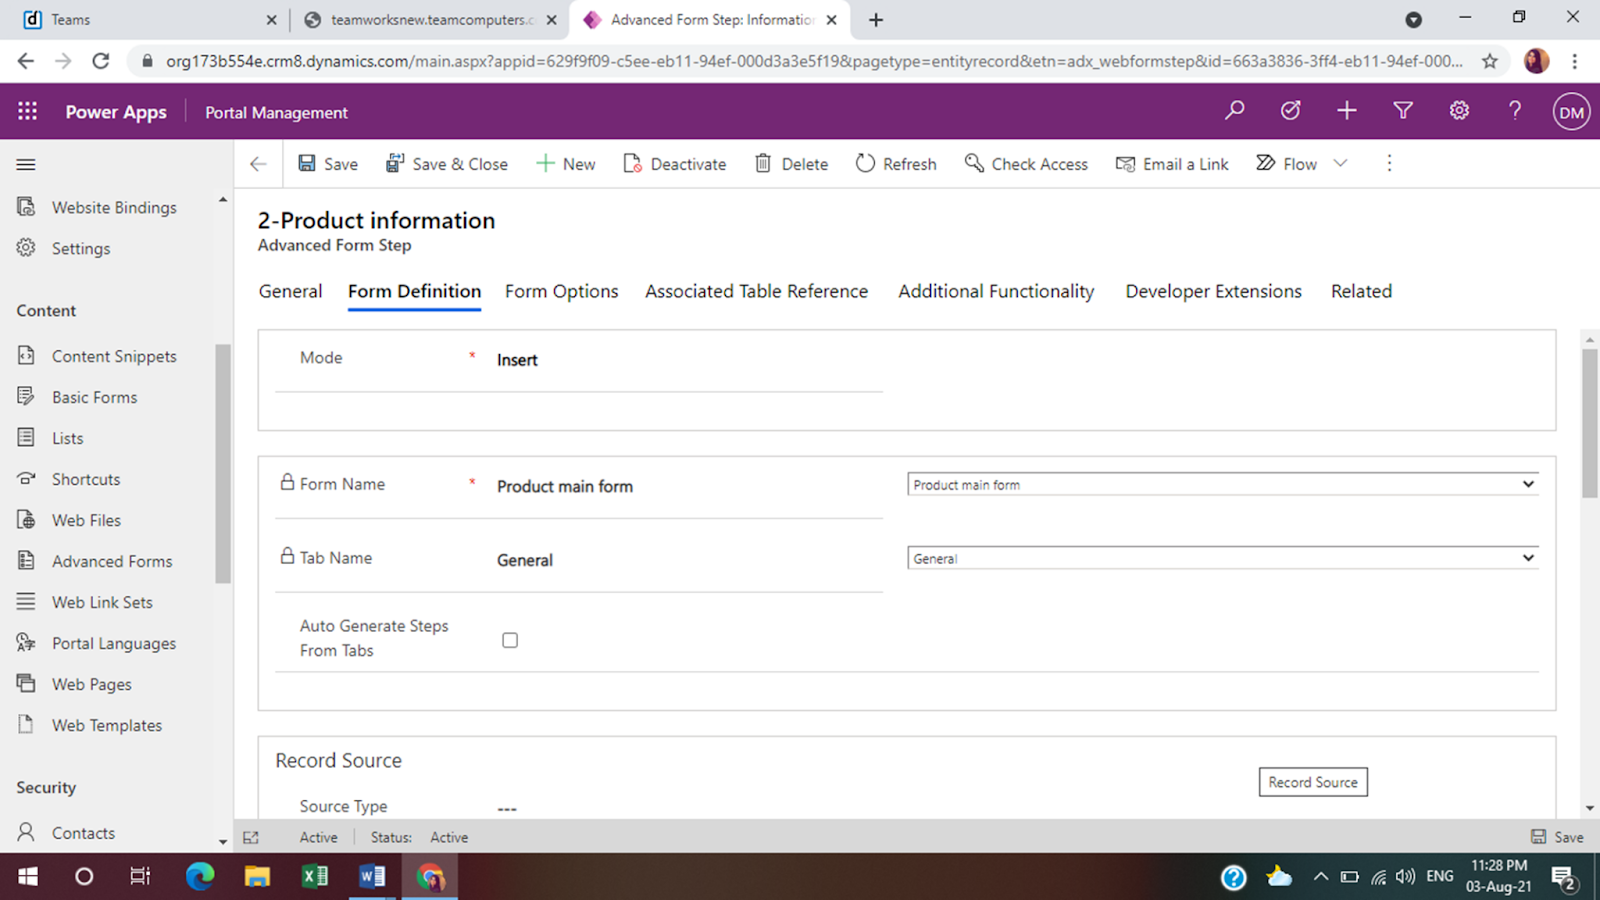
- Go to the form definition of the next step and fill in the required information.
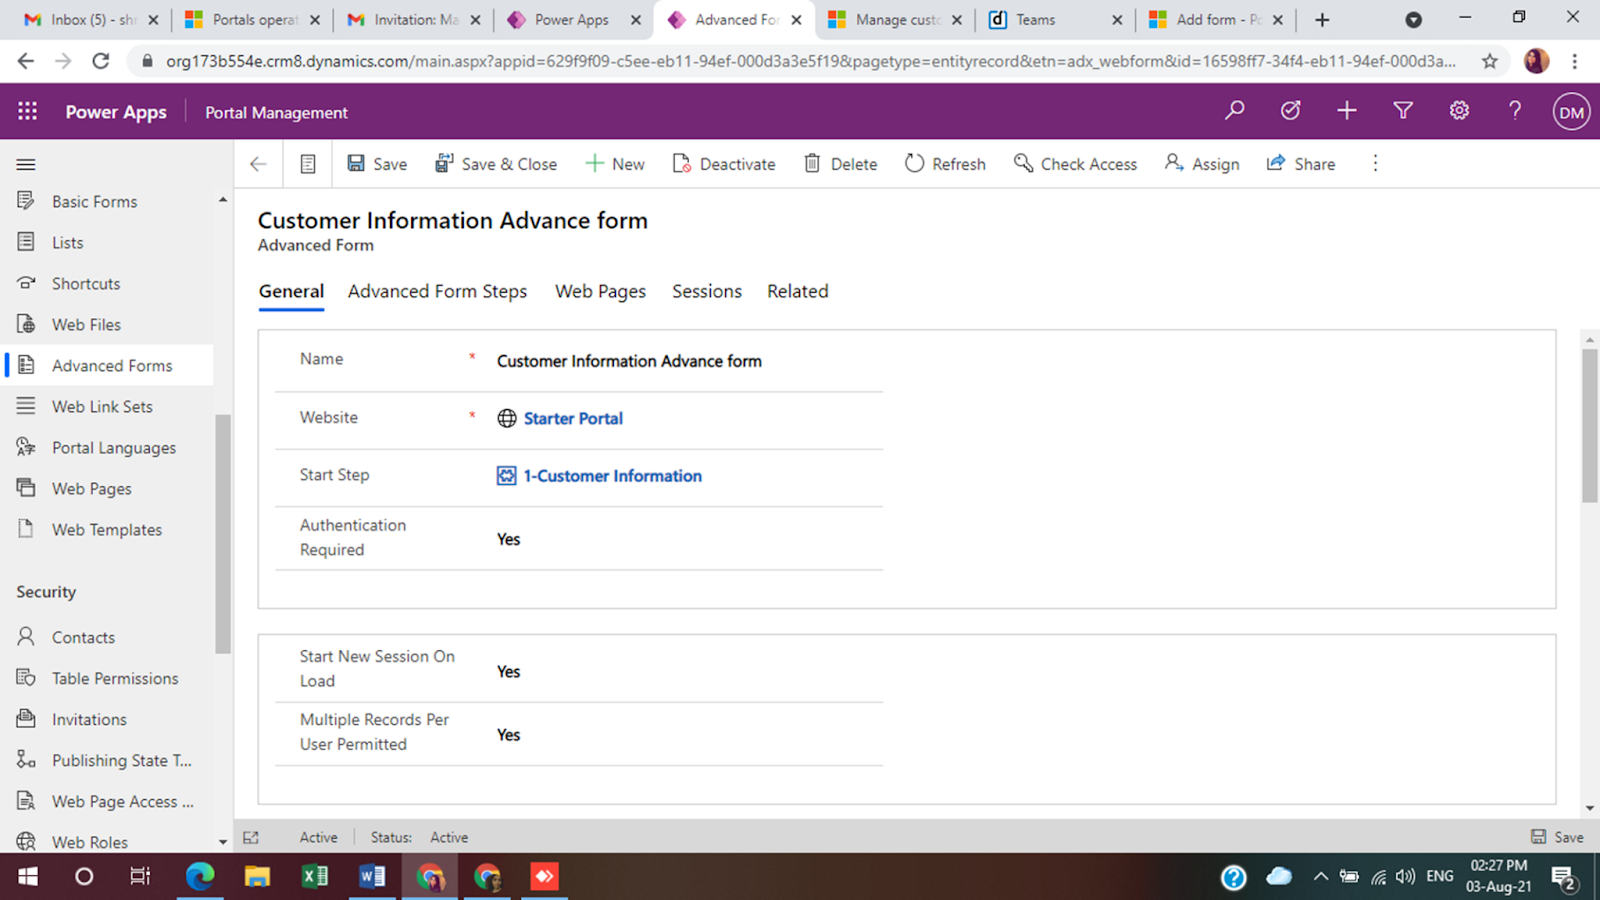
- Open the advanced form and add the start step of your advanced form.
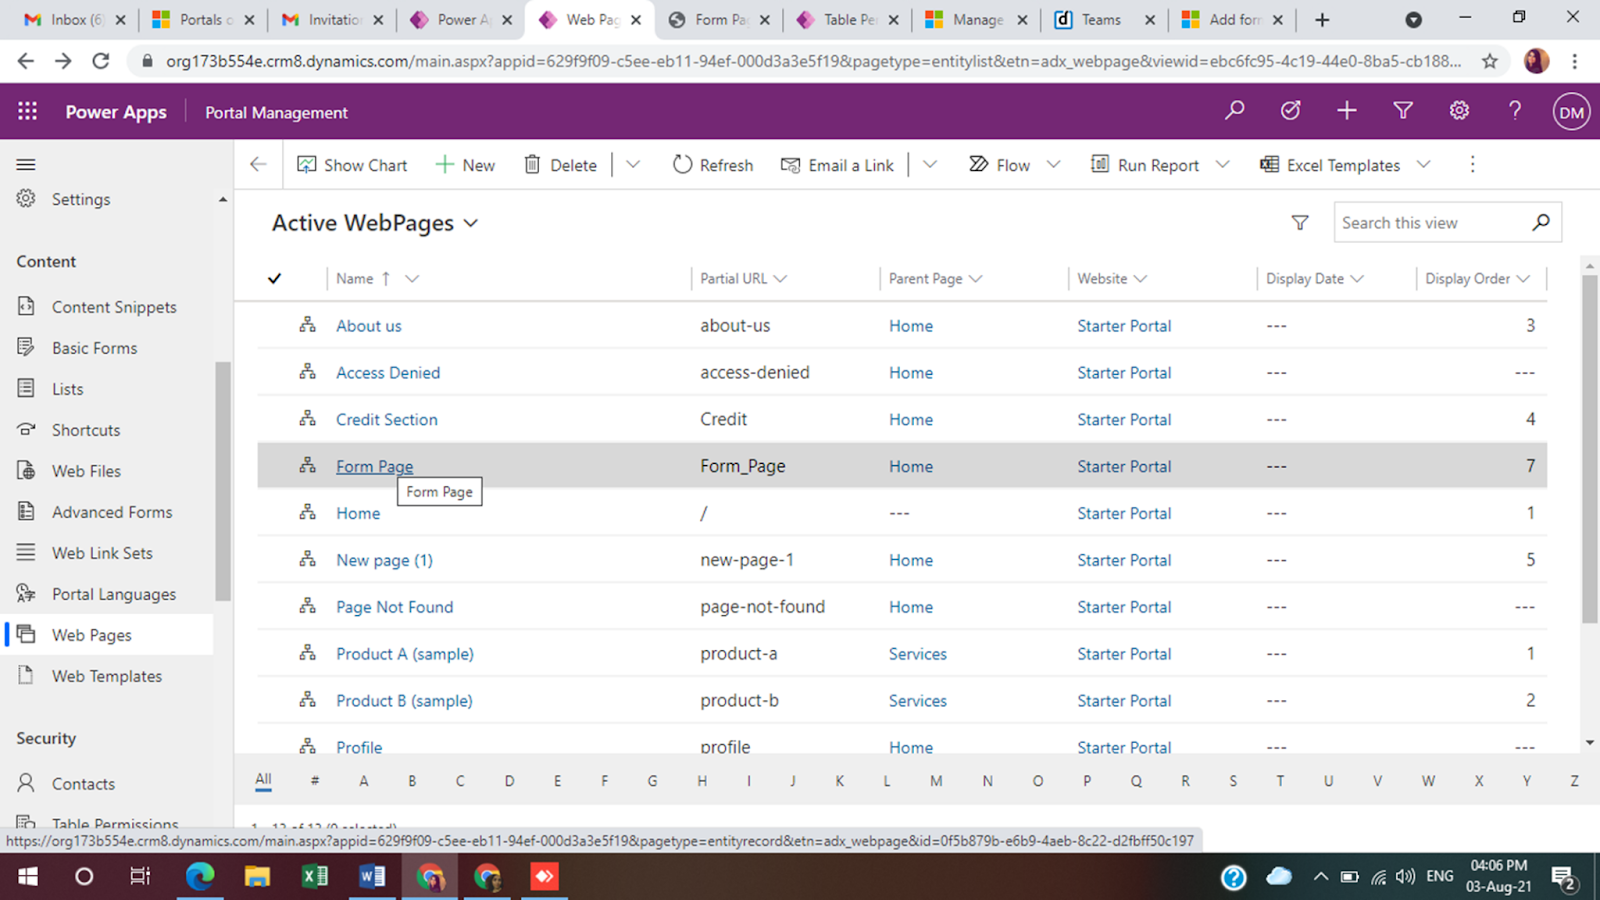
- Go to the web page and select your web page:
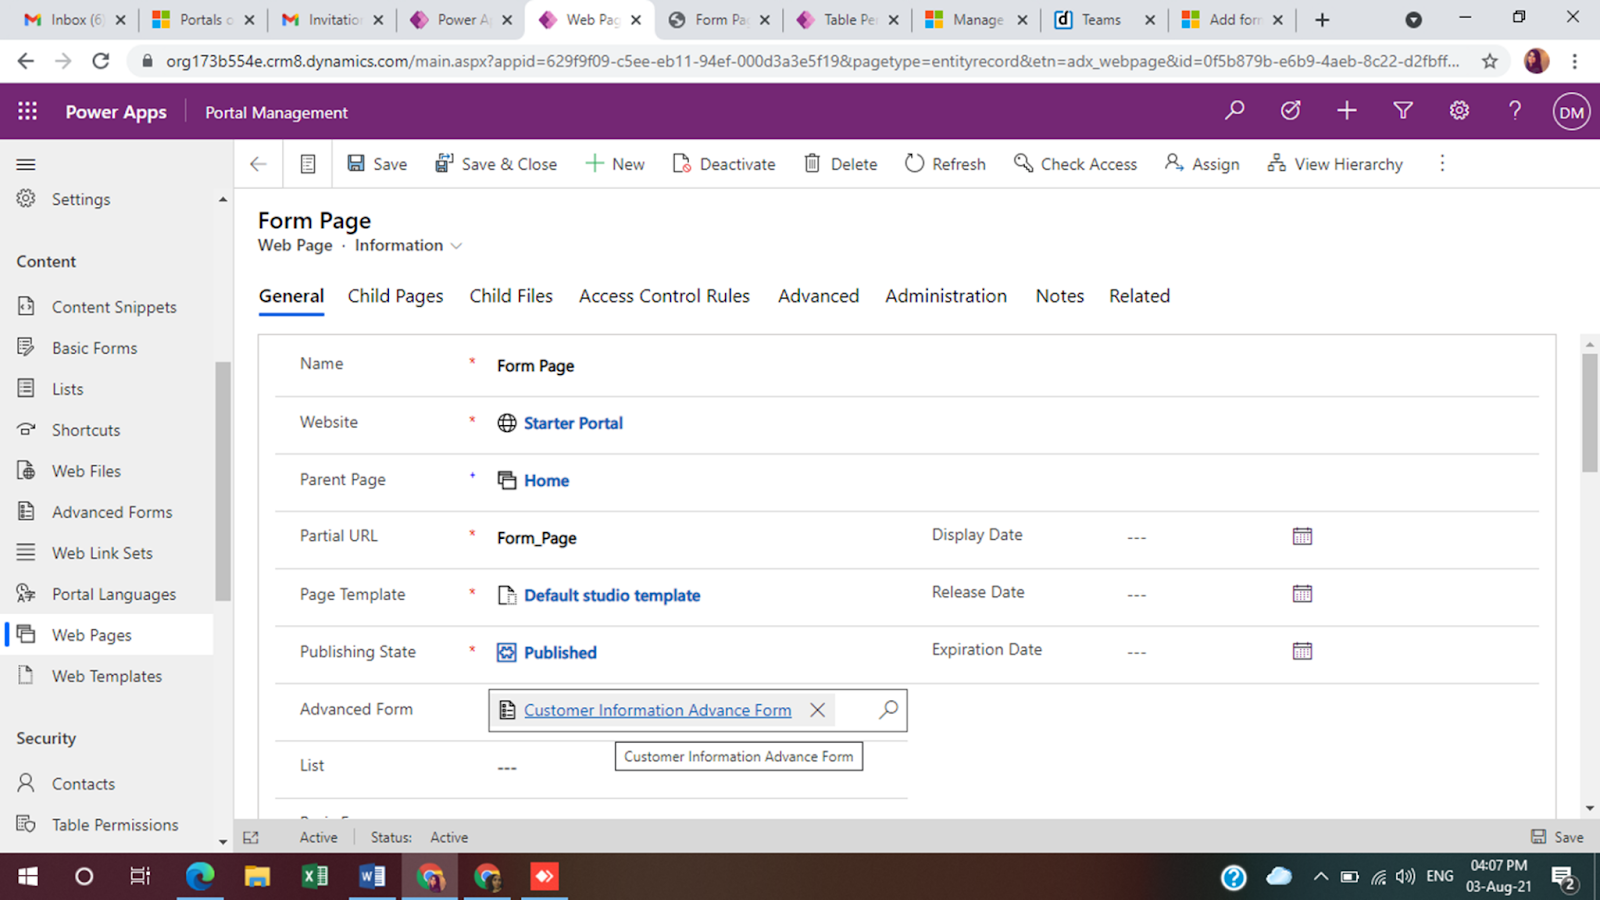
- Add your advanced form on the web page:
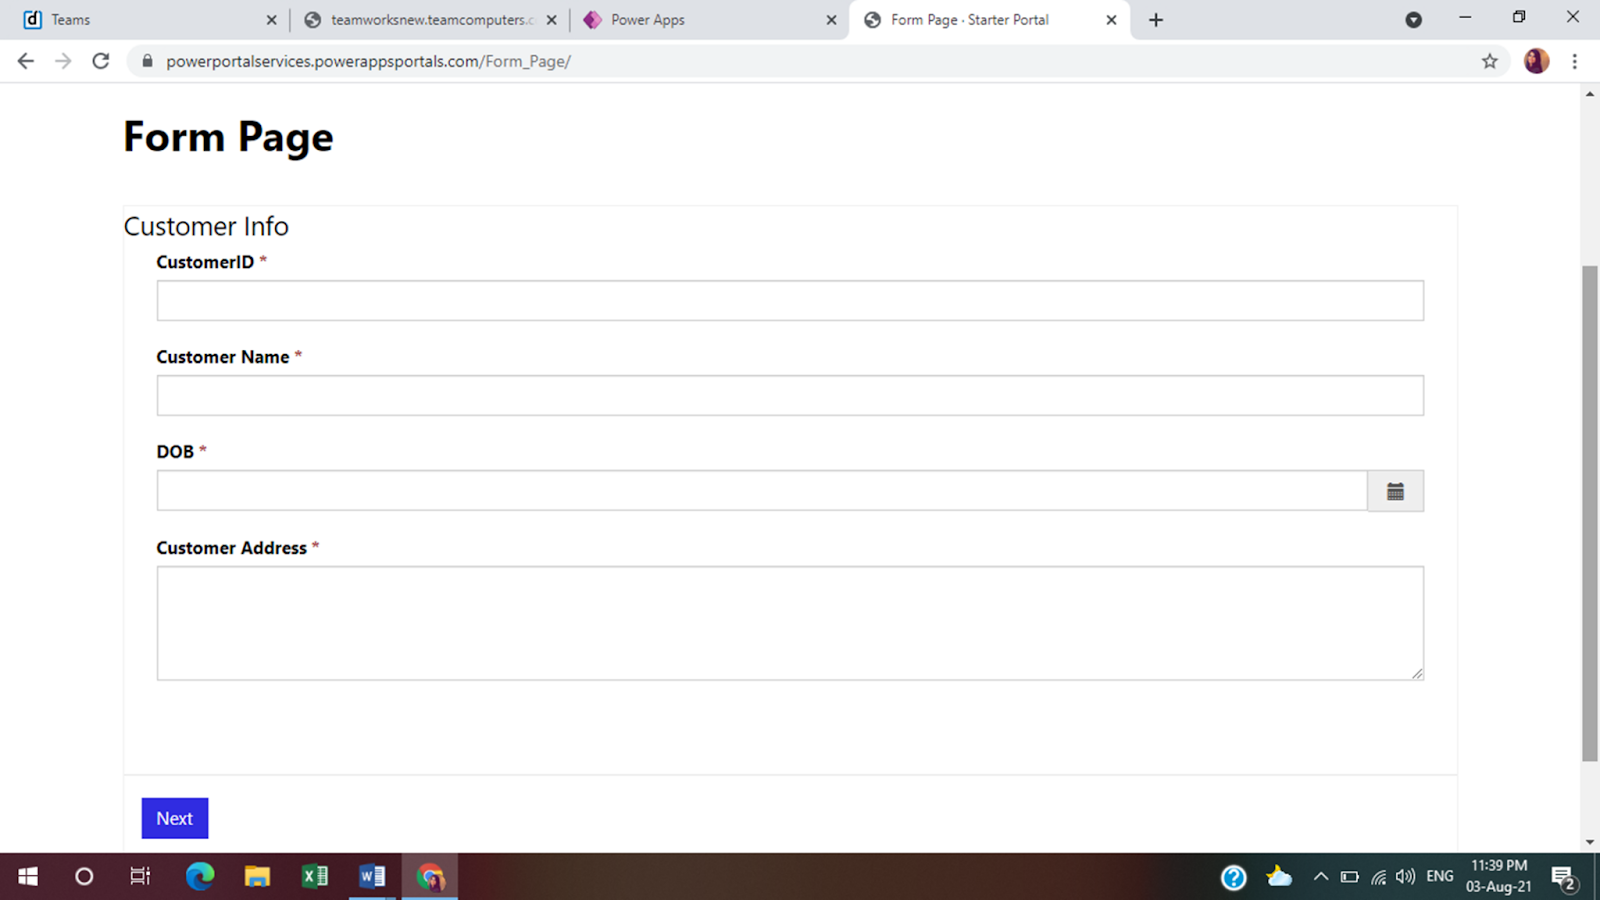
Step 5: Browse the advanced form created by clicking on browse website in the portal management studio. The form will be displayed on the web page.

Conclusion
Powerapps portal is an up and coming tool that offers loads of possibilities and opportunities for the future. Created with high end capabilities of Microsoft flow and Microsoft automate, Powerapps promise to delivers excelling products and tools and is being regarded as the technology of the future. Kockpit analytics has been a leading name data analytics solutions that provides robust and pocket-friendly Powerapps and power BI solutions to their clients. To get a deep look into Kockpit analytics or to schedule a free consultation, contact us here.


