Stay updated on the newest technologies, recent developments, and latest trends in Analytics and BI

MongoDB is a non-relational document database that provides support for JSON-like storage. The MongoDB database has a flexible data model that enables you to store unstructured data, and it provides full indexing support, and replication with rich and intuitive APIs.
We have packed our container with mongo and mongo-express images. Mongo Express is an interactive lightweight Web-Based Administrative Tool to effectively manage MongoDB Databases. Using Mongo Express, you can add, delete or modify databases, collections, and documents. We can use tools like MongoDB Compass, MongoDB Atlas, etc. For development, it is better to connect to an instance of MongoDB running inside a Docker container locally (instead of a cloud-hosted instance) to save resources. Both the images will be up and running as soon as the VM is started. The Ports used for mongo and mongo-express are 27017 and 8081 respectively. Username and password are root and example respectively.
Portability: Containers are lightweight and portable, which makes it easy to move the MongoDB instance from one environment to another, such as from development to production.
Scalability: Containers can be easily scaled horizontally, which means you can easily add more MongoDB instances as your workload grows.
Flexibility: Containers provide a flexible way to package and deploy MongoDB, and they can be easily configured to meet specific requirements, such as resource constraints or security settings.
Consistency: Containers ensure that the MongoDB environment is consistent across all environments, including development, staging, and production, which helps to reduce the risk of configuration errors and ensure that your application runs smoothly.
Log in to your Ubuntu VM using SSH.

After logging into your VM, type the “cd /usr/local” command to get into the main working directory.
Type the “ls” command, and it will show all the files in the current directory.

Type “sudo docker ps,” and you will see all running containers and the ports at which they are being operated.

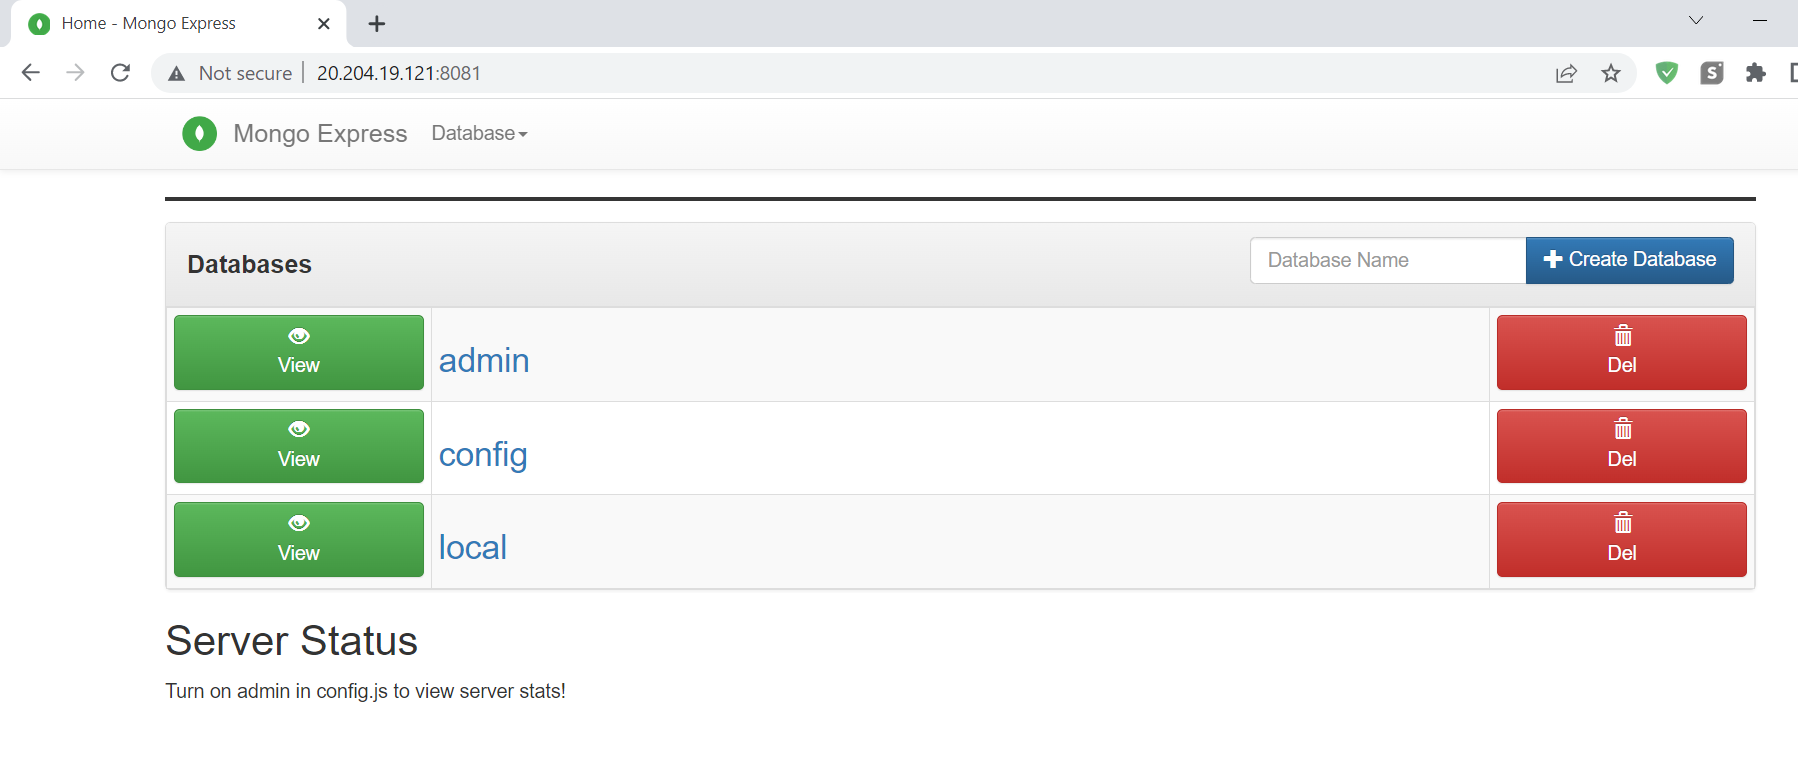
Open the web browser on your desktop. Write down your VM’s IP in the address bar followed by “:” and then the port number at which the image is active.
For Example 20.204.19.121:8081
Download MongoDB Compass from its official website. Launch it and follow these steps:
Launch MongoDB Compass.
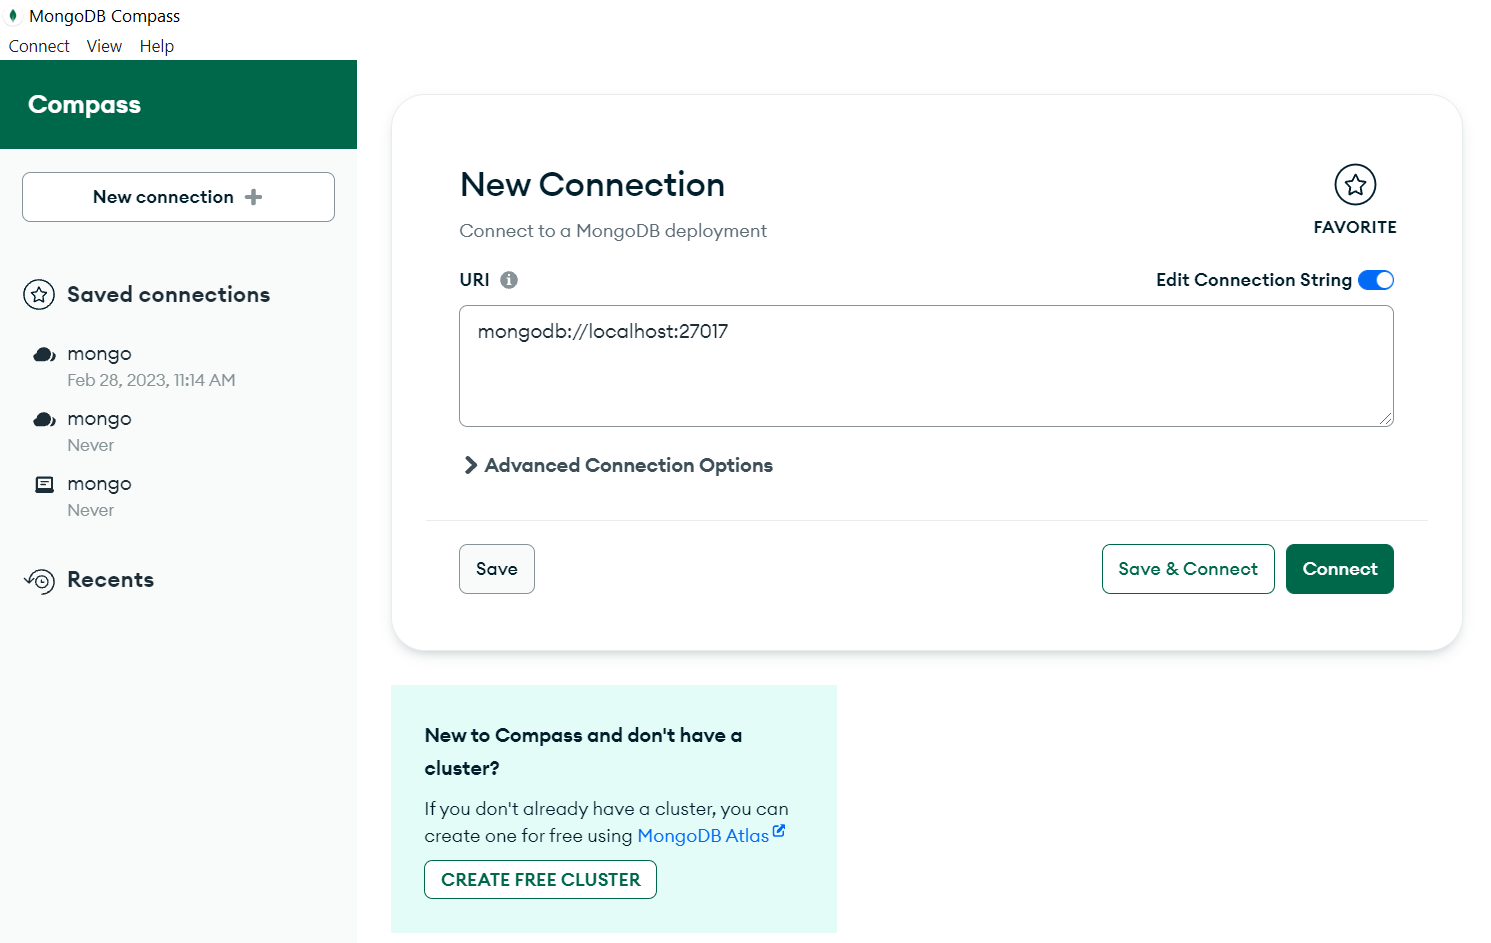
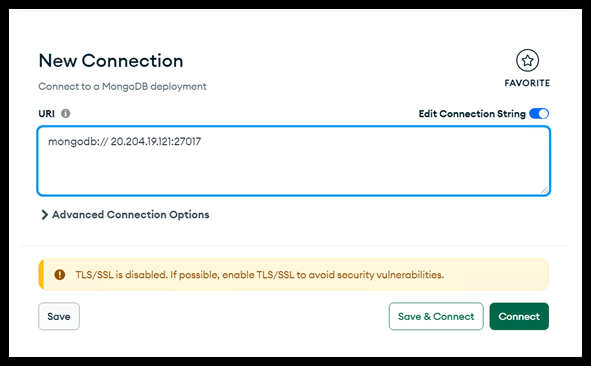
Edit connection string. Type “mongodb://<VM’s IP address>:<port>”.
For Example, “mongodb:// 20.204.19.121:27017”.
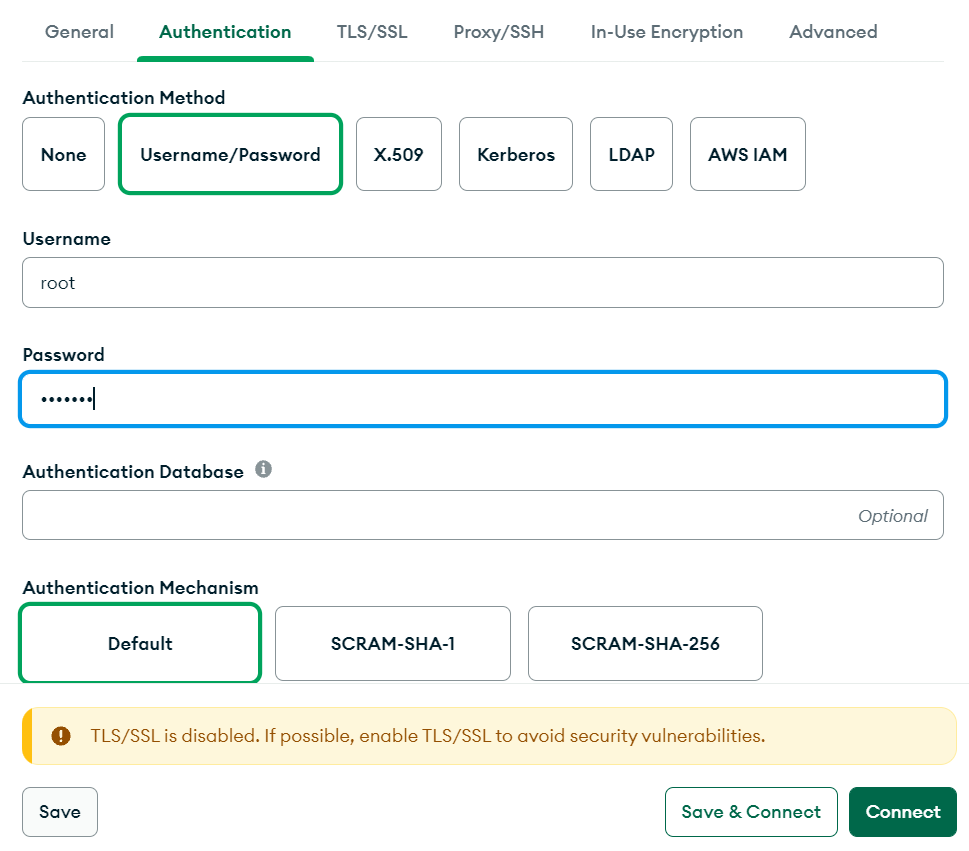
Click on “Advanced Connection Options.” Click on “Authentication,” followed by “Username/Password.” Enter your Username and password, then click on “Save & Connect.”
For example, Default Username: root and Password: example.
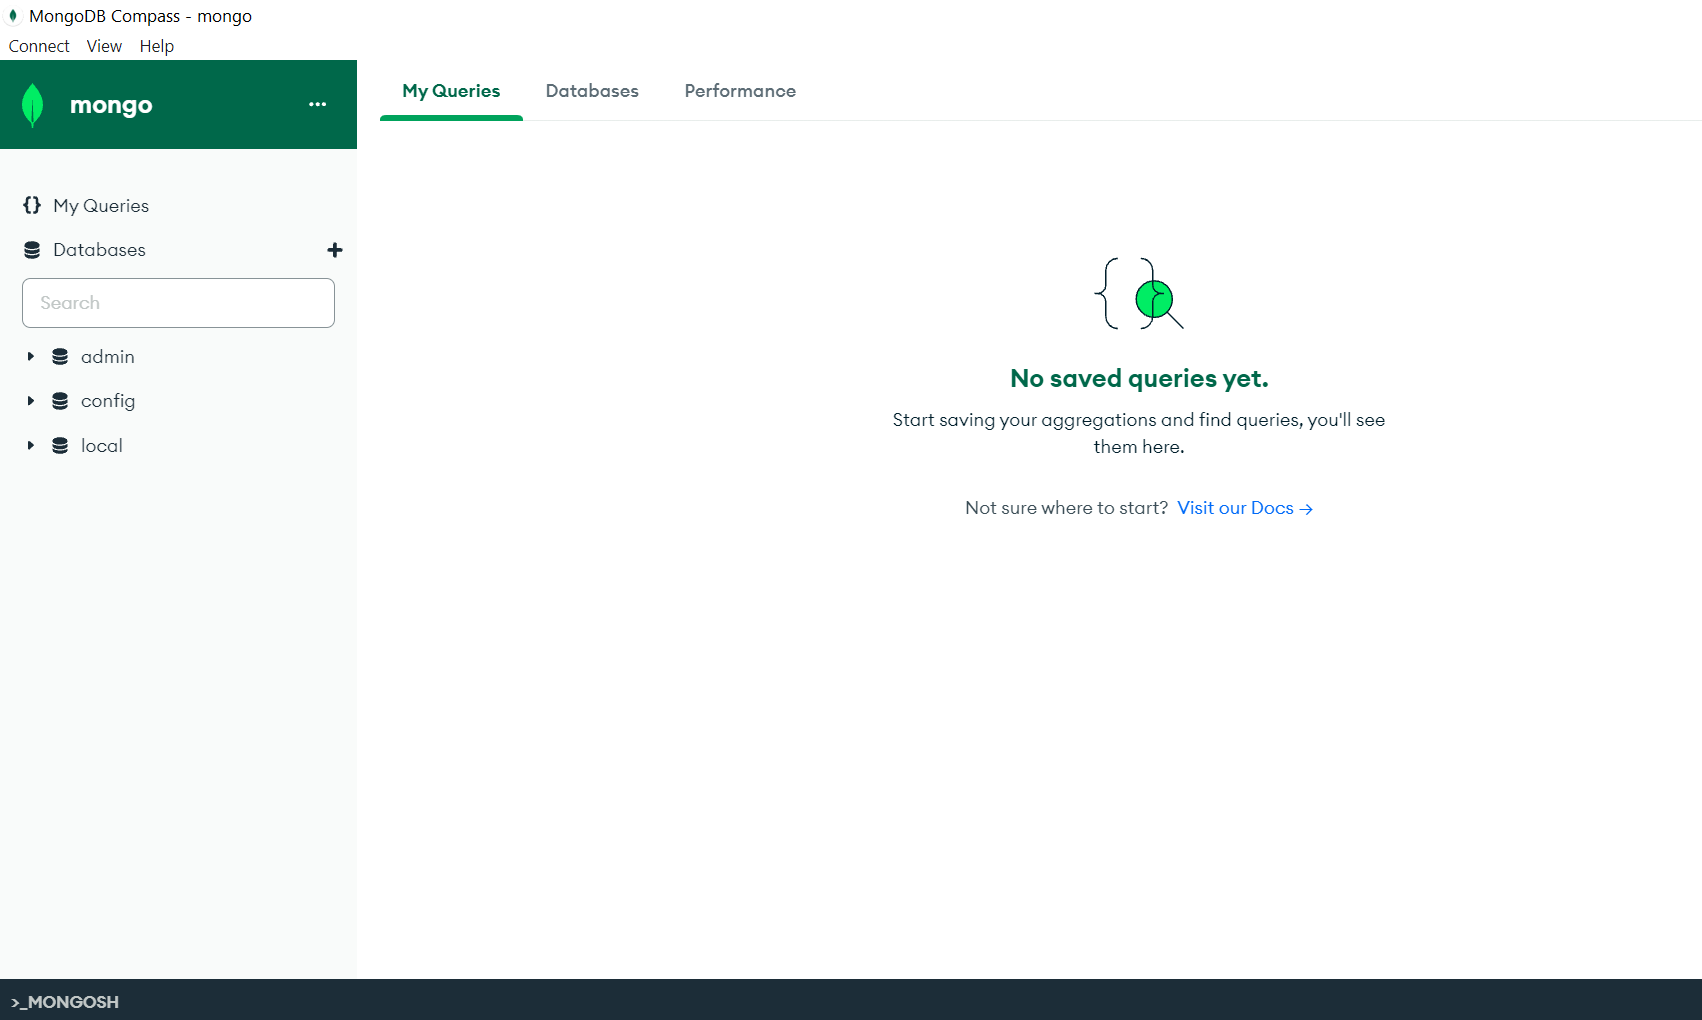
Connection will be established. You will have the following screen.
Type “sudo nano mongo.yaml” command. Here, we have integrated MongoDB, and mongo express in our container.
Version: You can use all sorts of scalar types as values: numbers, booleans, and strings (quoted or not)
Image: You can use any image from the library of the docker hub. And you can mention a particular version as well. For example, Image: mongo 2.6.8
Restart: If it is at ‘always’, your container will start every time you log into your server.
Environment: We define username and password under this key.
Ports: The first part before the separator is the port address on which we want our container image to run (kind of masking the real port), and the second part after the separator is the main port address where it will be running.
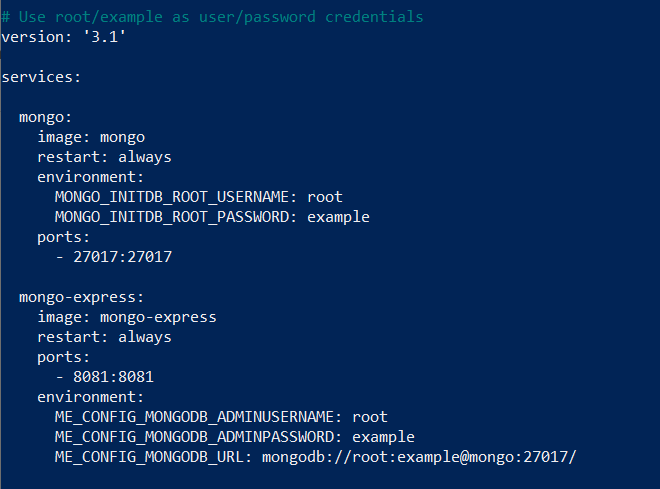
After editing, press Ctrl+X then Y, and press Enter. All the changes made in the yaml file will be saved.
To get the yaml file up and running. Type “docker-compose –f mongo.yaml up –d” command.
(The -d operator runs the detached container as a background process. The up command will pull the mongo image from the docker registry.)
