Stay updated on the newest technologies, recent developments, and latest trends in Analytics and BI

Now you can enjoy the quick and hassle-free configuration of your workspaces with Kockpit's pre-configured images. Spark Multi-Node with Hadoop is a virtual machine image (VMI) created for Ubuntu and Redhat (OS) that allows you to set up your machines within minutes.
For you, we have packed Spark and Hadoop in an image offering, enabling easy setup and configuration. With the help of an integrated form in KockpitShell.sh, you can connect to Spark and Hadoop UIs without any need to develop scripts. Moreover, no need to develop, change, or deploy any XML files. Once the information is entered, your cluster will be ready to use.
The distribution of Hadoop and Spark is based on Linux and is provided by Kockpit Analytics Pvt. Ltd. Hadoop and Spark Image is designed for Production Environments on Azure.
After deploying Spark Master with Hadoop using Ubuntu/RHEL, the user is required to deploy Spark Executor with Hadoop using Ubuntu/RHEL to create a Multi-node(cluster).
The Username and Password of the Master and Slave should be the same. If not, create a master and slave with the same username and password, or else the below procedure does not work.
First of all, configure the slave first after that configure the master server.
Log in to your Slave Azure VM using SSH.
After log in into your VM type the "ls" command in the /usr/local/ directory to get a list of files.

Now as you can see there is a file named "KockpitShell.sh". Bash that file using the command "bash KockpitShell.sh"
After Bashing the file, the following Screen will appear.
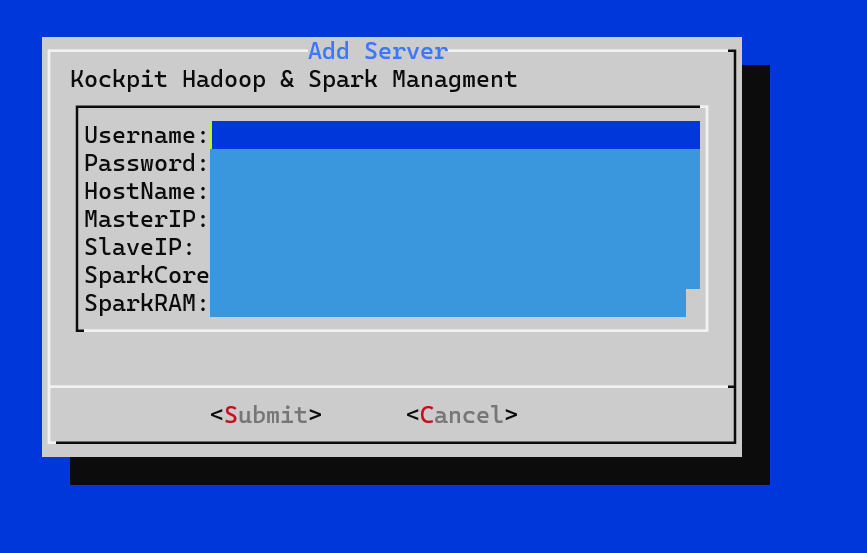
In the first 4 fields fill the username, password, hostname of the Master machine and the Master IP of the VM. For example:
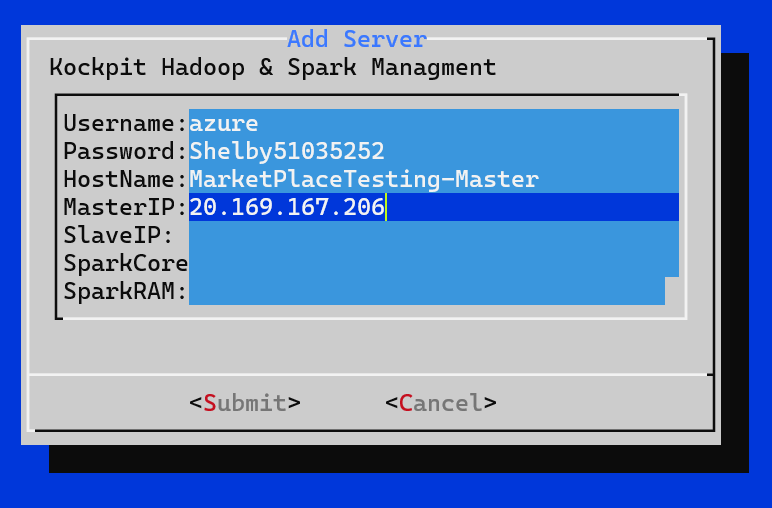
Enter the Slave IP enclosed in double quotes(" ") as shown below. Use , To Separate IPs from each other(if having multiple slave IPs).

In the last 2 fields, input the number of cores your machine has in Spark Cores and input the RAM your machine has in the Spark RAM field. For example my VM has 2 Cores and 4GB of RAM, so the input fields will be like this:
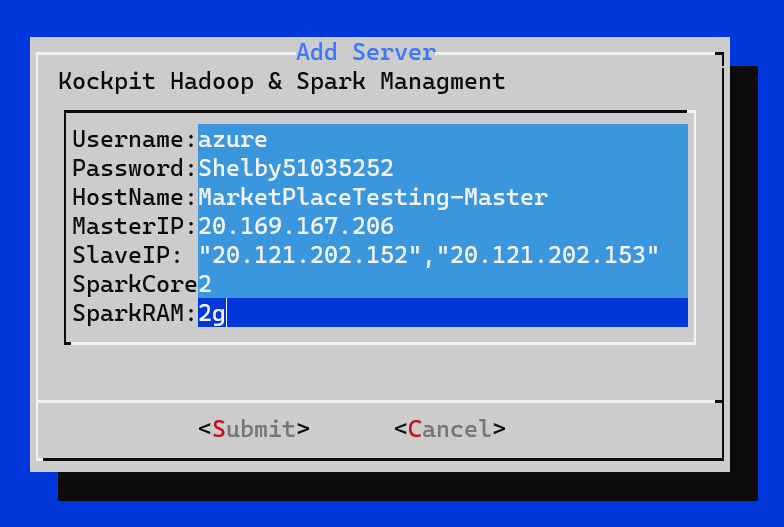
Note: Make sure you add a small "g" to the Spark RAM field which stands for Giga Bytes.
After filling up the above form, click on the submit button and wait for the script execution.
The final output will be like this:

Now, go to your Master server and follow from Step No.1 to Step No.7.

Use the command "jps" to list all your active processes. Wait for 10 secs if the process shown below does not show up, and again do "jps". To successfully Setup a Hadoop and Spark Multi-node cluster, the following processes should be running:
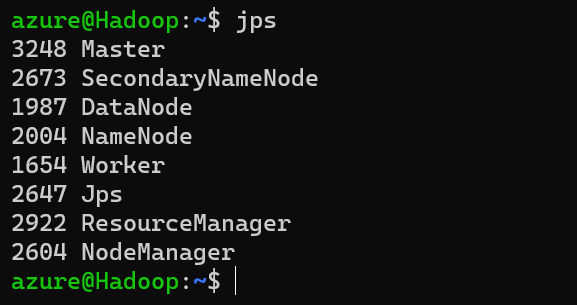
Copy your VM IP and paste it in browser and port number in the IP to access the Web UI of Hadoop and Spark.
Port For Hadoop is 9870 and for Spark, it is 8080
For Example:
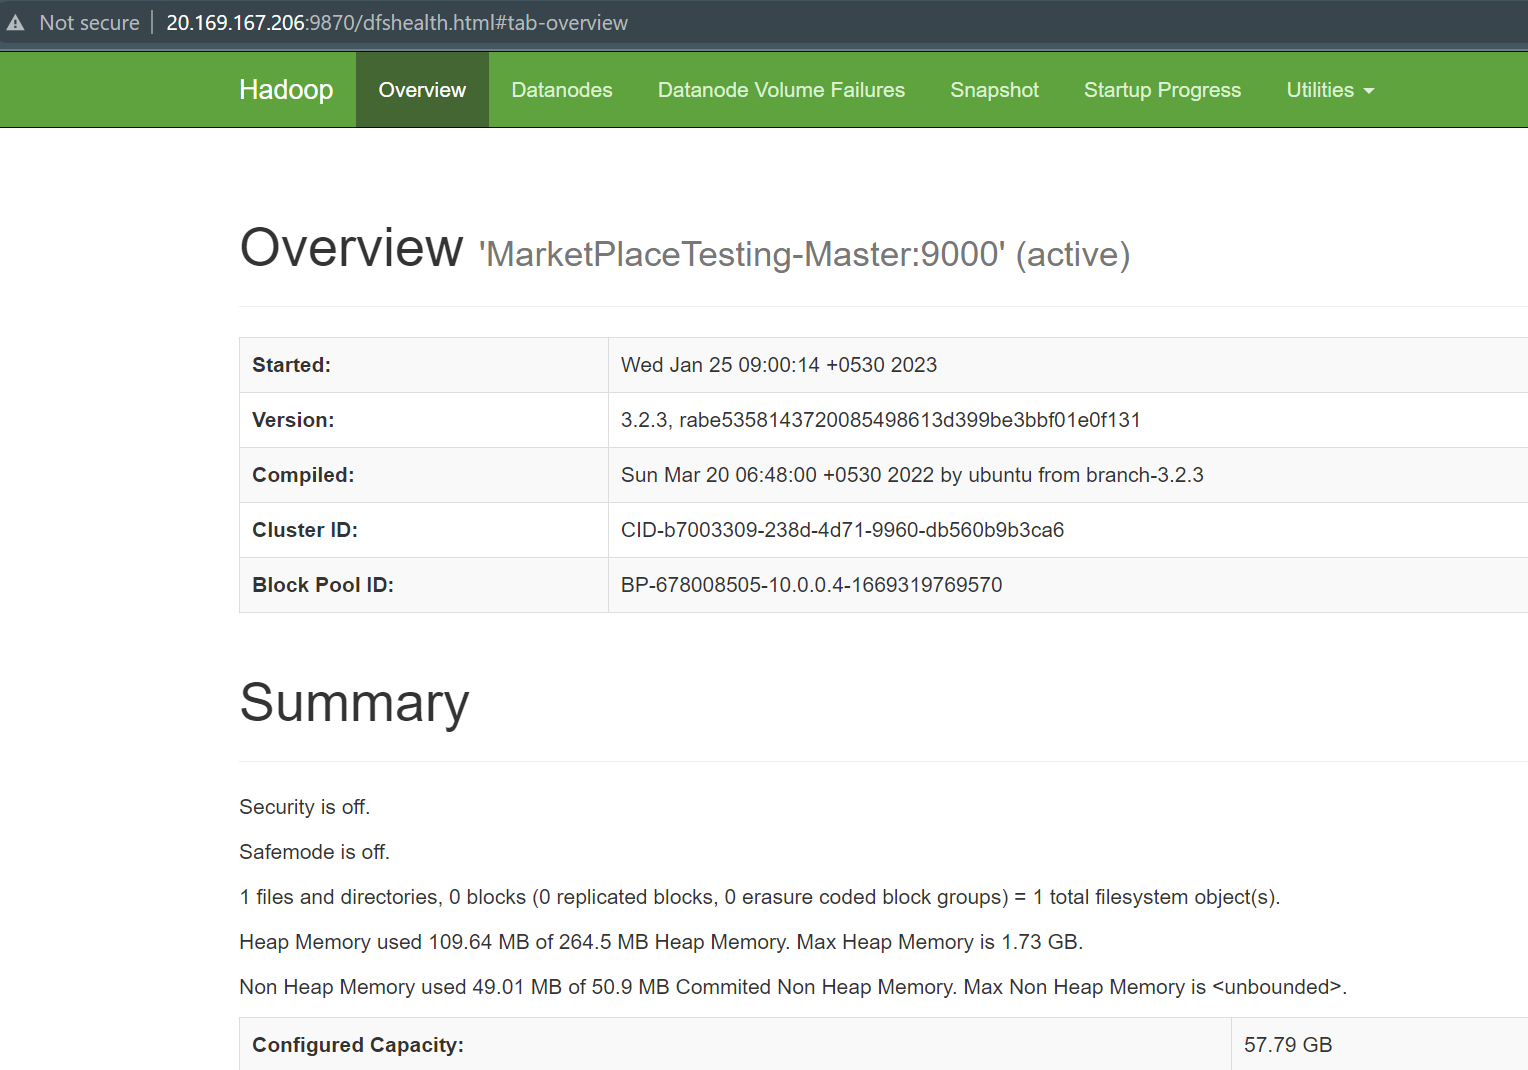
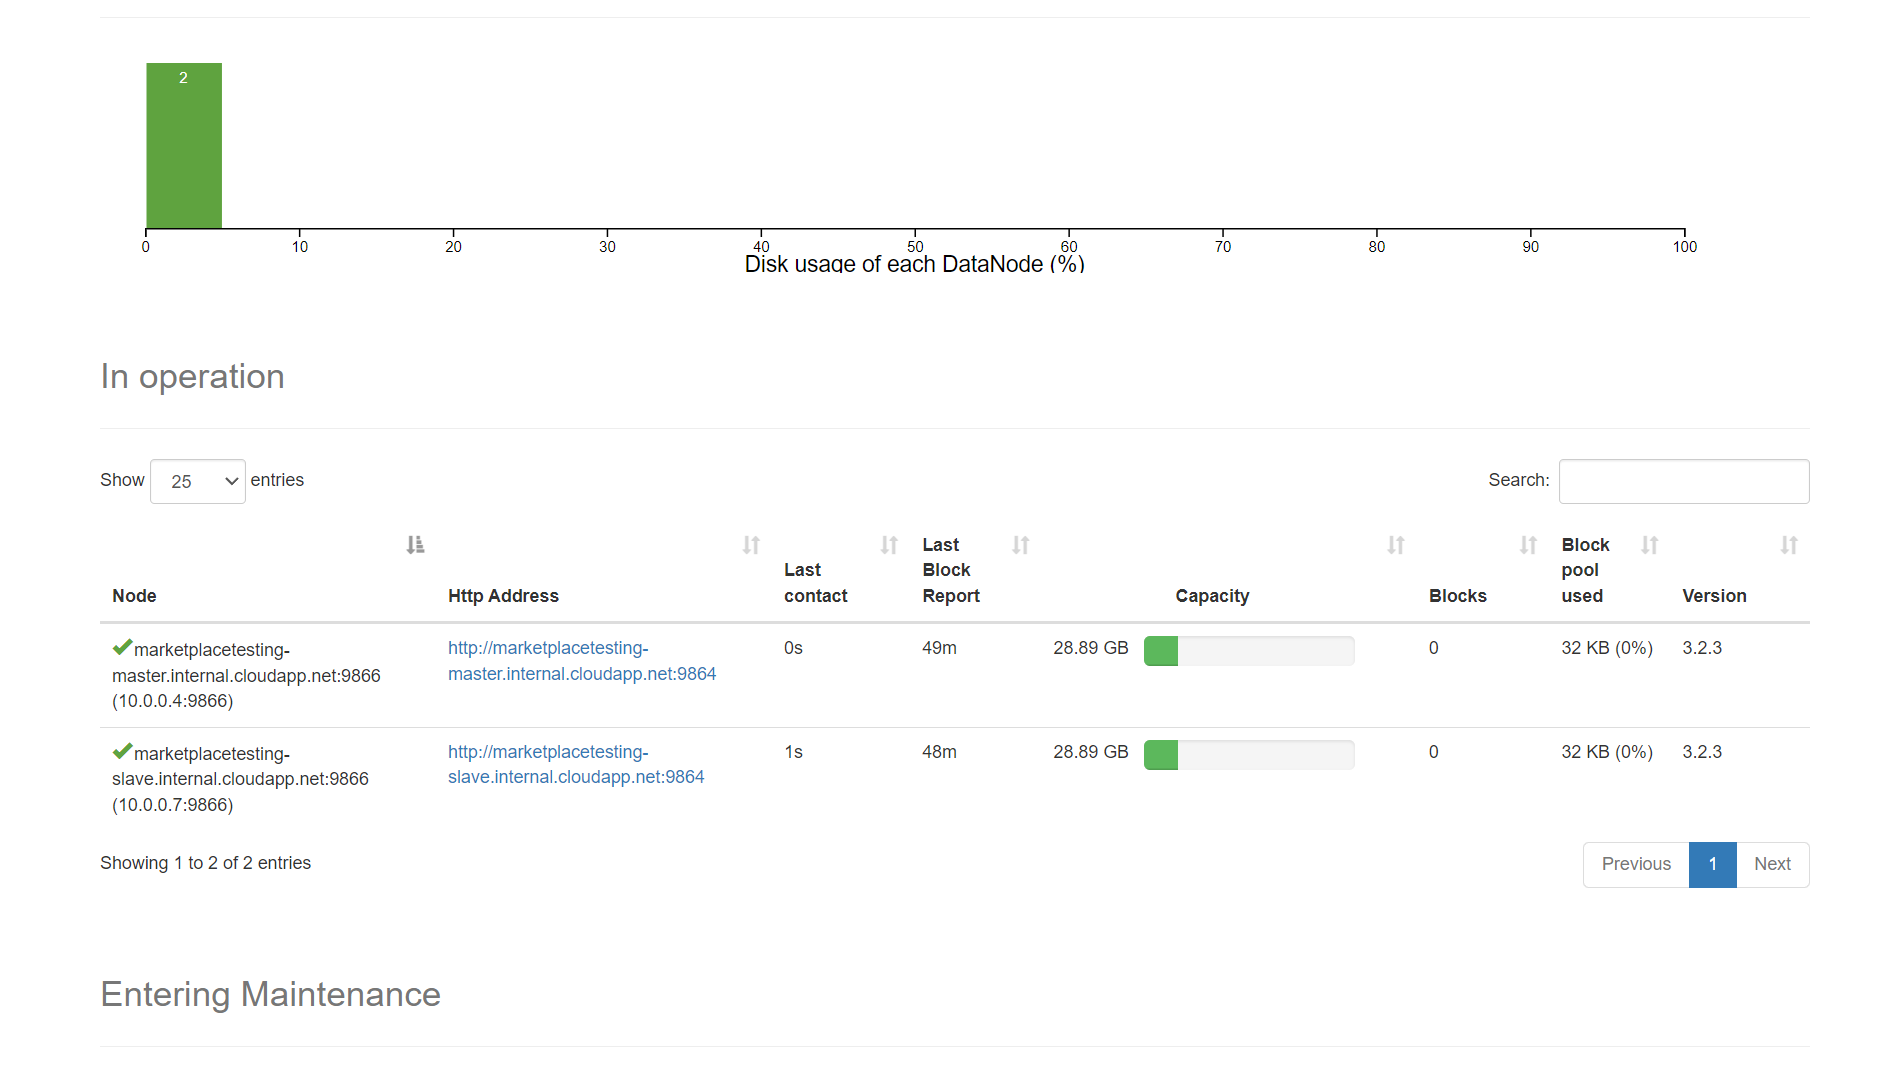
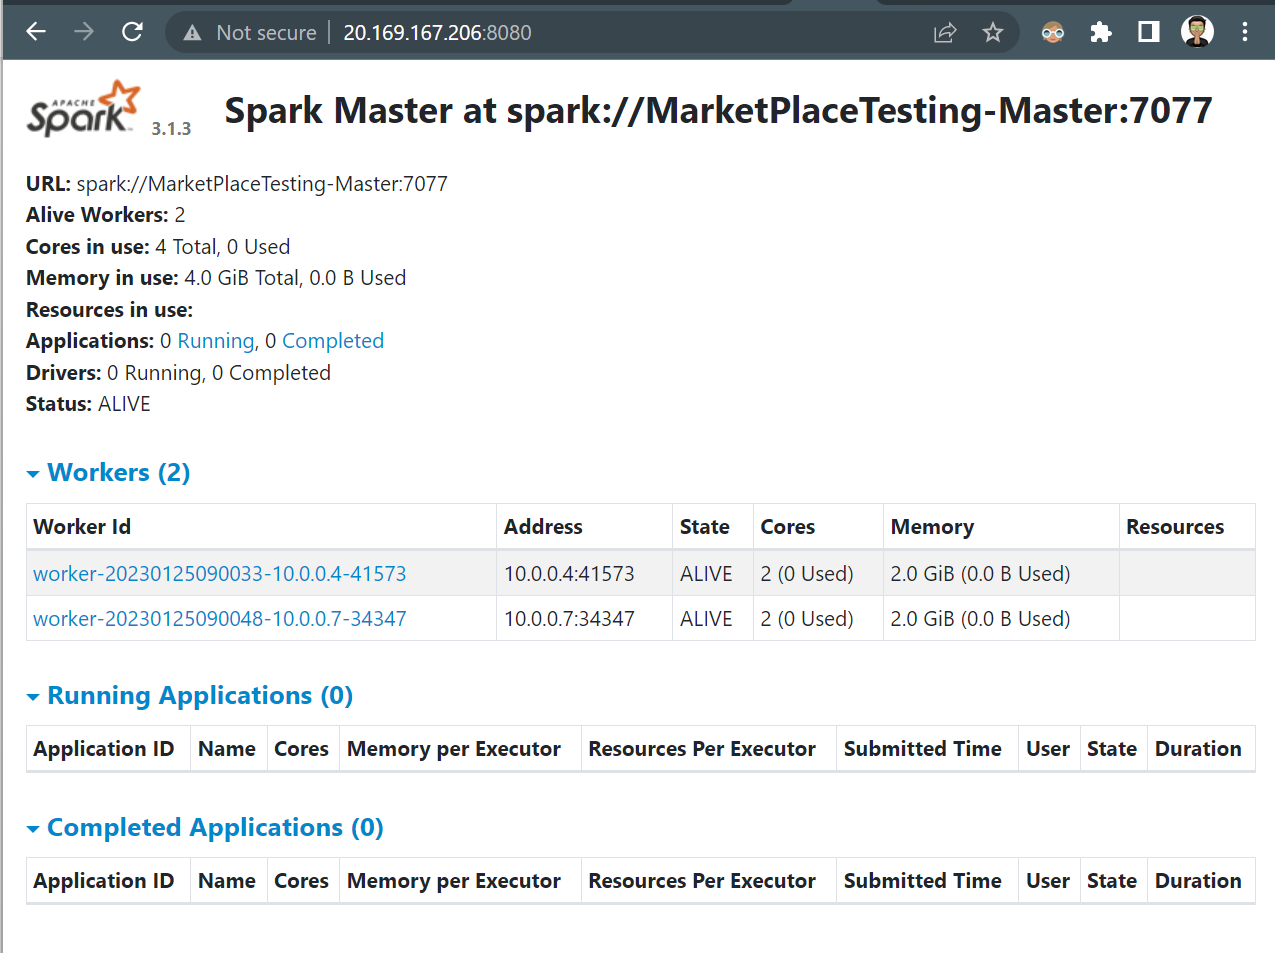
Your Cluster is ready to go!
If you cannot view the same processes running in Step 7 or are unable to view the UI as represented in Step 8, you might have entered the wrong details in the form.
Enter the correct details in the Step 3 form.