Register an app with Azure Active Directory
This tutorial describes how to register an application with Azure Active Directory, which enables a user to connect with environment from external client applications using OAuth authentication.
Prerequisites
- An Azure subscription for application registration. A trial account will also work.
Create an application registration
1- Sign in to the Azure portal using an account with administrator permission. You must use an account in the same Microsoft 365 subscription (tenant) as you intend to register the app with. You can also access the Azure portal through the Microsoft 365 Admin center by expanding the Admin centers item in the left navigation pane, and selecting Azure Active Directory.
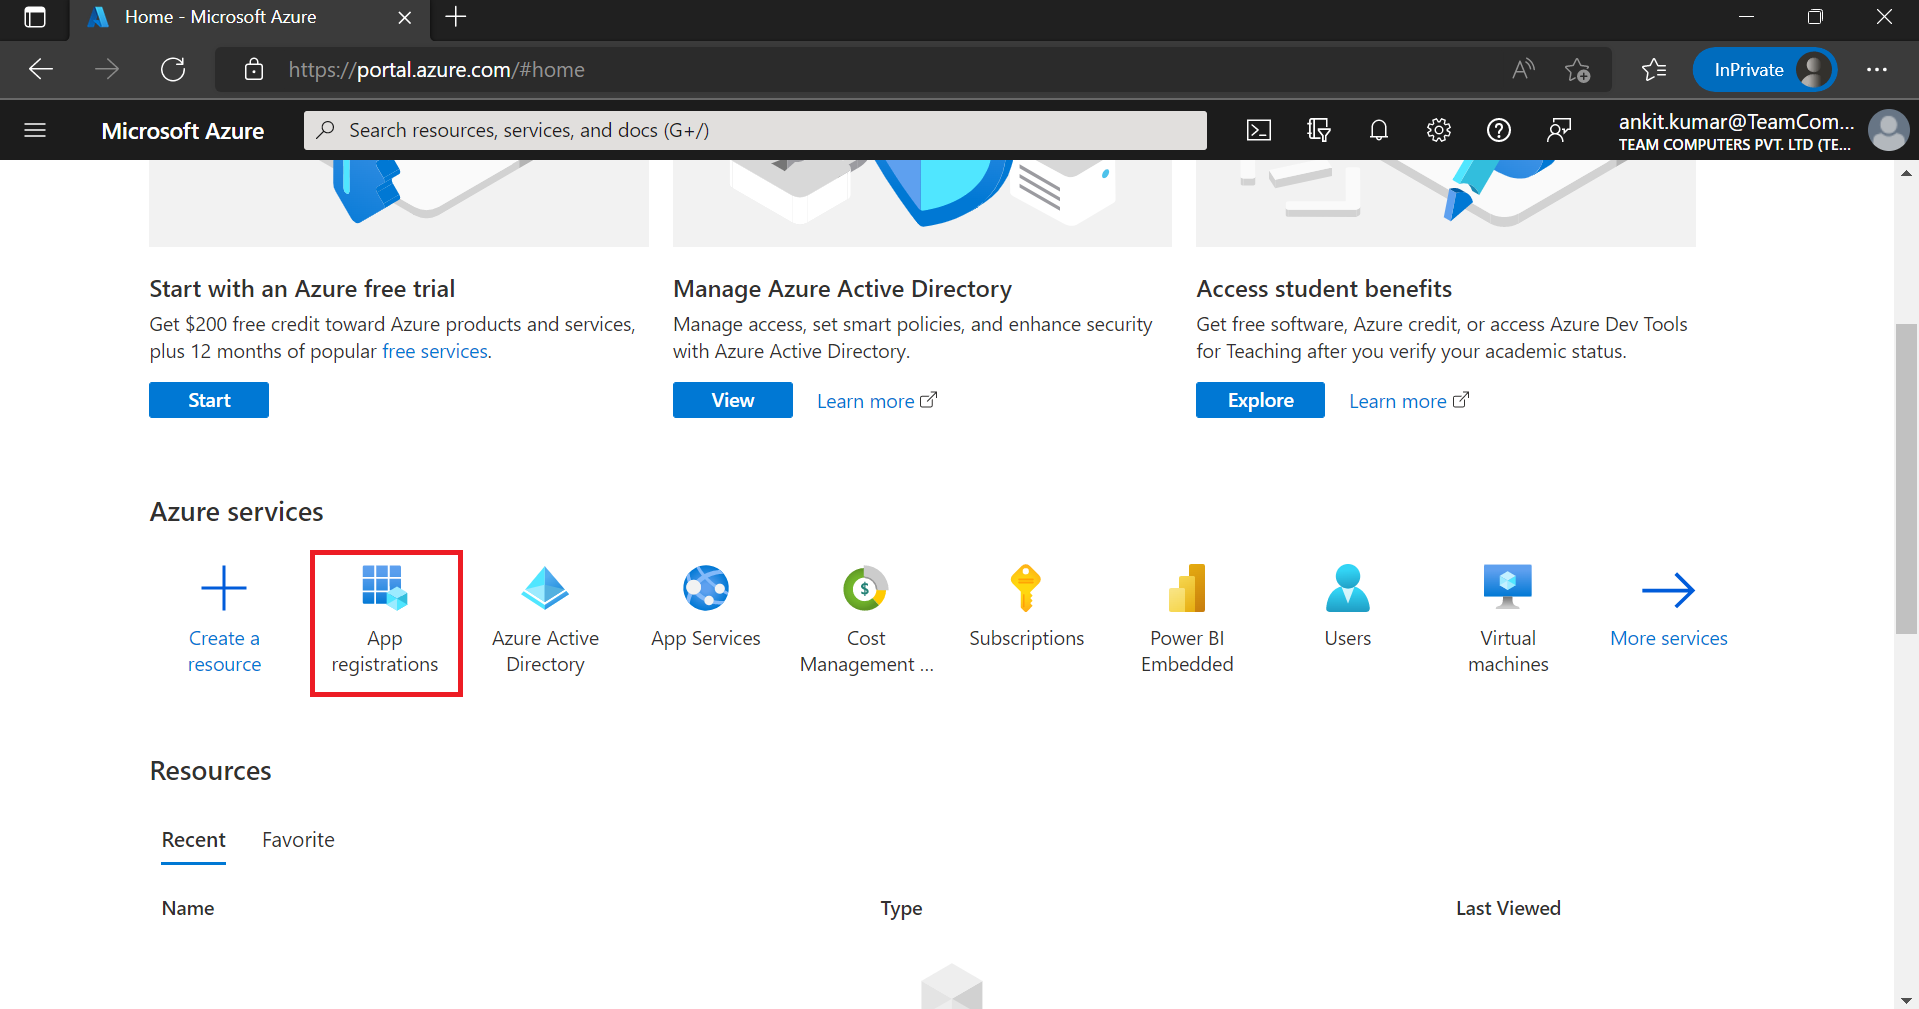
2- In the Azure portal, select Azure Active Directory in the left pane and select App registrations and click on New registration.
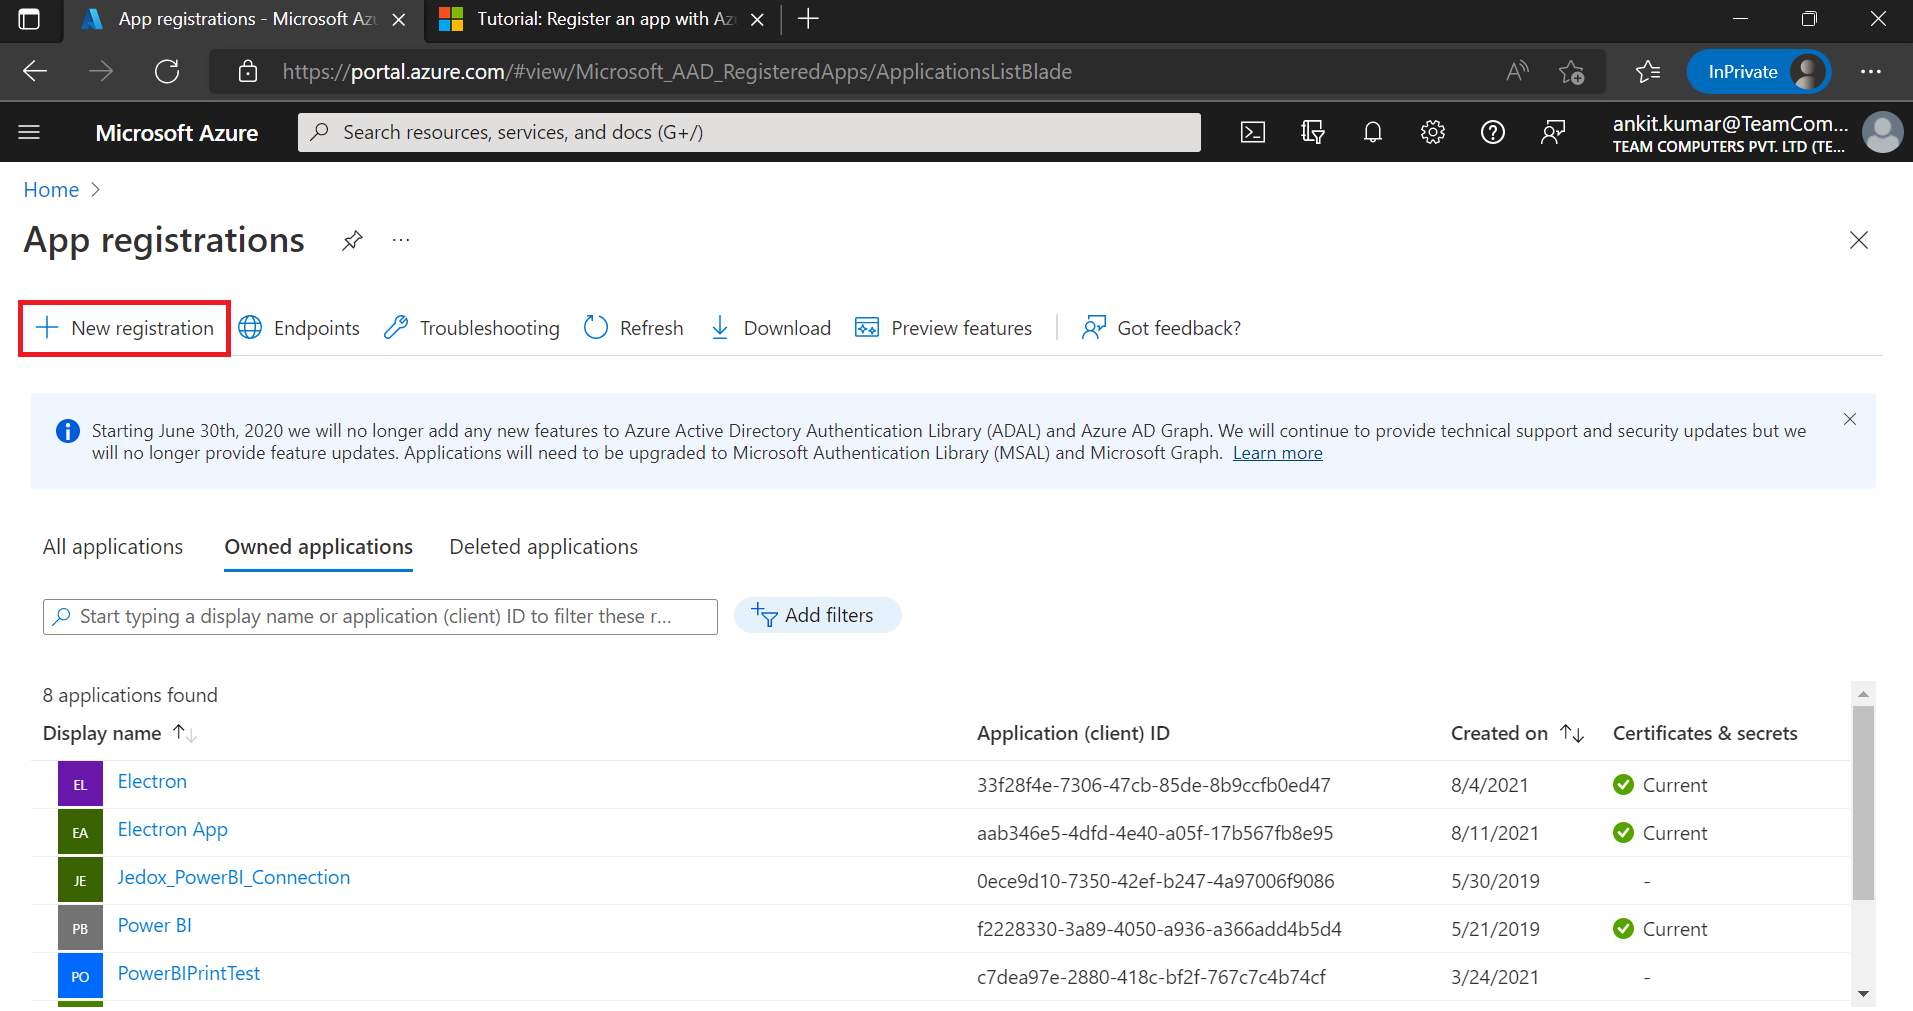
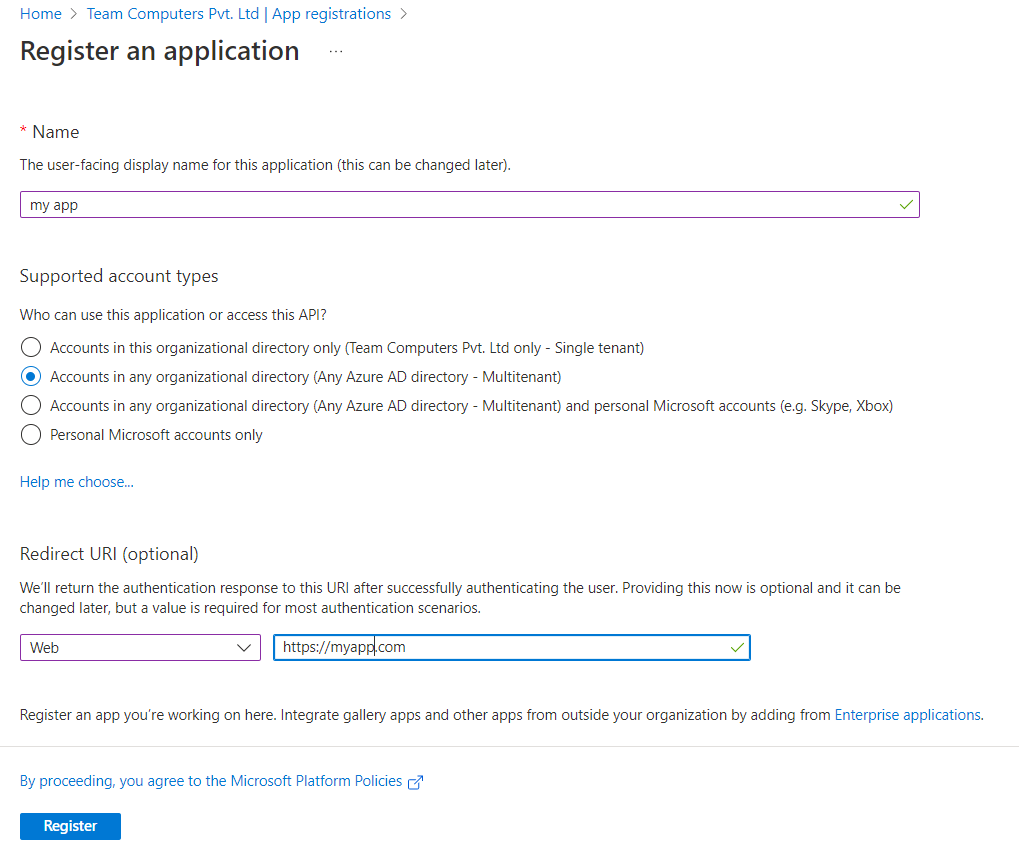
3- In the Register an application page, enter your application's registration information:
- In the Name section, enter a meaningful application name that will be displayed to the users.
- Select Accounts in any organizational directory option from Supported account types section.
-
Set the Redirect URI.
- Click on Register to create the application.
4- On the app Overview page, hover over Application (client) ID value, and select the Copy to clipboard icon to copy the value as you'll need to specify this in your application's authentication code or app.config file where appropriate.

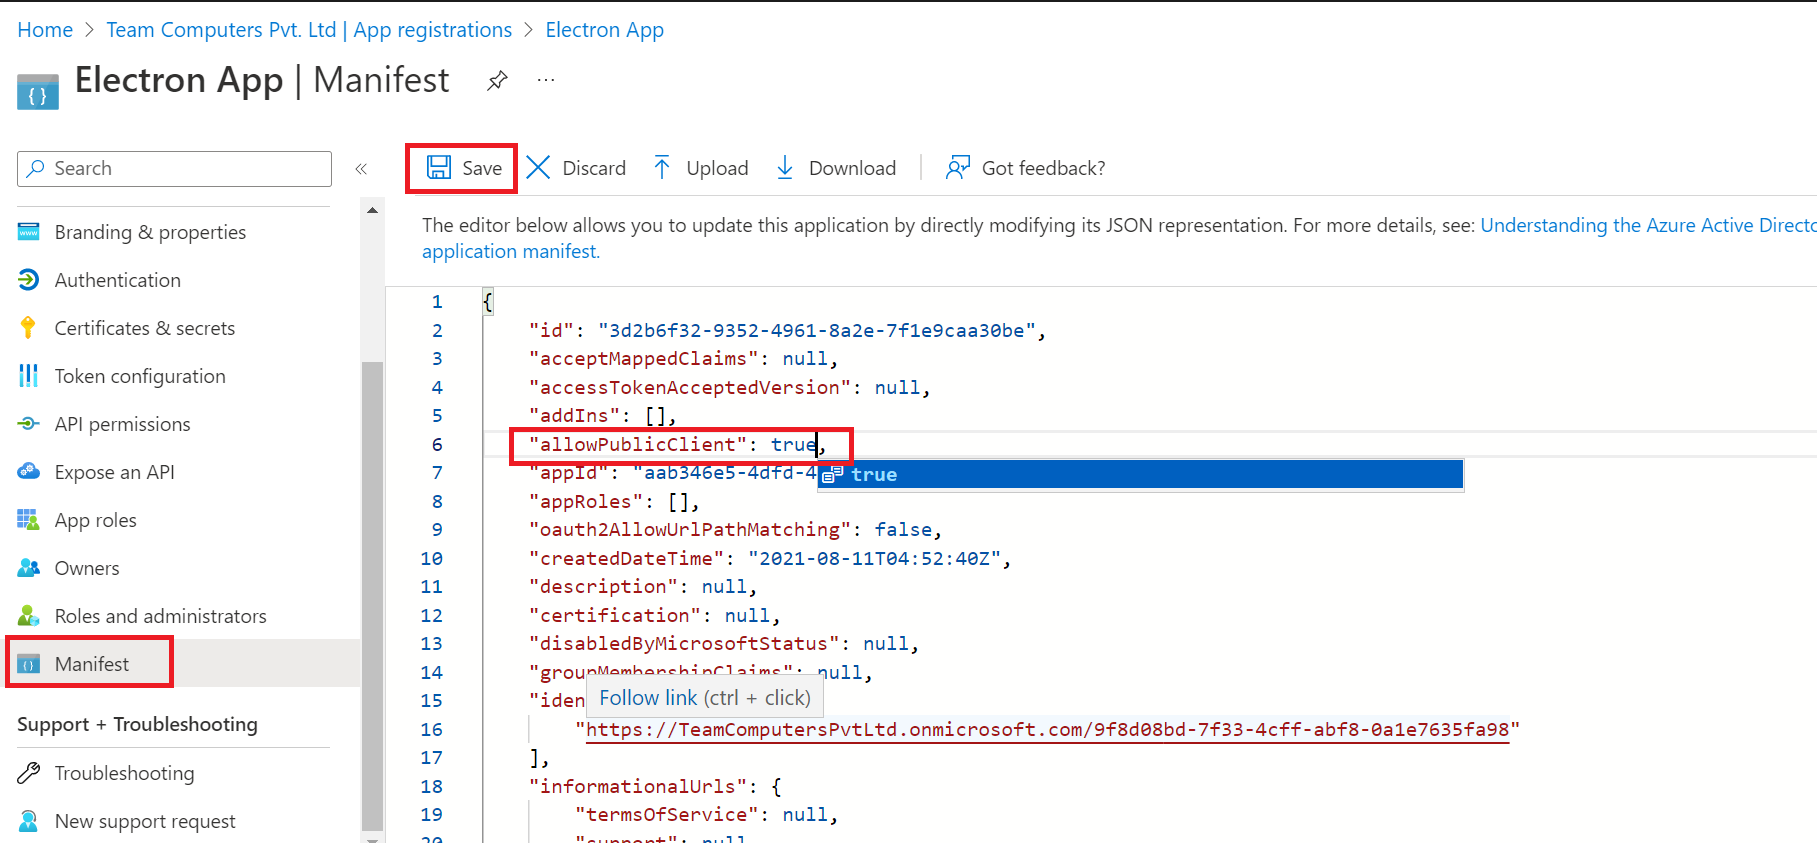
5- Select Manifest tab, in the manifest editor, set the allowPublicClient* property to true and click on Save
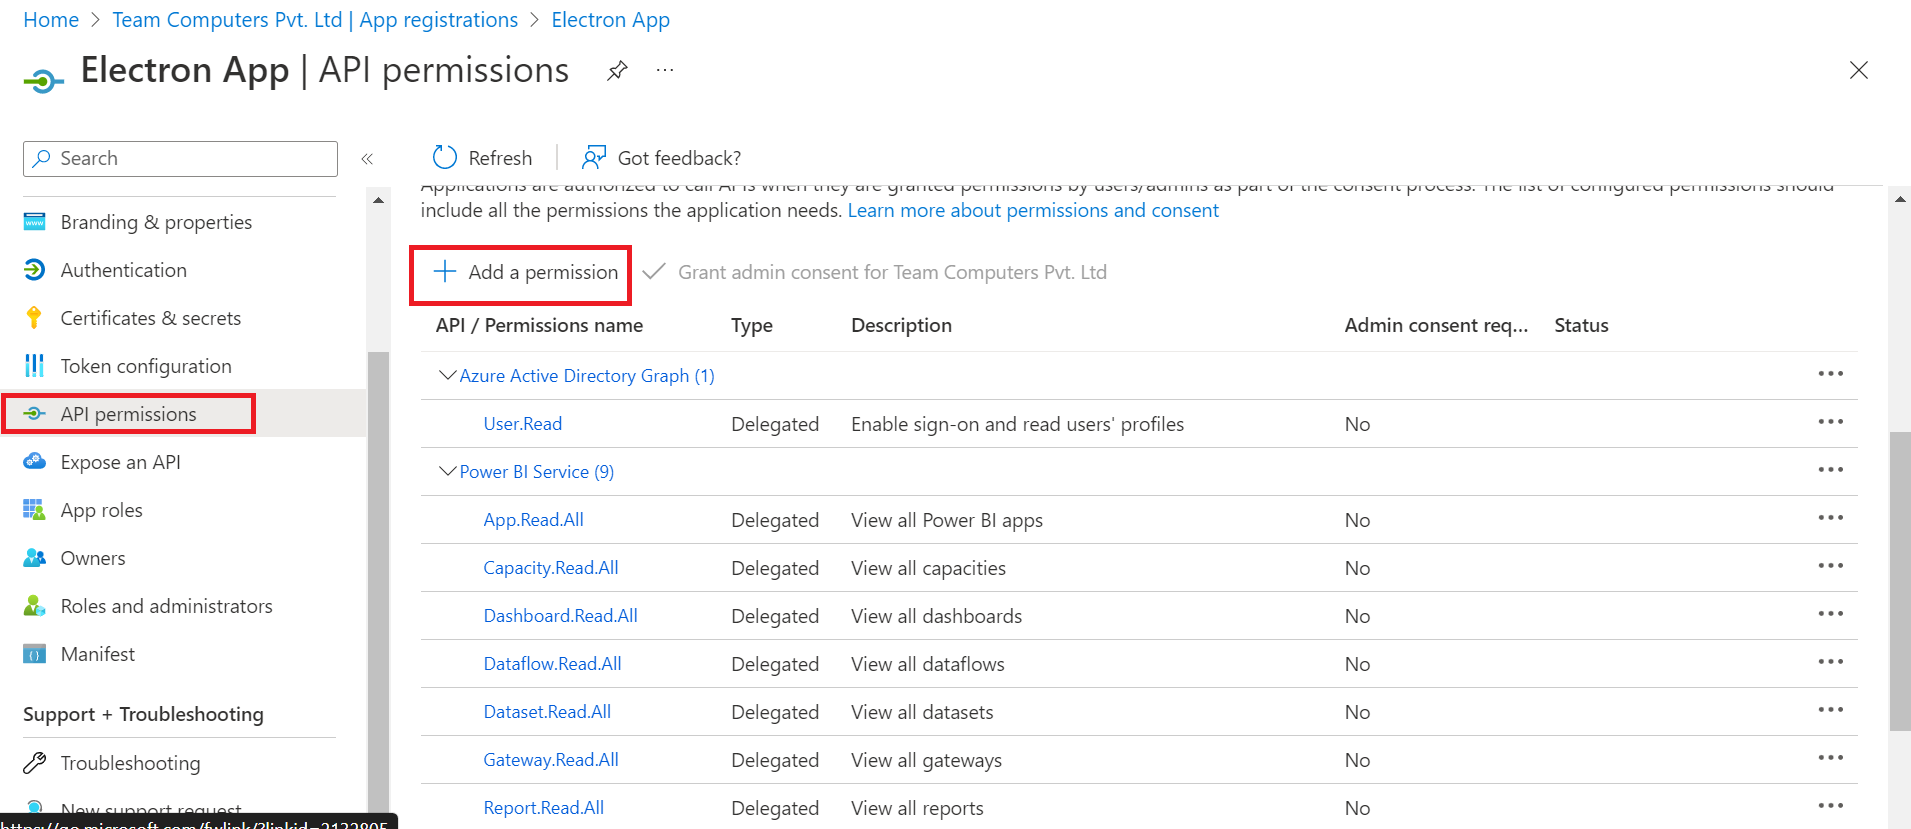
6- Select API permissions tab, click on Add a permission.
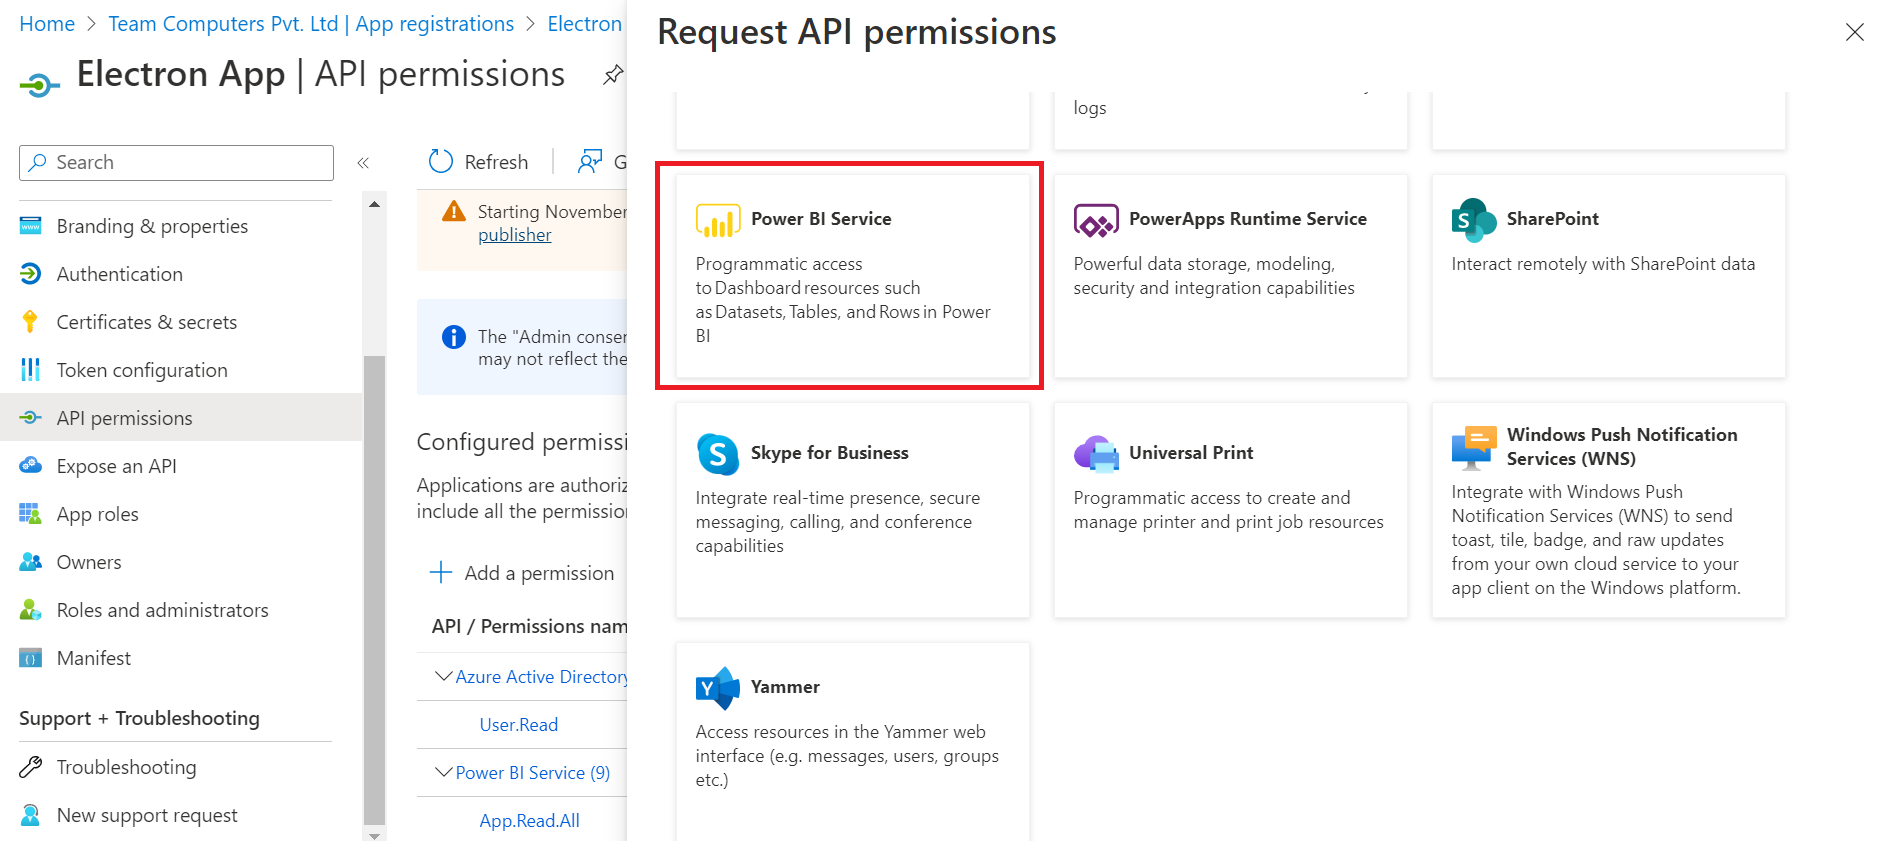
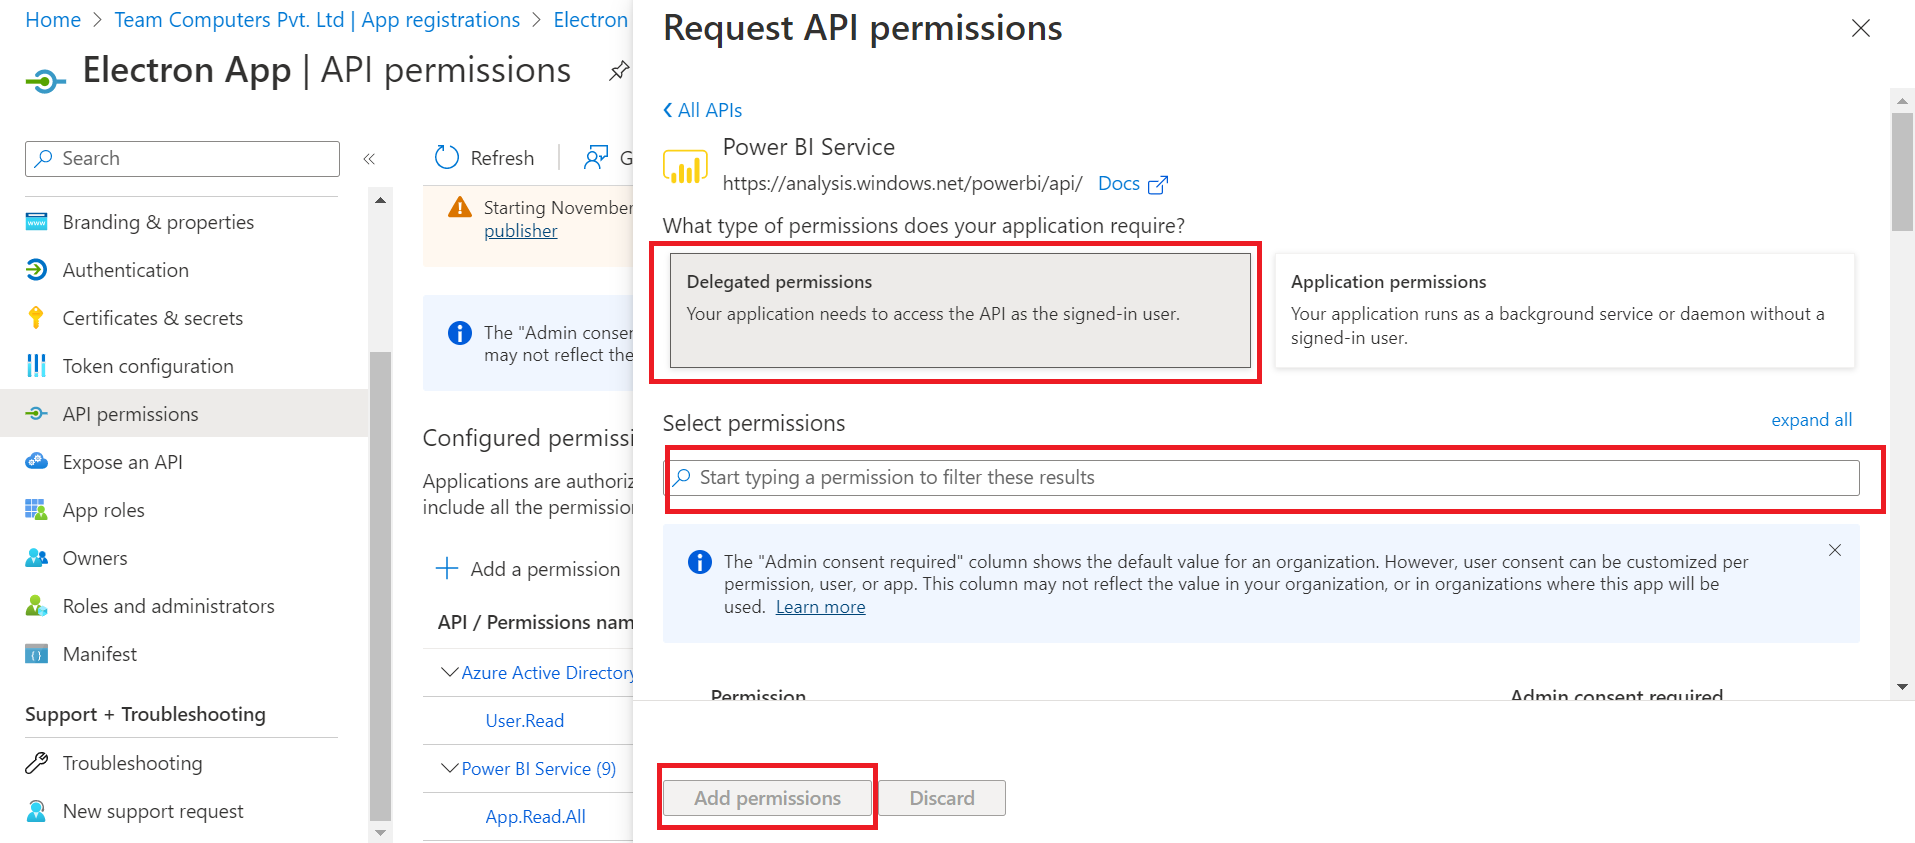
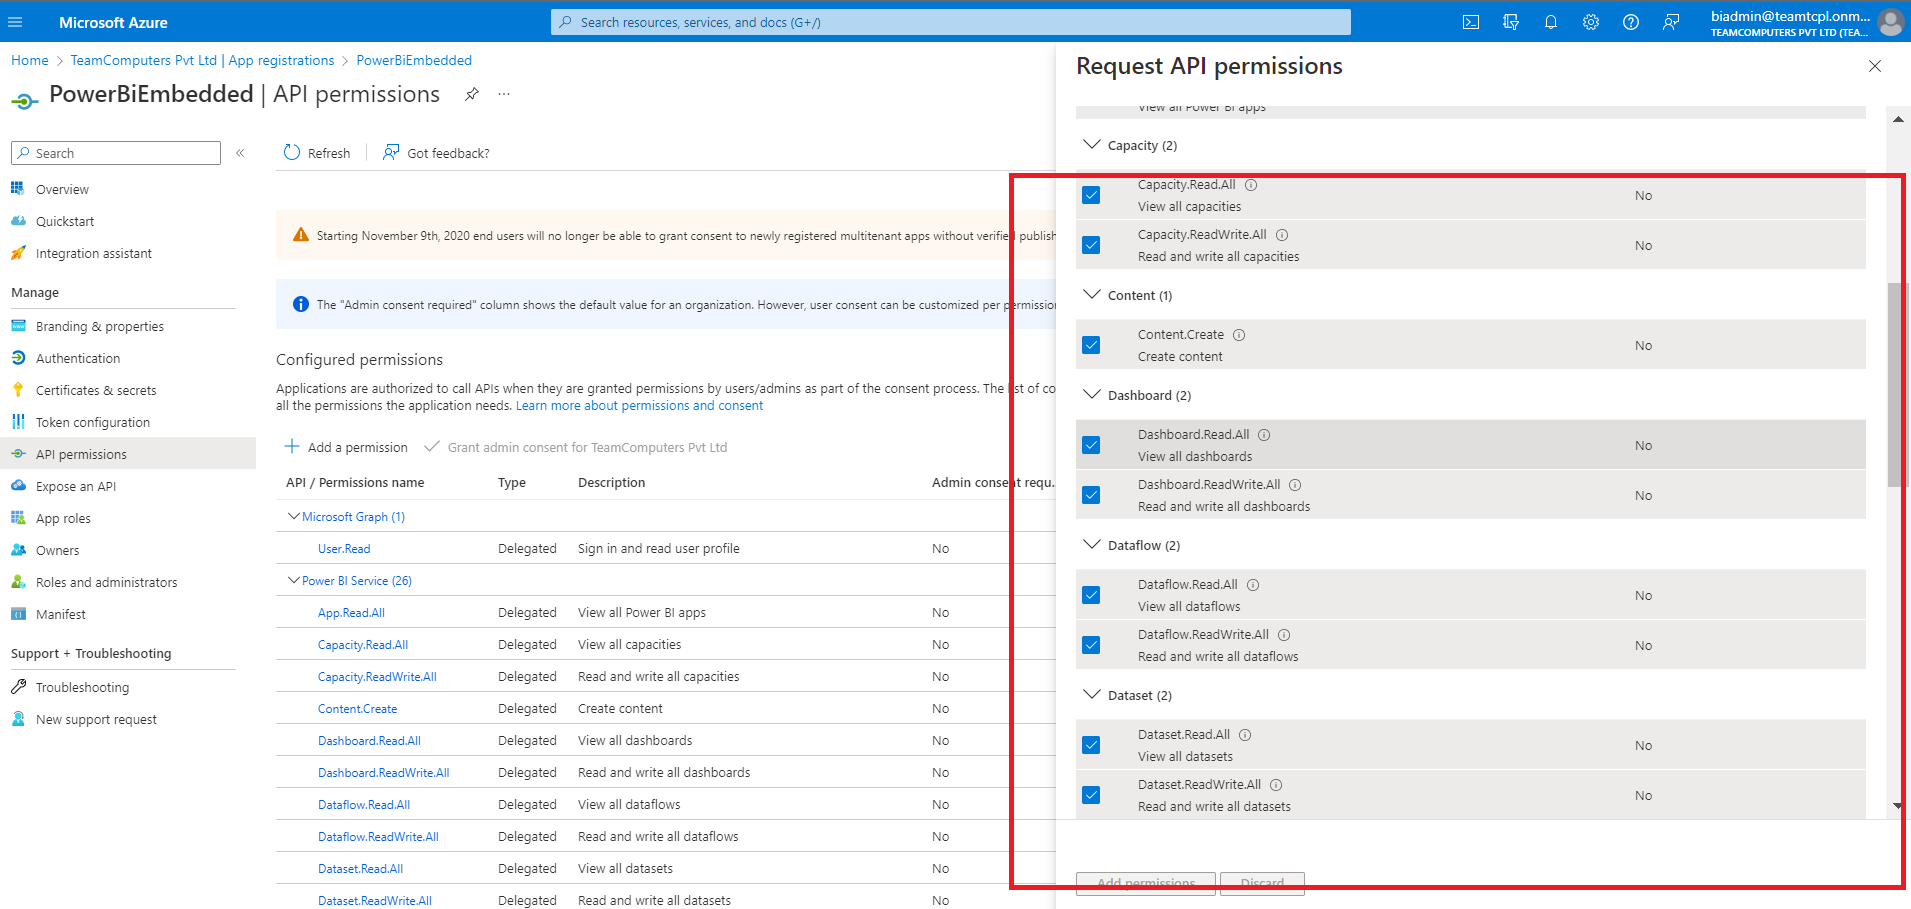
7- Click on Delegated permissions and check the options and click on Add permissions.
Settings in Power BI account
Please follow this steps to do suitable and necessary settings in Power BI account (use same account that was used to register new app in azure ad.)
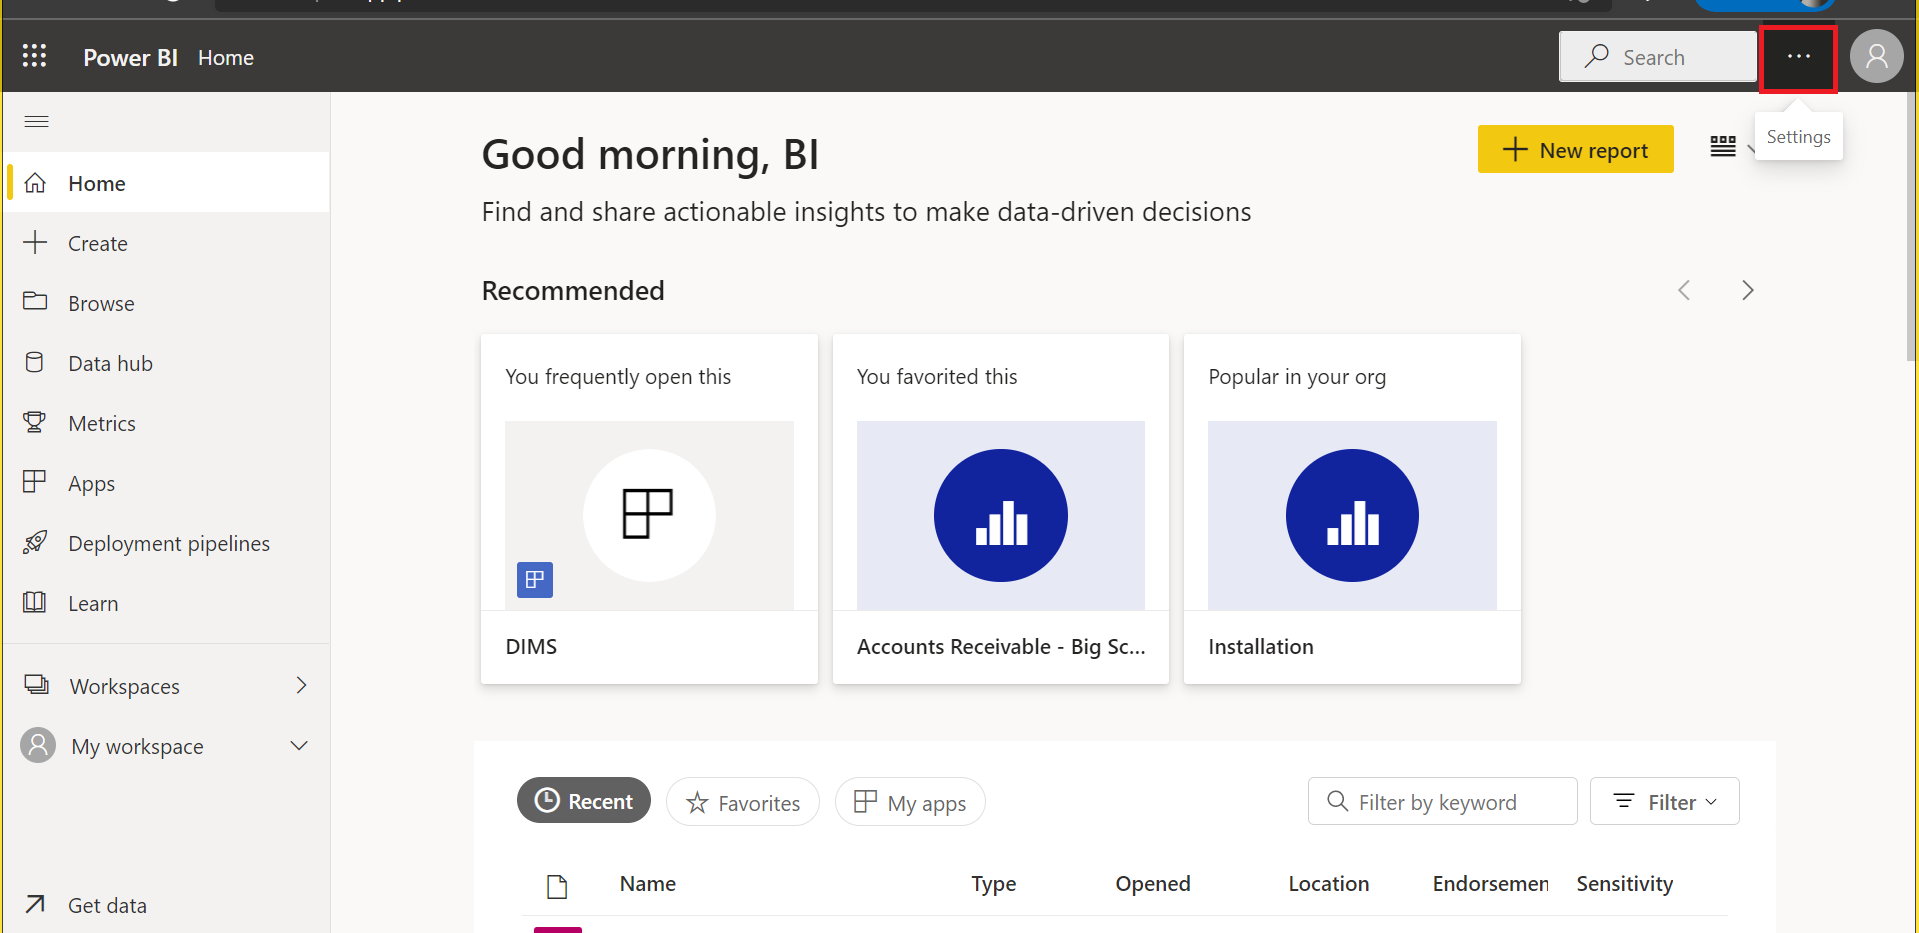
1- Login in Power Bi account, in home click on top right corner over 3 dots as shown in fig.
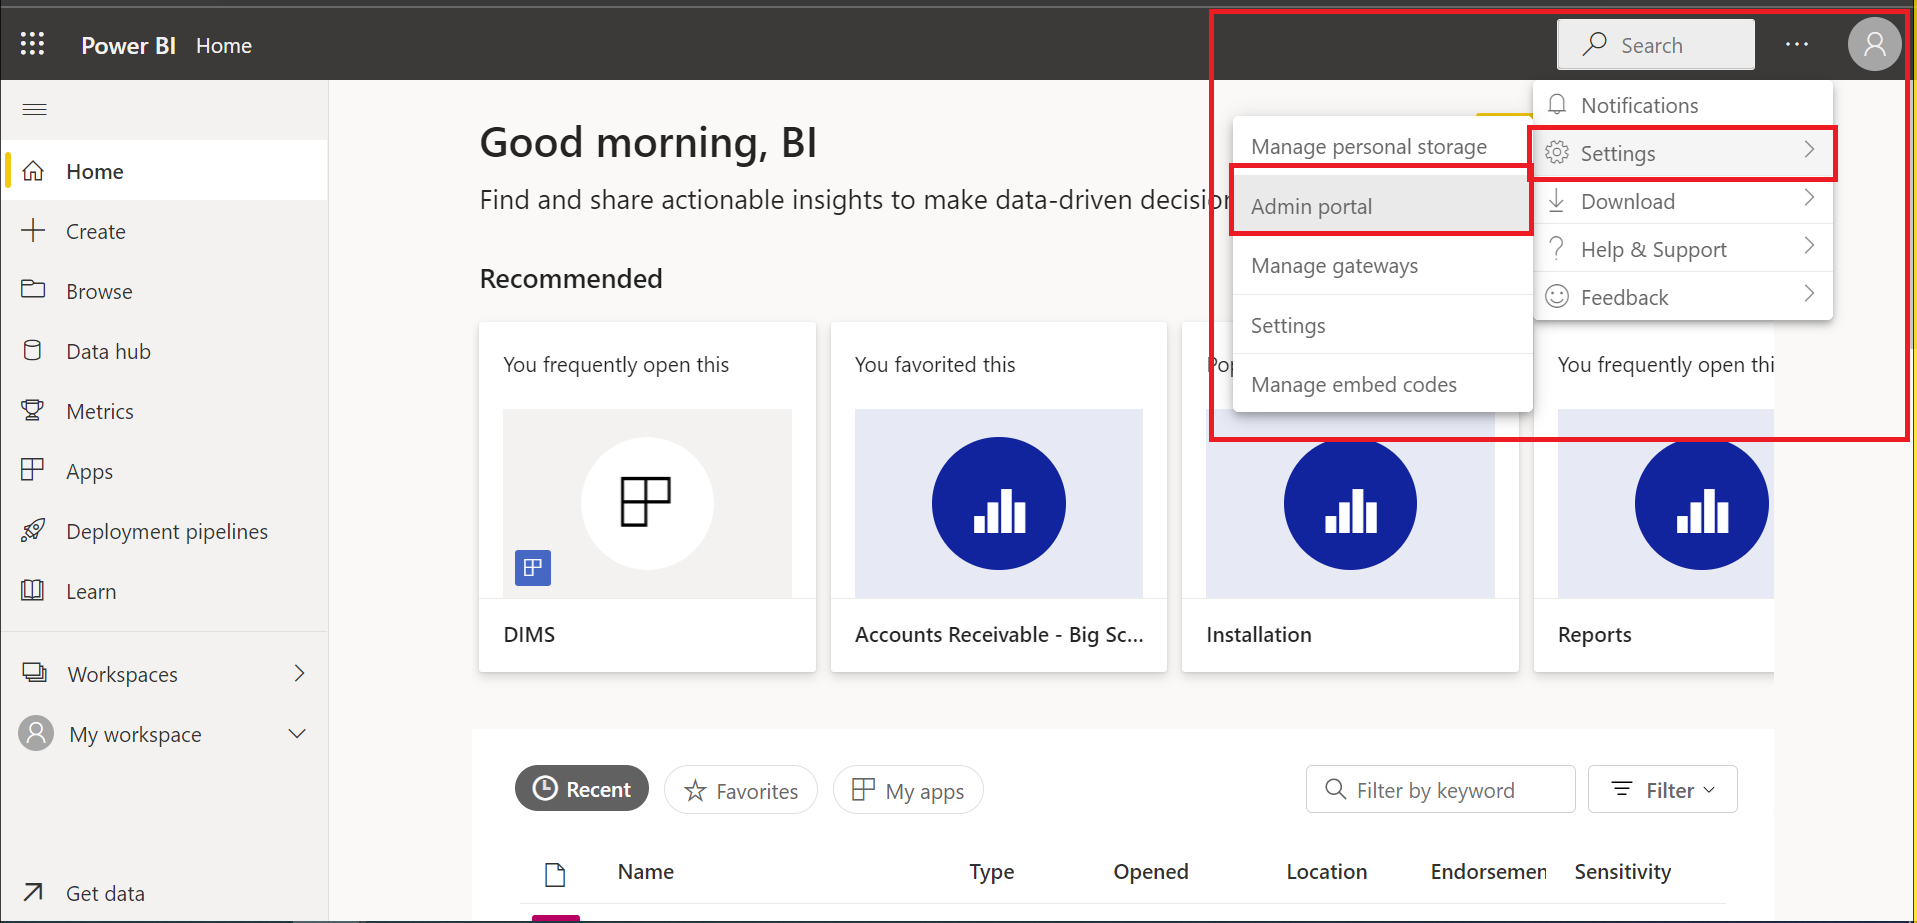
2- A pop up will appear, click on settings and in next popup click on admin portal.
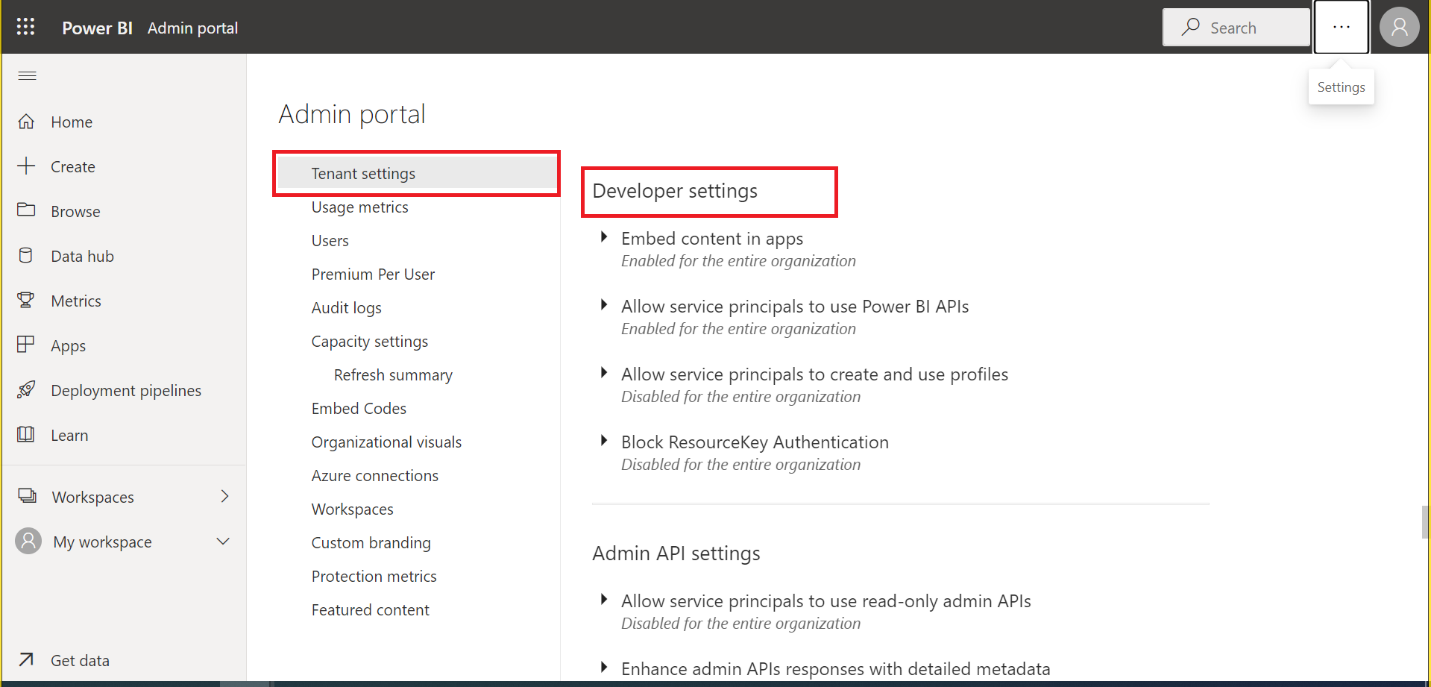
3- Top left side navigation select tenant setting, and scroll down to developer setting in right screen.
4- Under developer setting choose Embed content in apps, and enable the settings as shown in figure below.
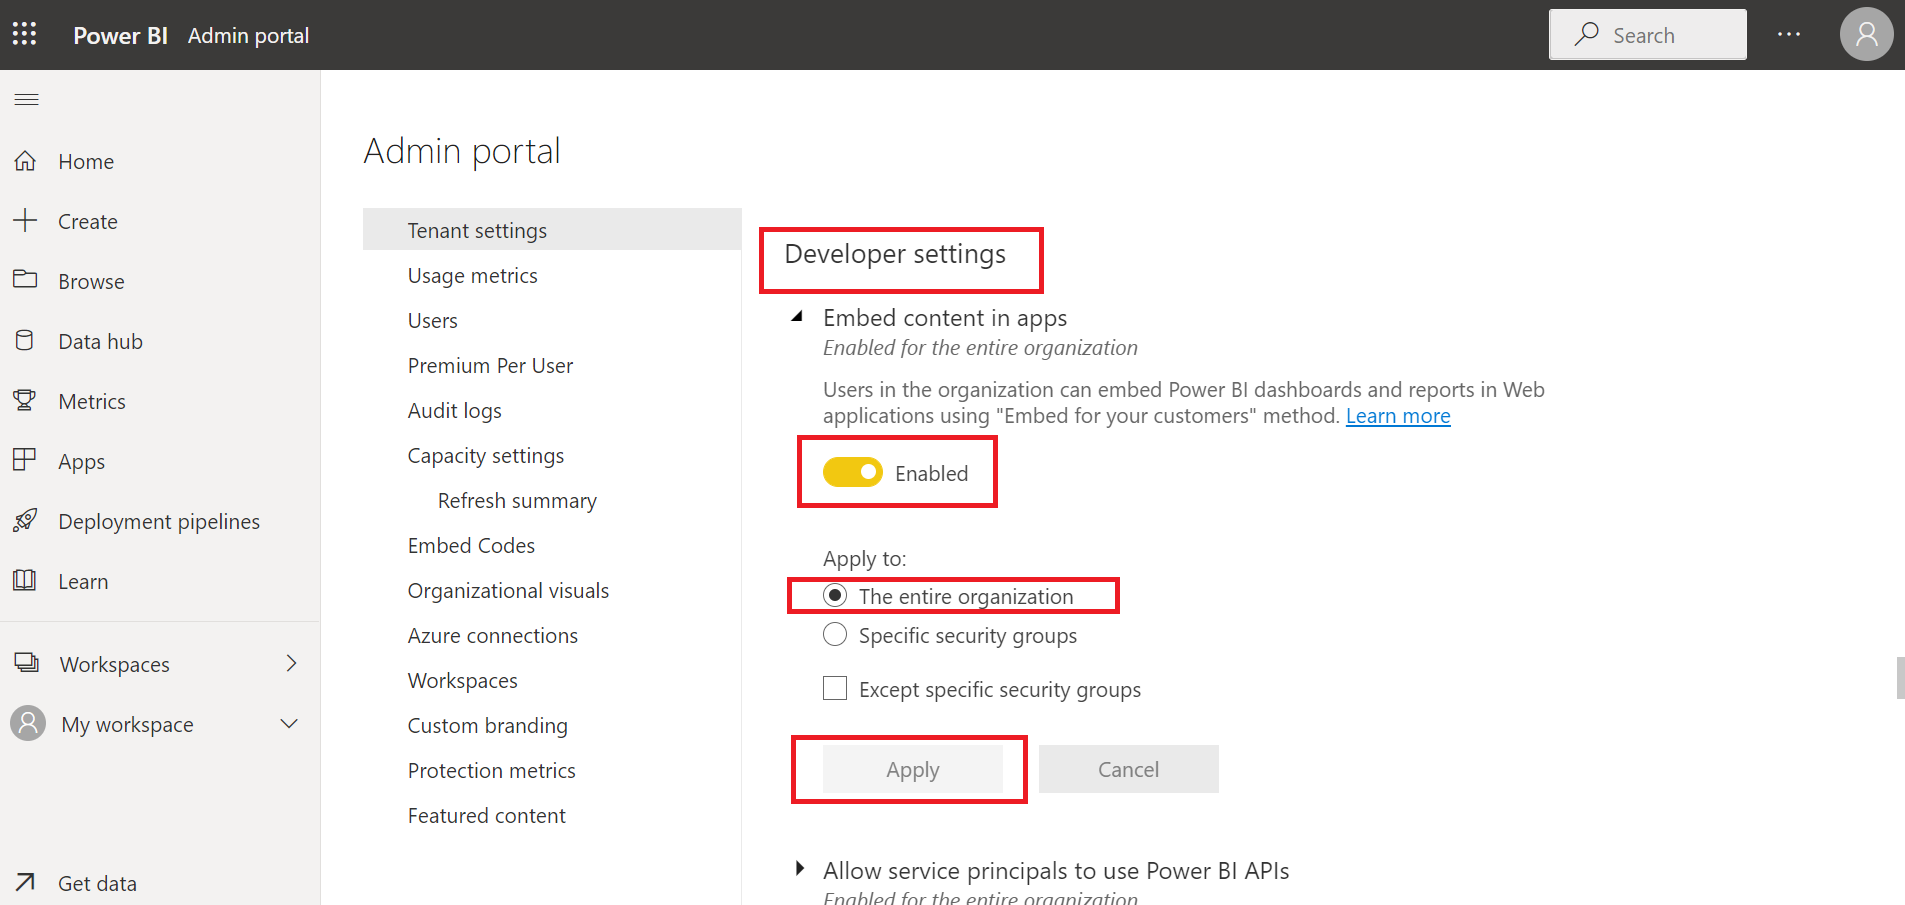
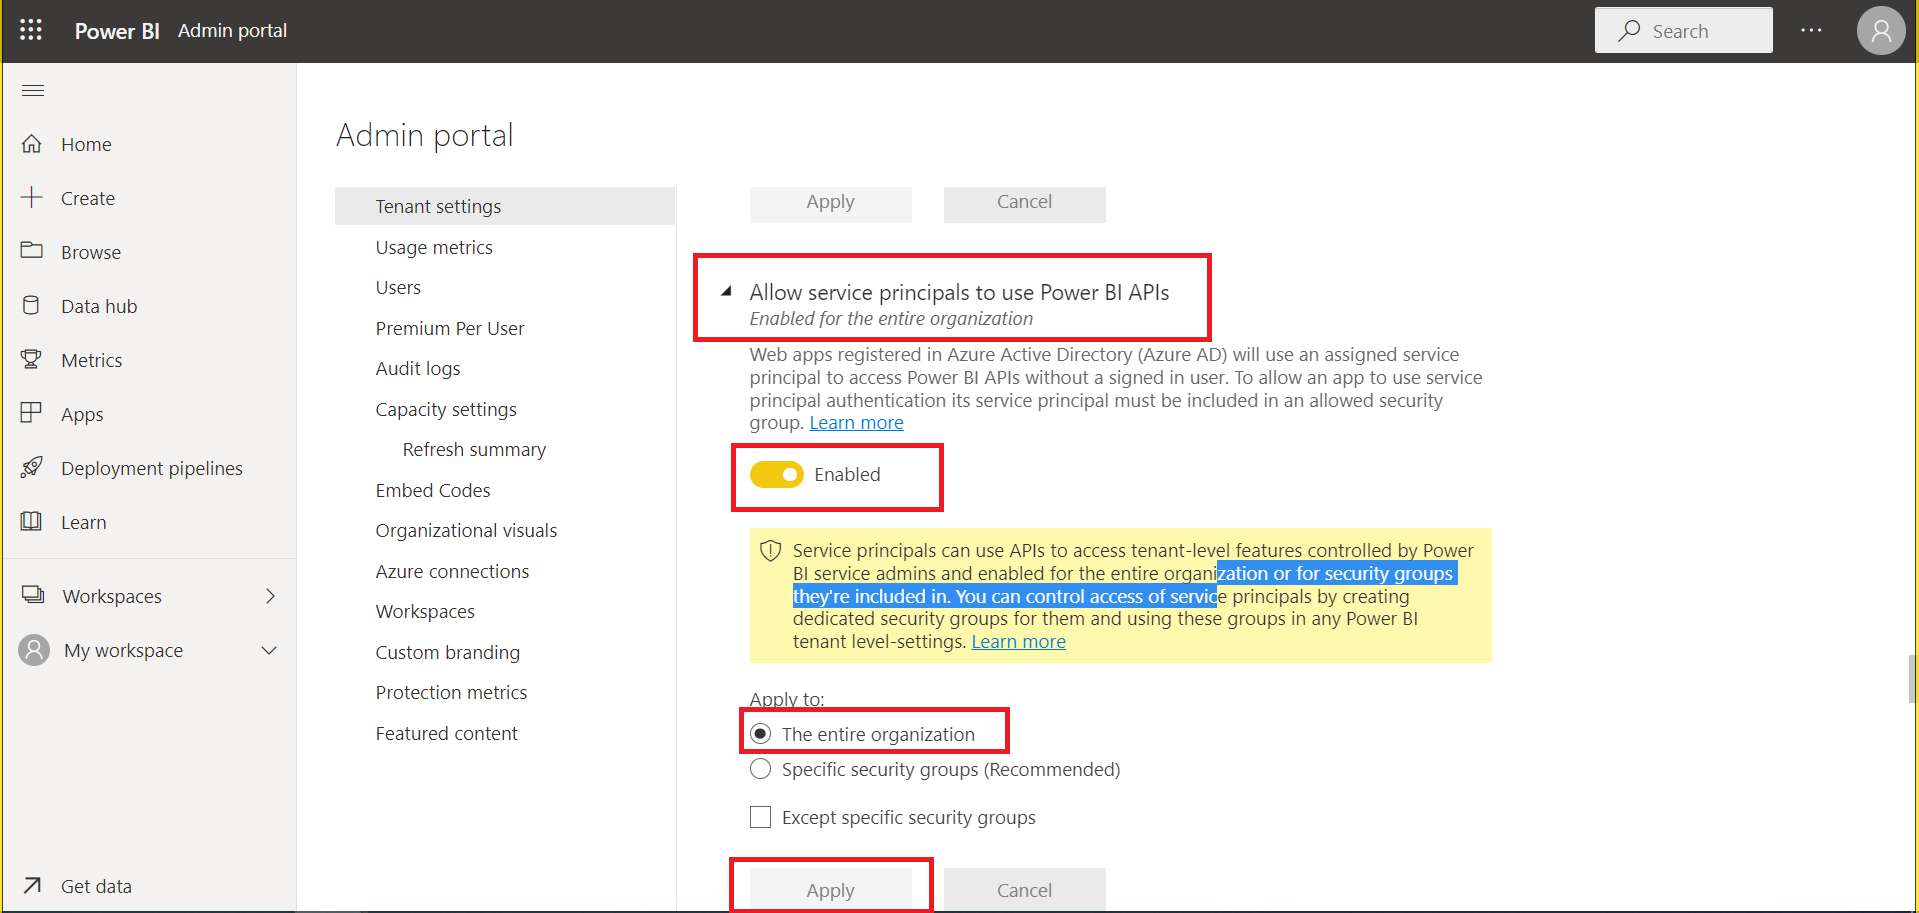
5- In developer setting click on another setting i.e Allow Service Principle to user power bi APIs, and follow same steps as step 4 and shown in figure below
User Onboarding Konnect Web Utility
In this section we will discuss and get through the process after successfully registering app in azure ad and allowing few settings and creating reports in Power BI.
Step by step process is as follows:
1- Visit the URL in any of the browser in your system i.e. https://portal.kockpit.in
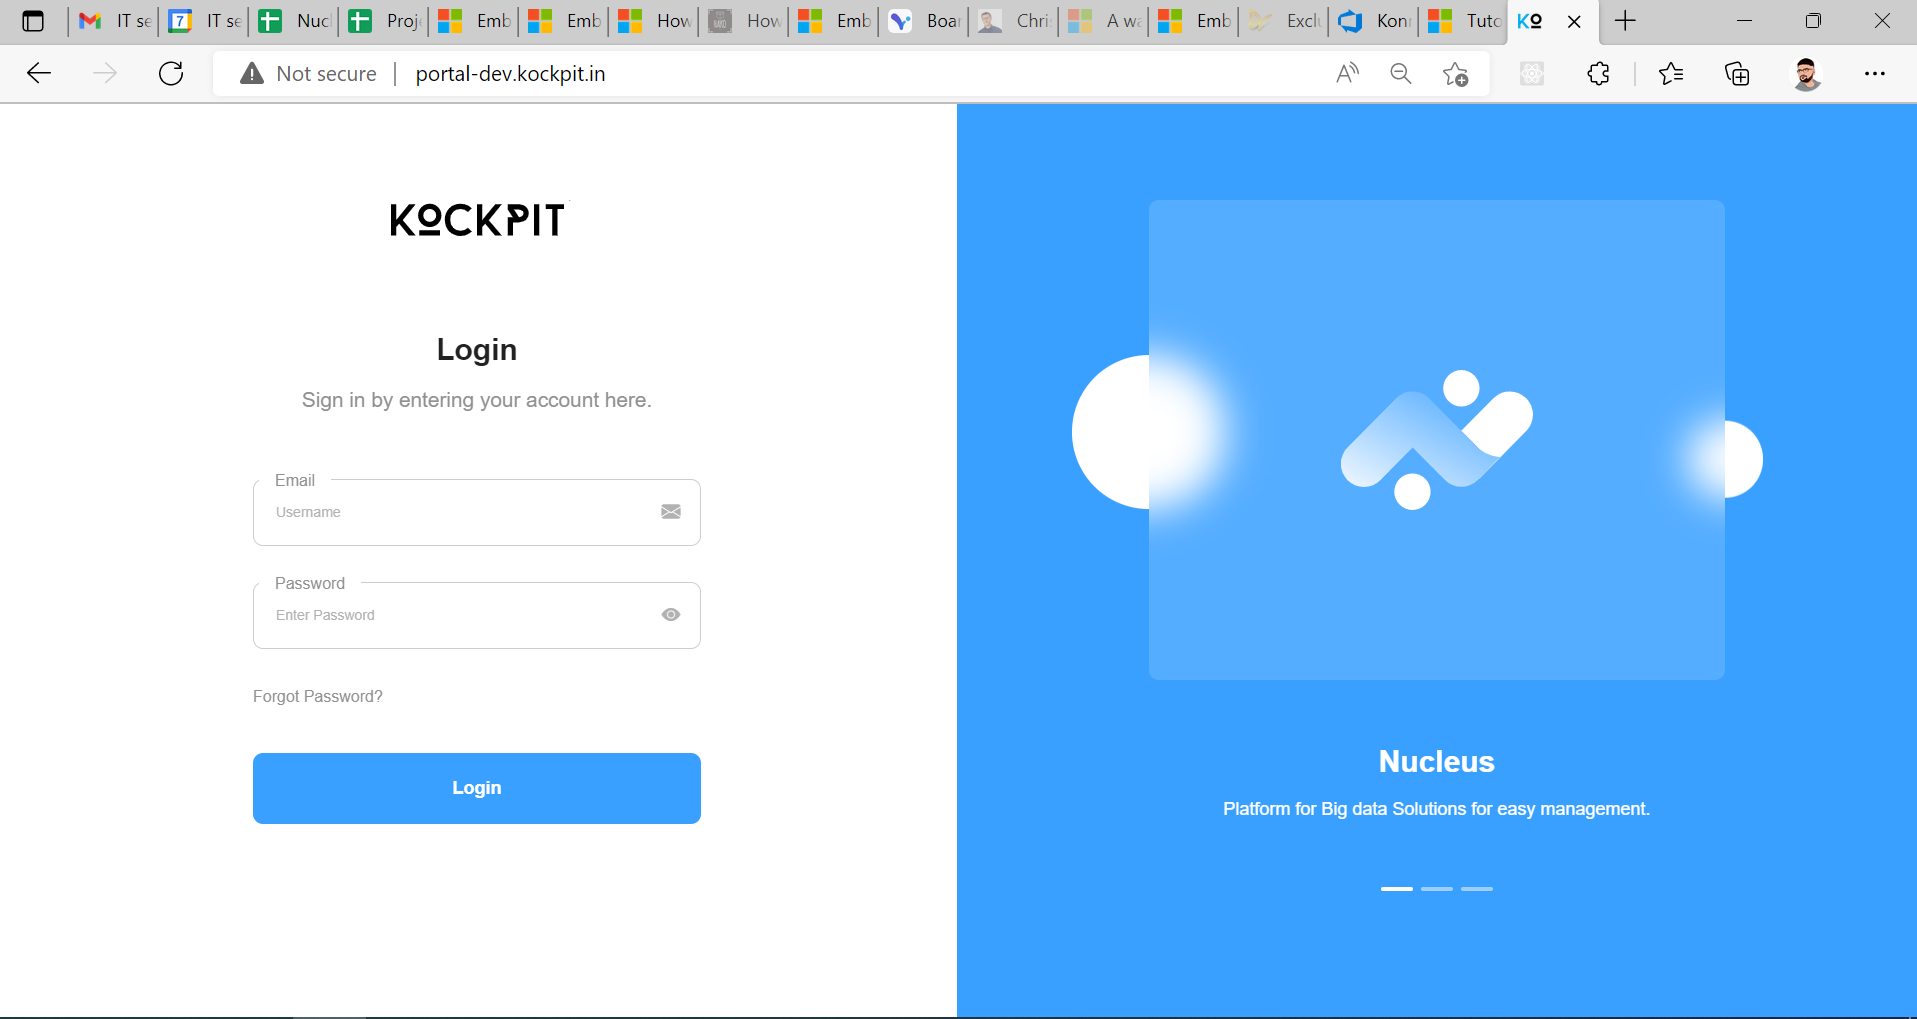
2- Enter your credentials to successfully login to your kockpit portal account, where you will find all utilities and offering for which you have subscribed.
3- Select Konnect card of the list of offering card available in your account.
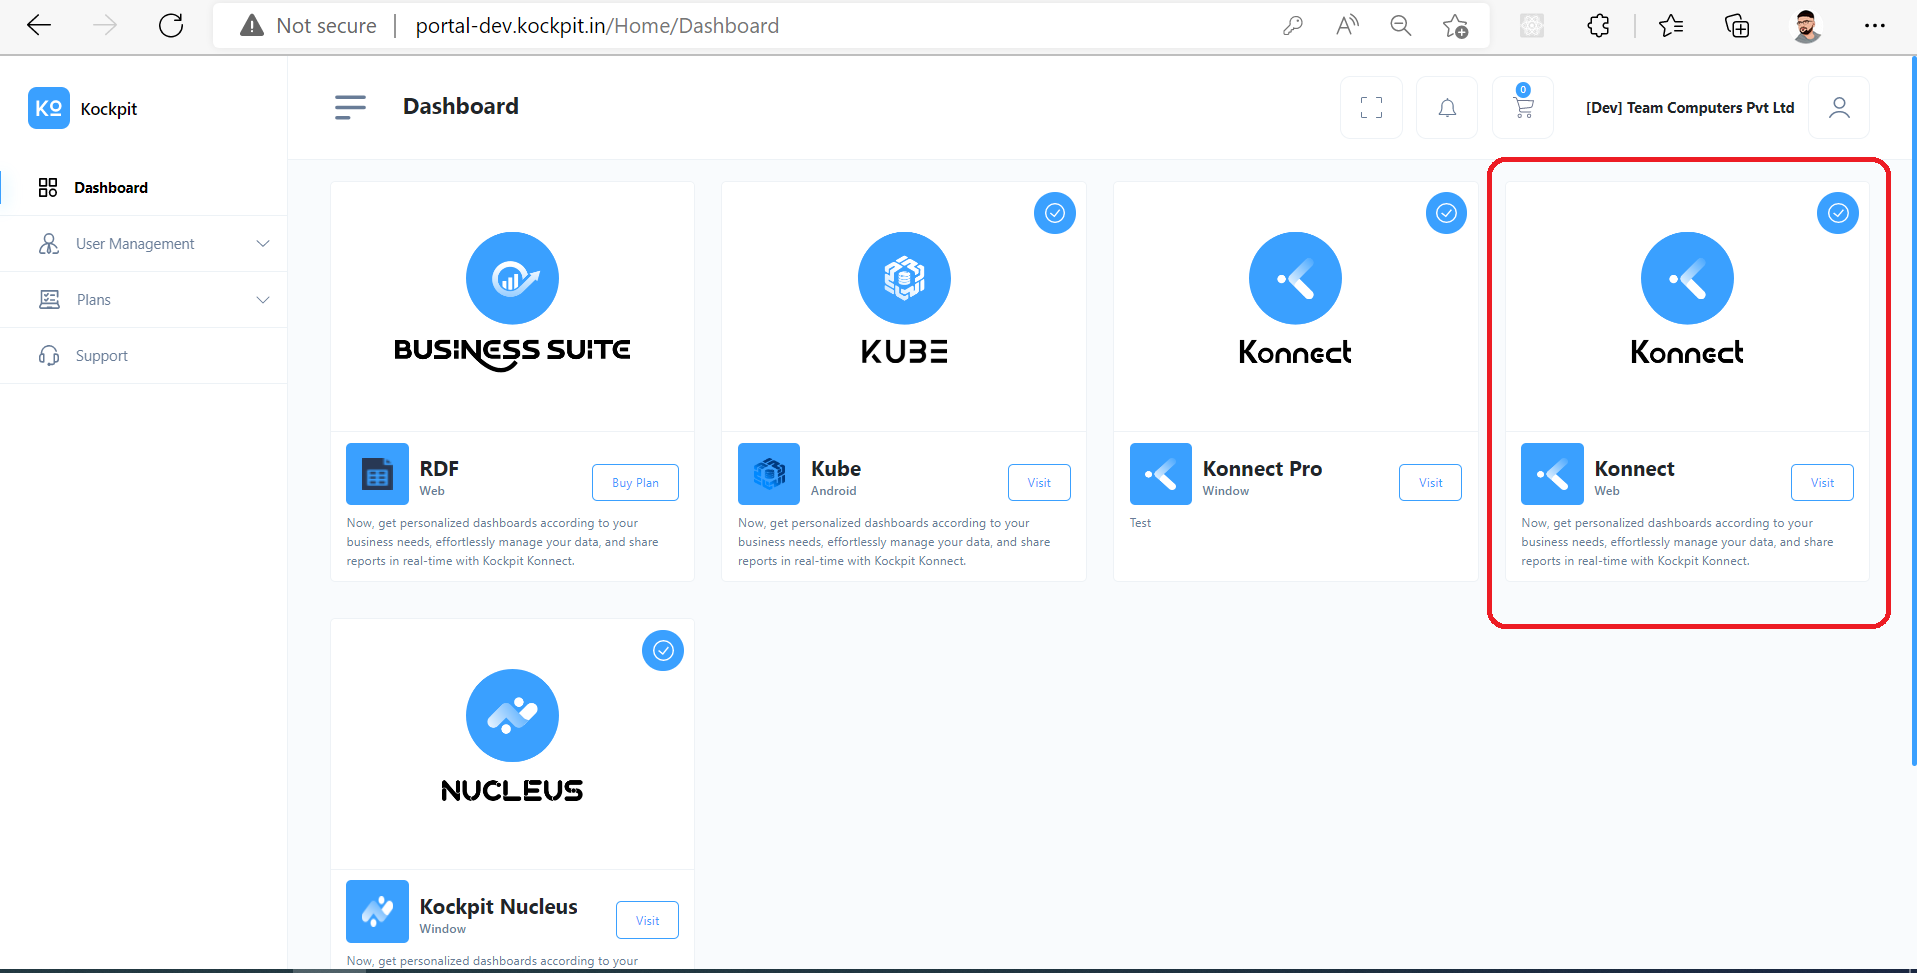
4- Click on visit button and you will be redirected to Konnect web utility where you will find all the settings and configuration related to Konnect.
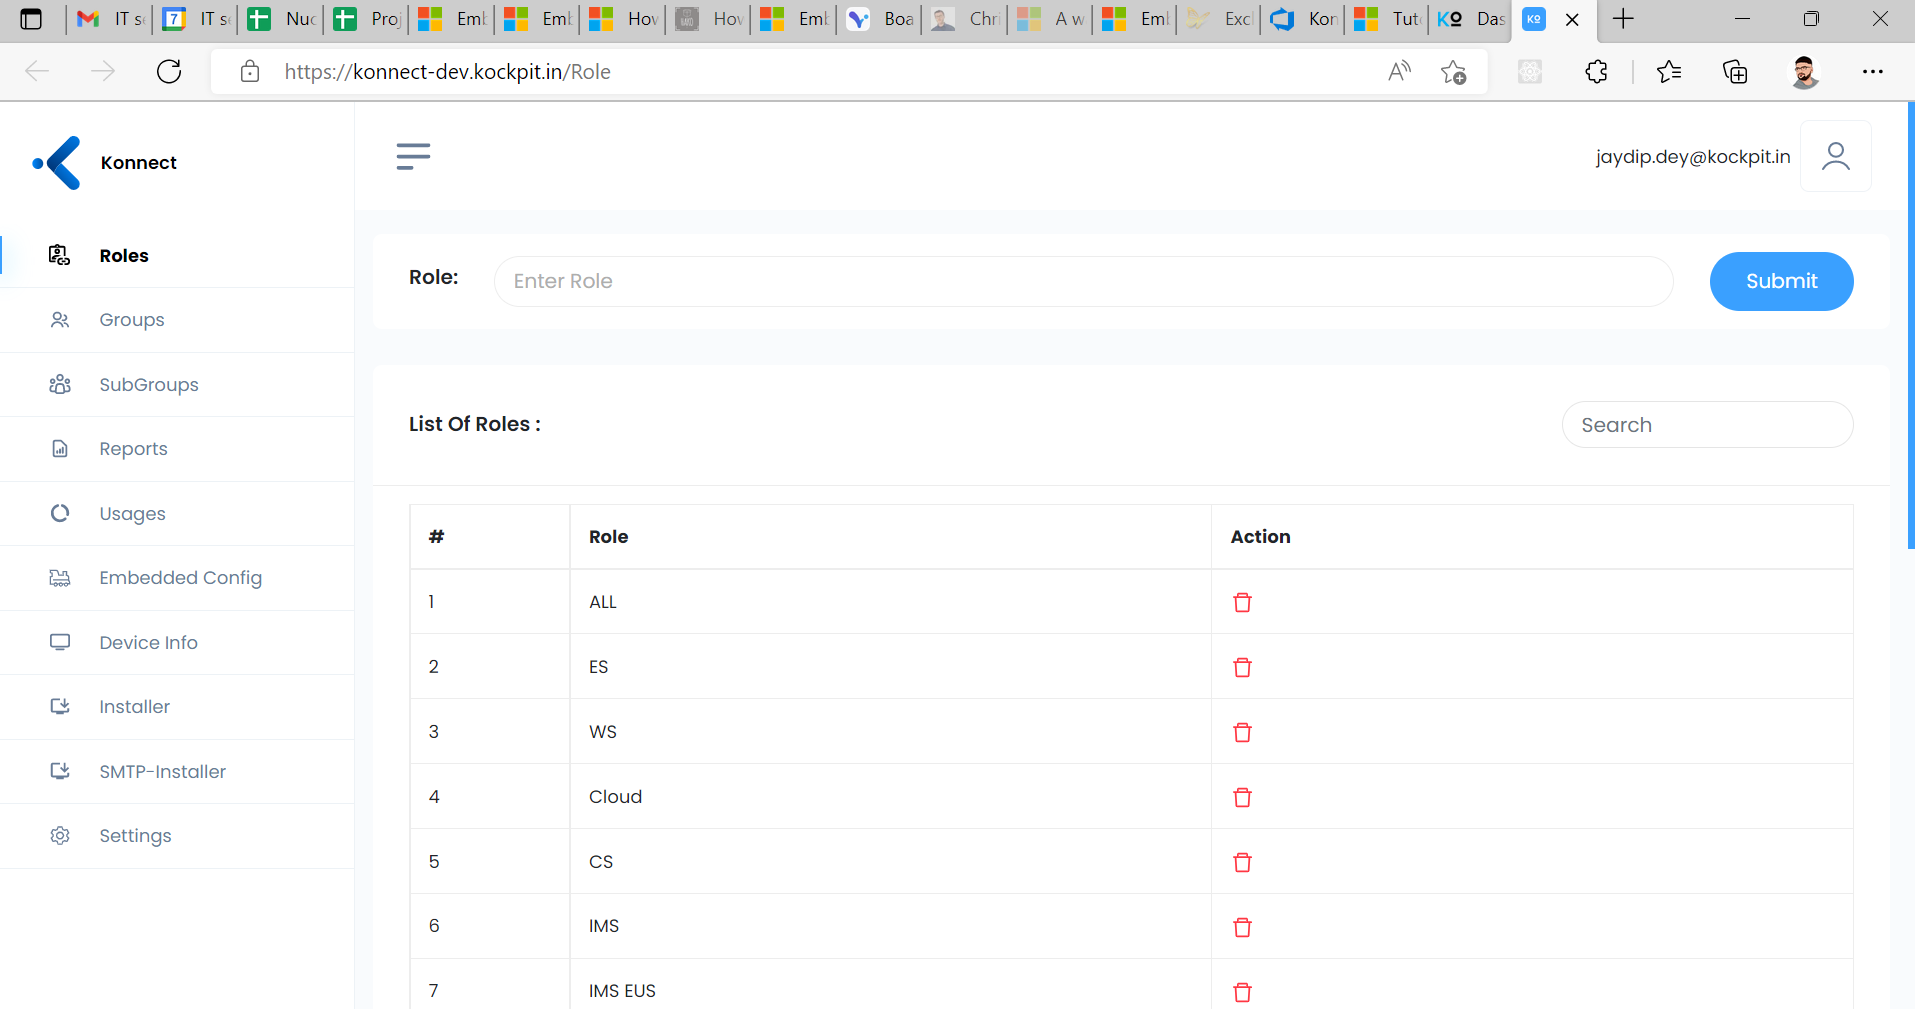
5- Select and click on Embedded Config option from left side navigation panel.
6- The tab will show three input fields i.e. client id, client secret, tenant id, (note that these three id you have saved after you have successfully registered an app in azure ad), enter those id in the given input field and hit Add.
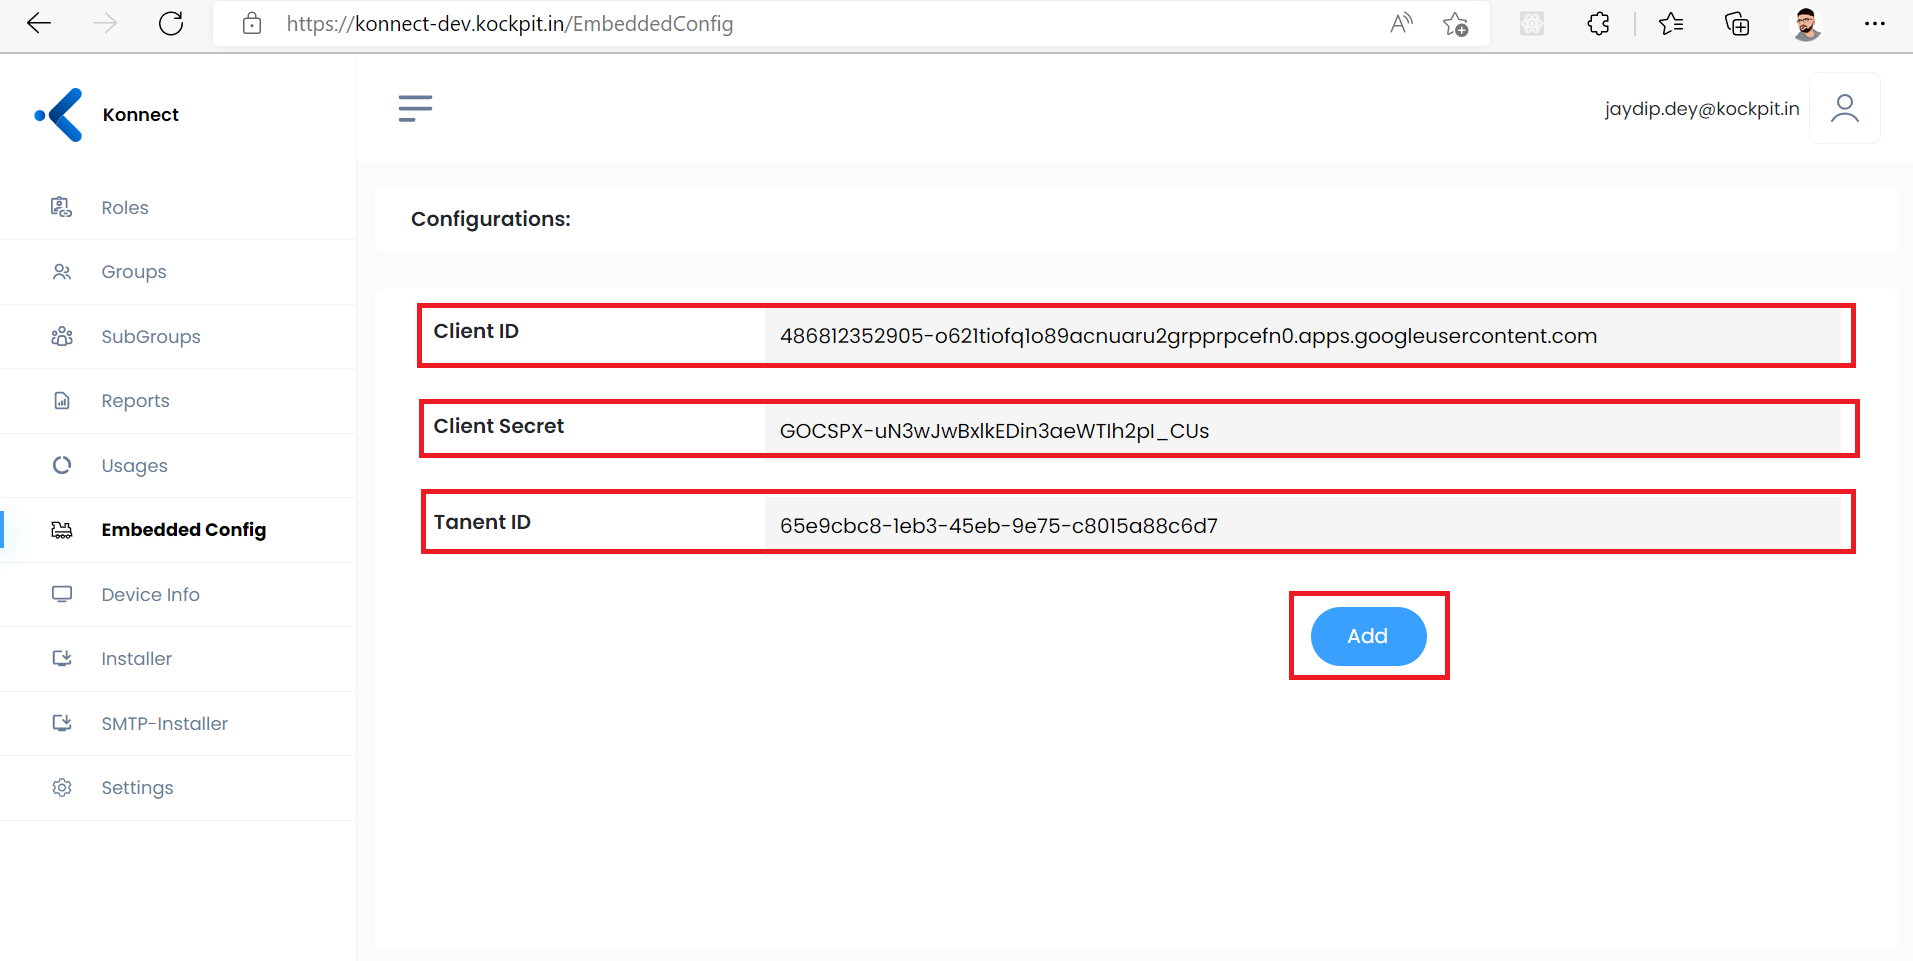
7- The configuration is set successfully, now you can create rolls, access power bi reports etc.
8- To add new reports select and click on report option in left side navigation bar.
9- Select any one from the custom created groups from the dropdown menu.
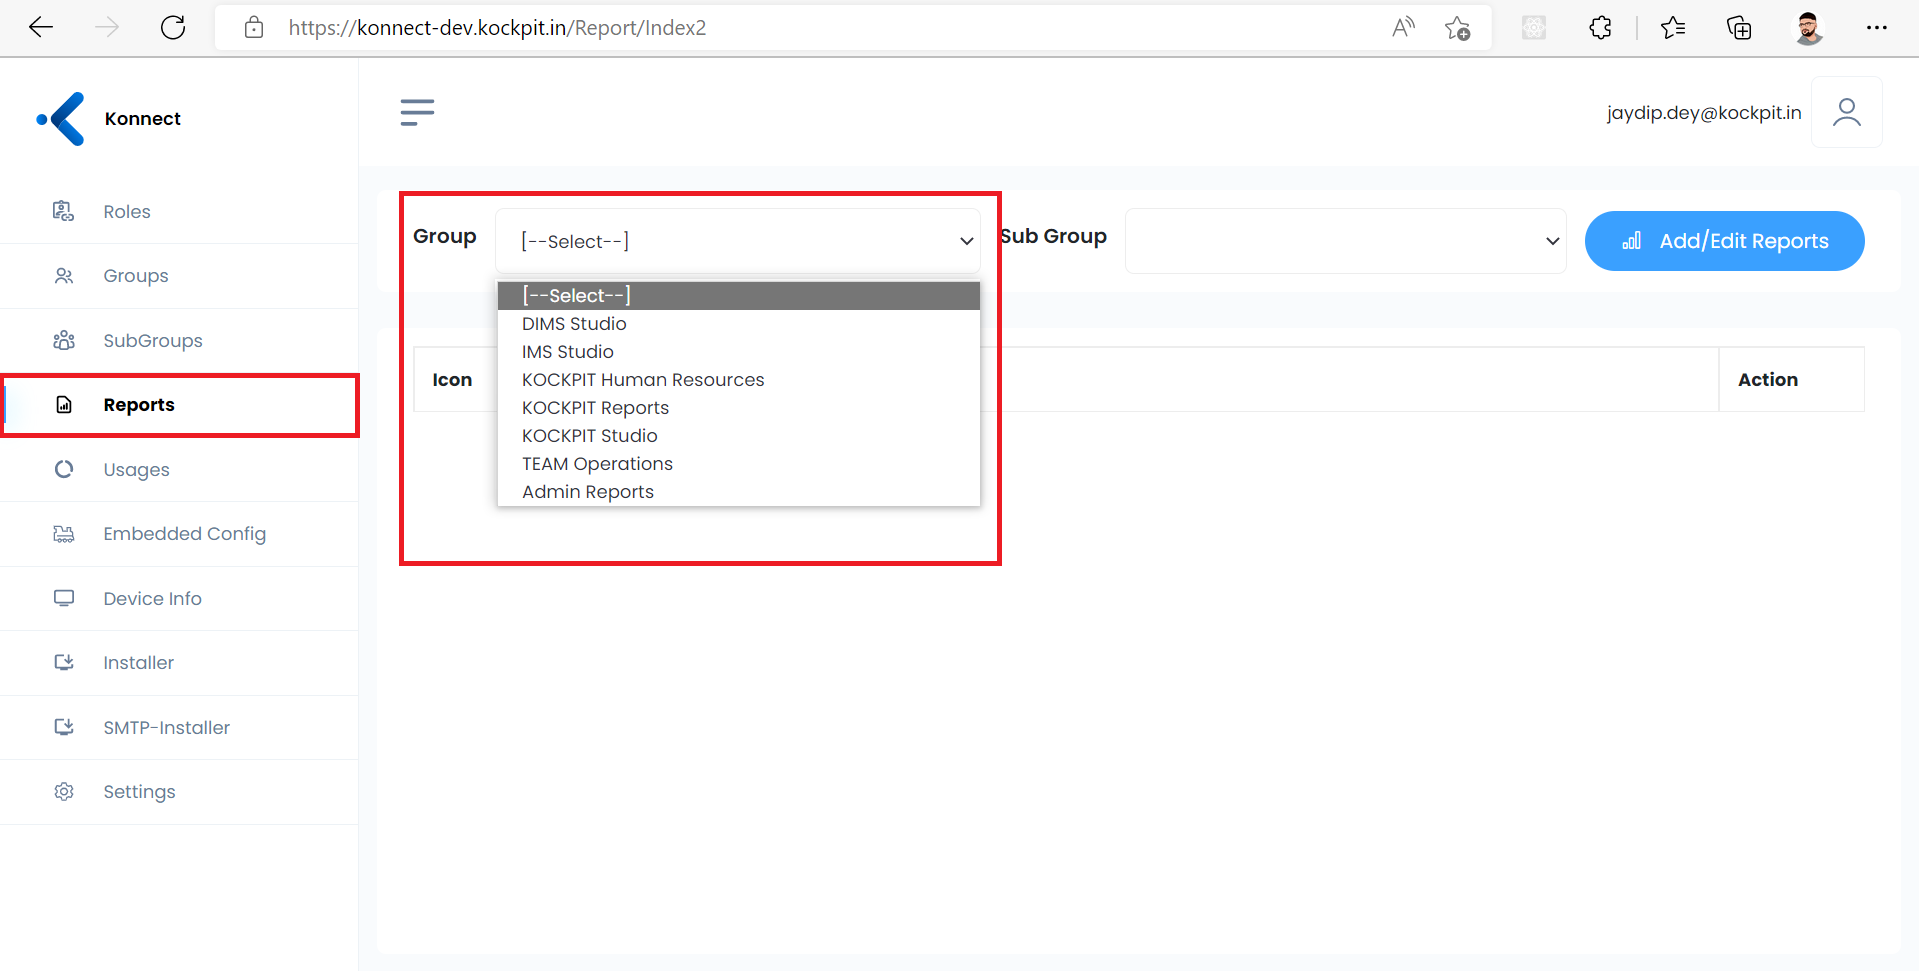
10- After group is selected, select from available subgroup where you want to add that report, and after selection press add/edit report button.
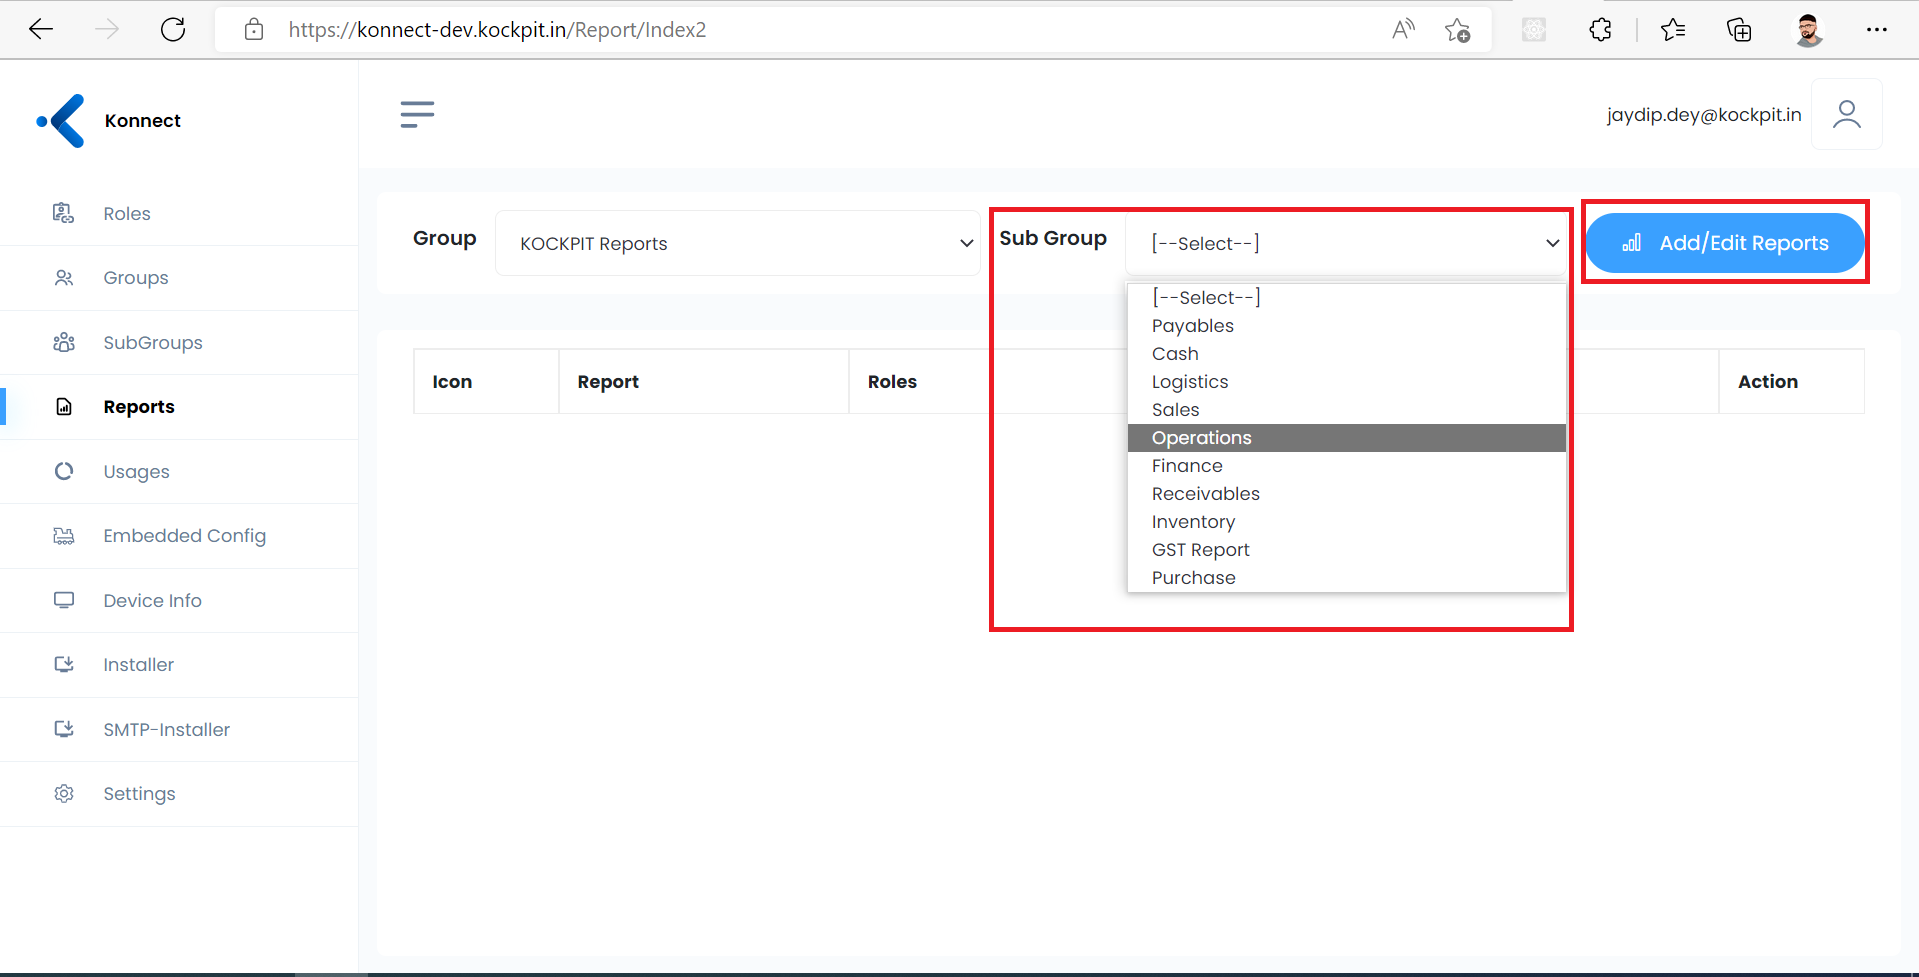
11- Before getting the list of report, as a one final authentication step login with the Power BI account credentials from where you want to access the reports created, enter credentials and press login.
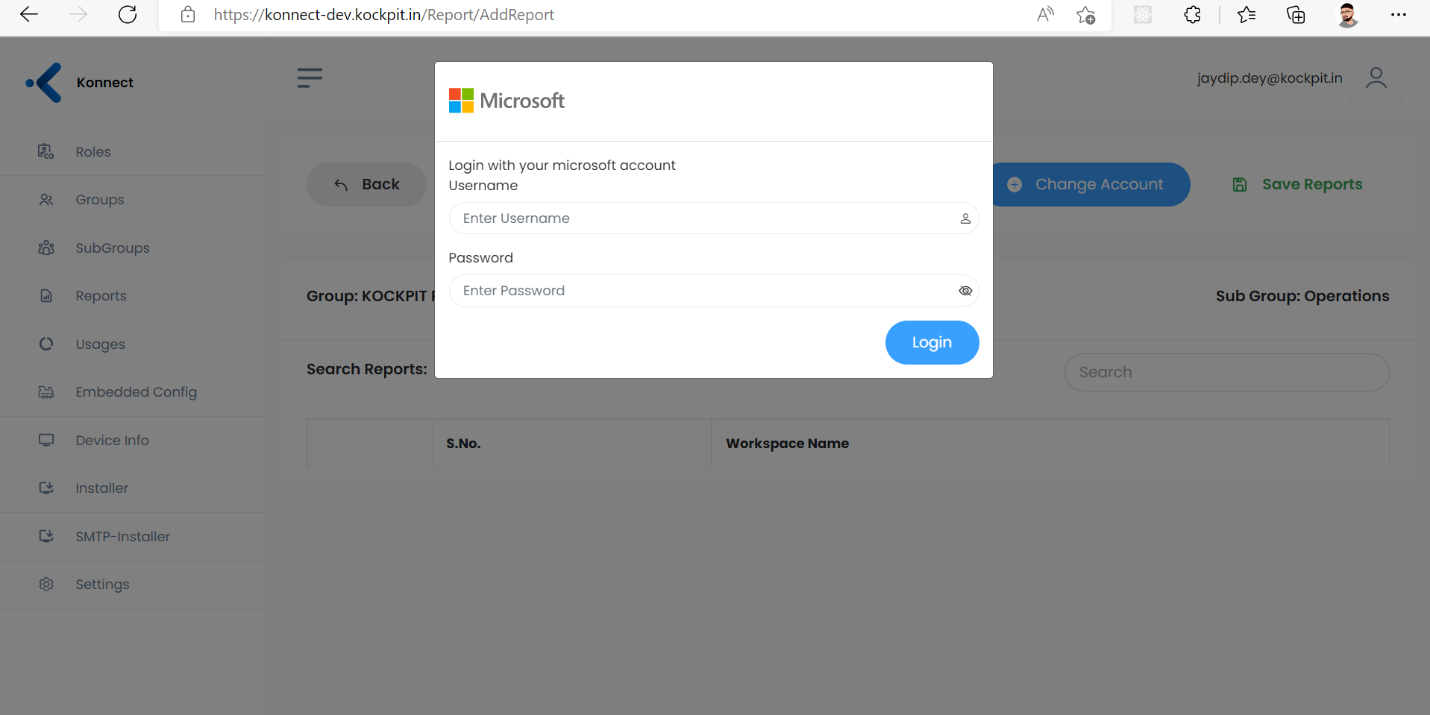
12- After successfully authenticating Power BI credentials your will be redirected to the page where you will find all the workspaces available in your power bi account.
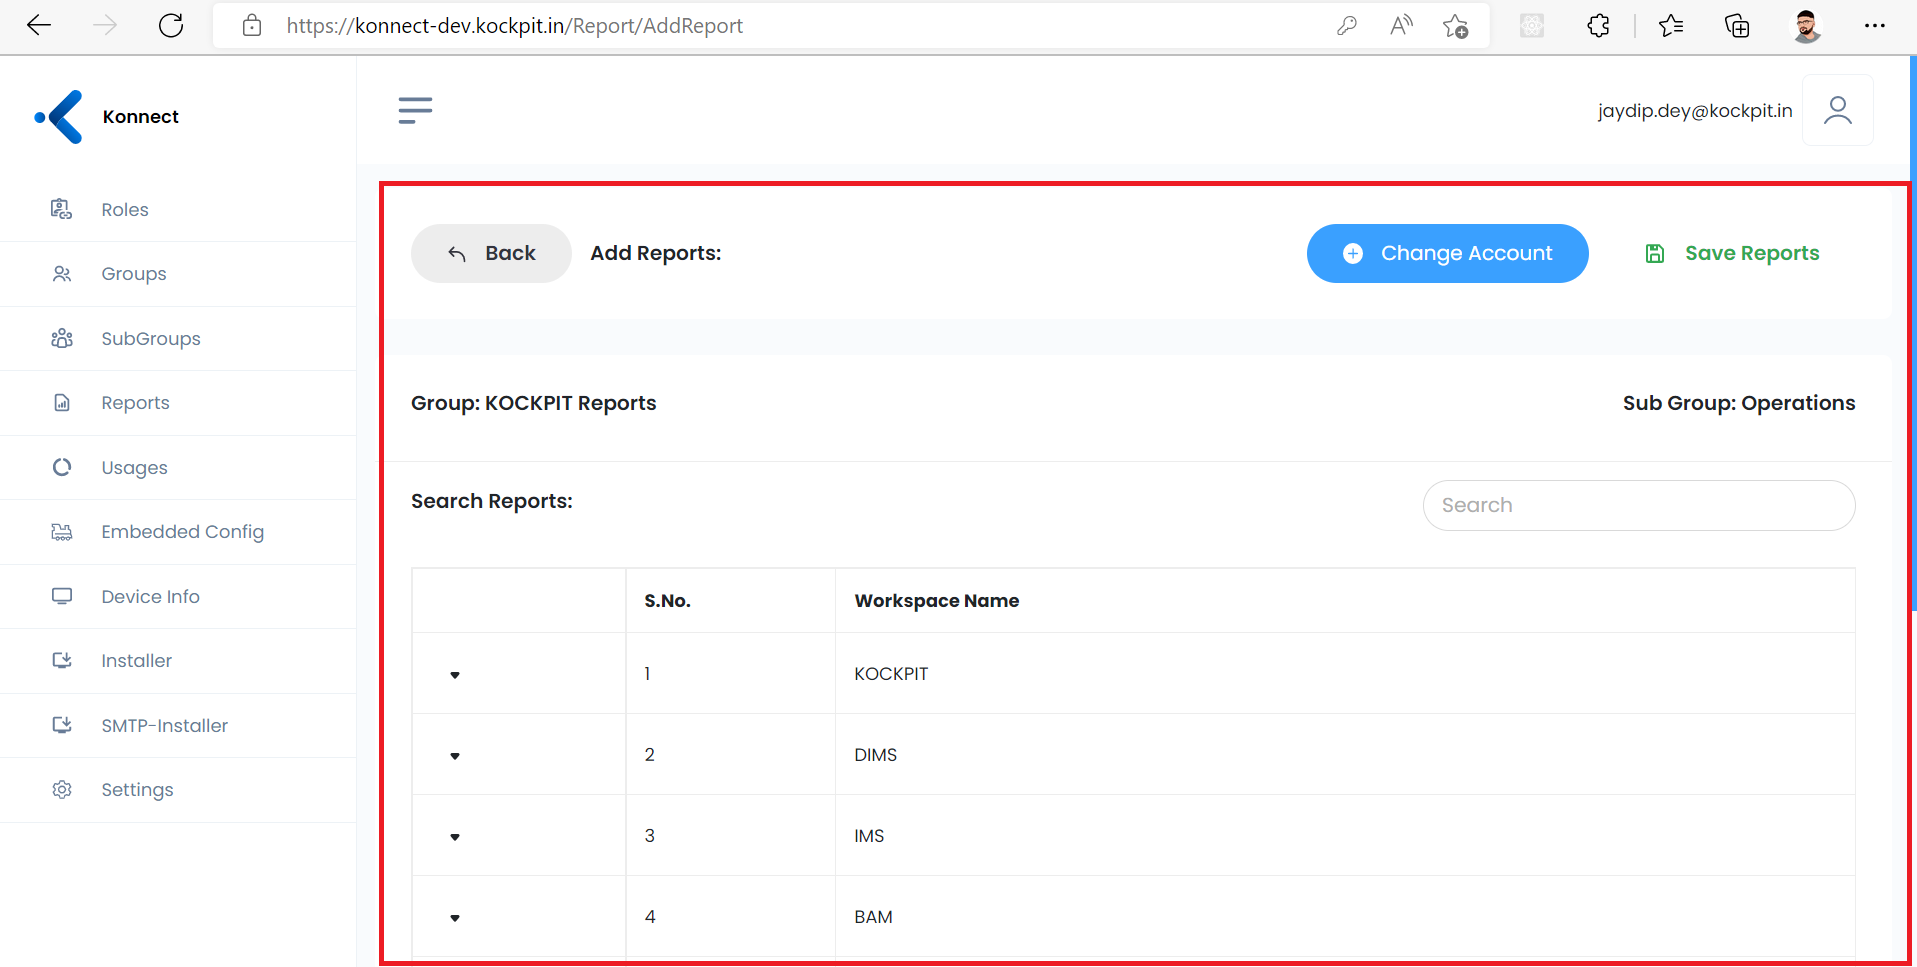
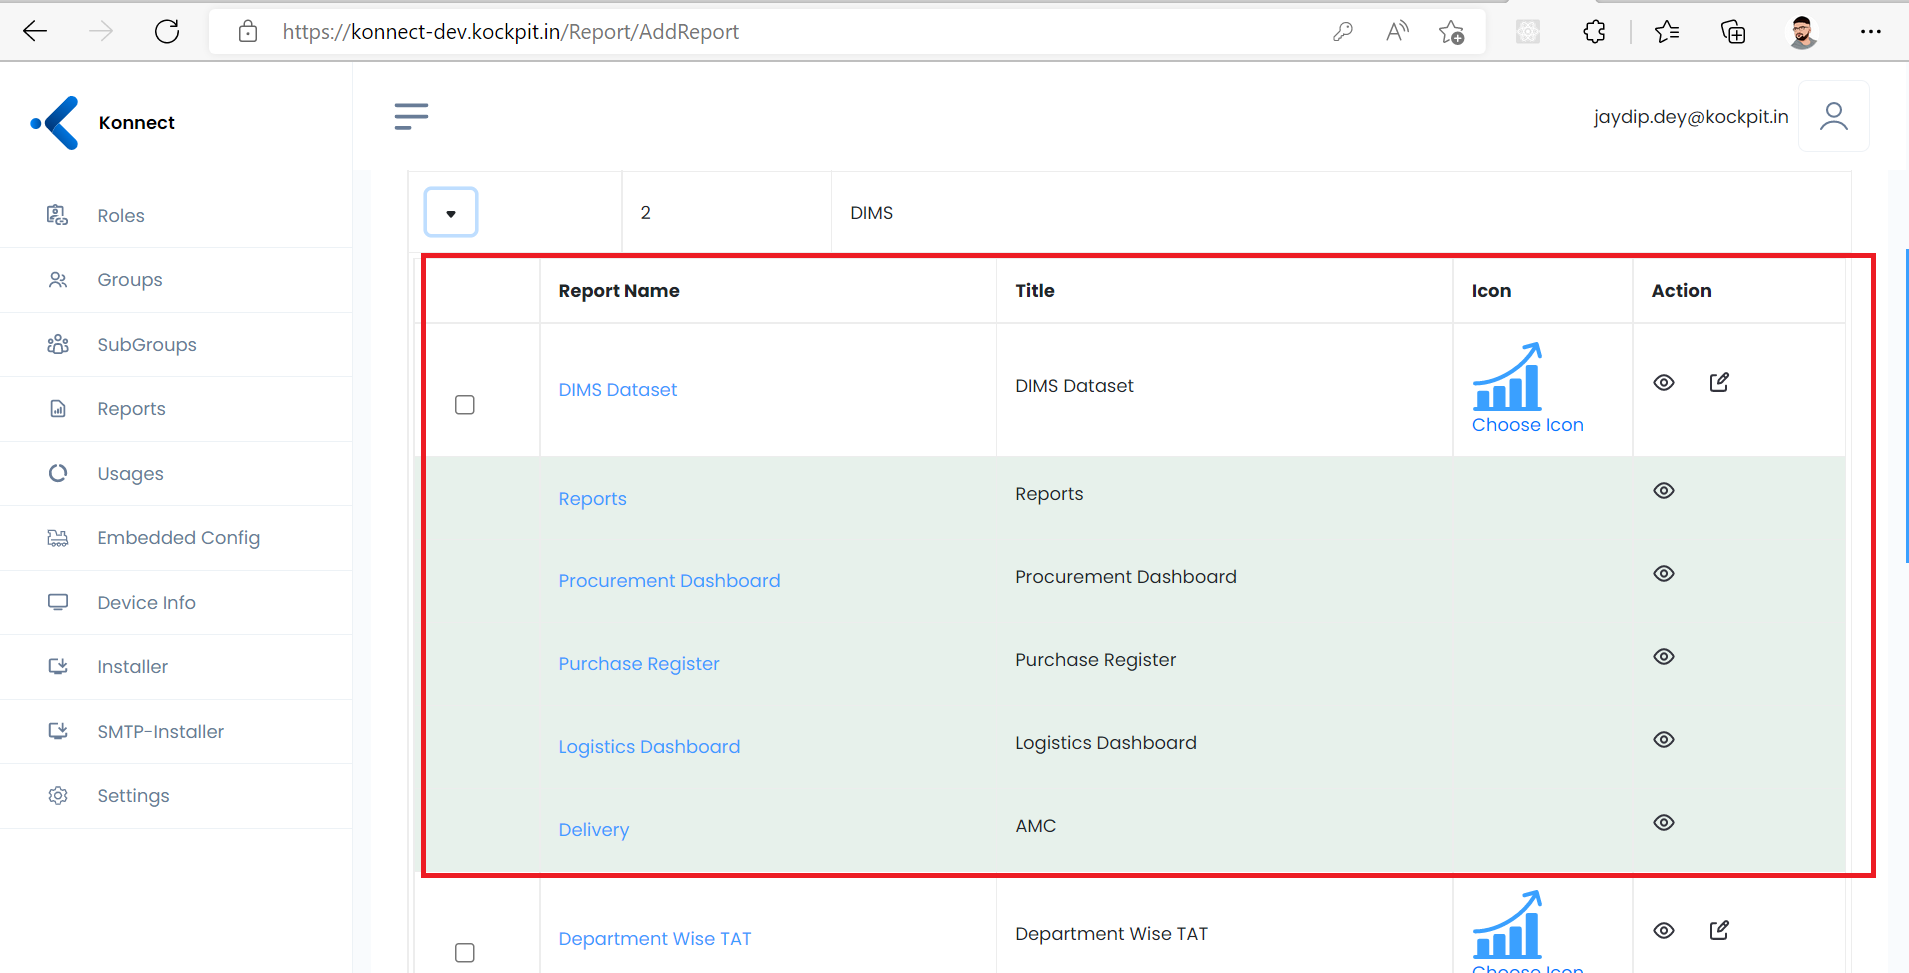
Here you can select the report which you want to add to your konnect dashboard and also can preview it.